MacBook's Journey to Linux - Part 1: Hello world!
linux Debian rEFInd Estimated reading time: 8 minutesRecently I faced a task, that required me usage of Linux. I’m not a very experienced user of this OS, so I spent some time investigating this question.
I have only my old MacBookPro14,3 that can be used for installation and running Linux. Due to the task, the preferred distributive of Linux is Debian. As a result, I decided to note every step I took, to make this happen.
Related articles:
- MacBook’s Journey to Linux - Part 1: Hello world!
- MacBook’s Journey to Linux - Part 2: Bring the light!
- MacBook’s Journey to Linux - Part 3: My little fairies
- MacBook’s Journey to Linux - Part 4: Speak to me.
Installation of a second OS to MacBook
As I mentioned above, I have only an old Macbook, that can be used for this. At the same moment I use that PC, so some files and other stuff are present there. So the only option for me was to install Linux on the same machine.
To make this happen I need to perform a few steps:
- grab part of hard drive space for a new system
- modify the system boot mechanism to allow boot selection
- prepare installation image
- install the system
A pretty easy task at first look, but the devil is in the details.
Disk partition
We need to use some separate disk partitions for the new OS.
To do so, we can use a great build utility on Mac - DiskUtility. I won’t cover the full process of how to do that, instead - here is the perfect tutorial from Apple related to this.
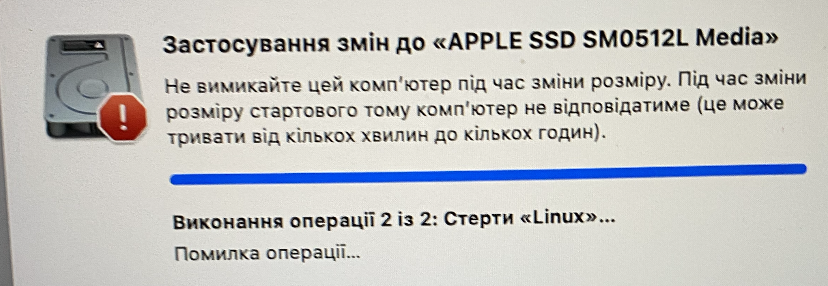
The only moment that I want to mention - during this process, I got some errors and needed to switch to recovery mode and complete the process interruption there - during partition the process was unable to complete. Thus this is not an undoable process, always remember that it’s a bit risky.
As I mentioned above, I have some data on my Mac and I did everything with the knowledge, that I could lose everything in case of error, but it’s better to make a copy before u start.
A few moments that need to be remembered:
- backup data that is present on the disk
- for Linux, u need at least 30GB for decent installation (I created a disk with 35 GB)
Parameters for DiskUtility:
- Name: anything u like,
- Format: OS X Extended (Journaled)
- Size: 30+ GB (keep in mind that some parts of this space can be used by Linux for swap).
As a result, I got a divided hard drive:
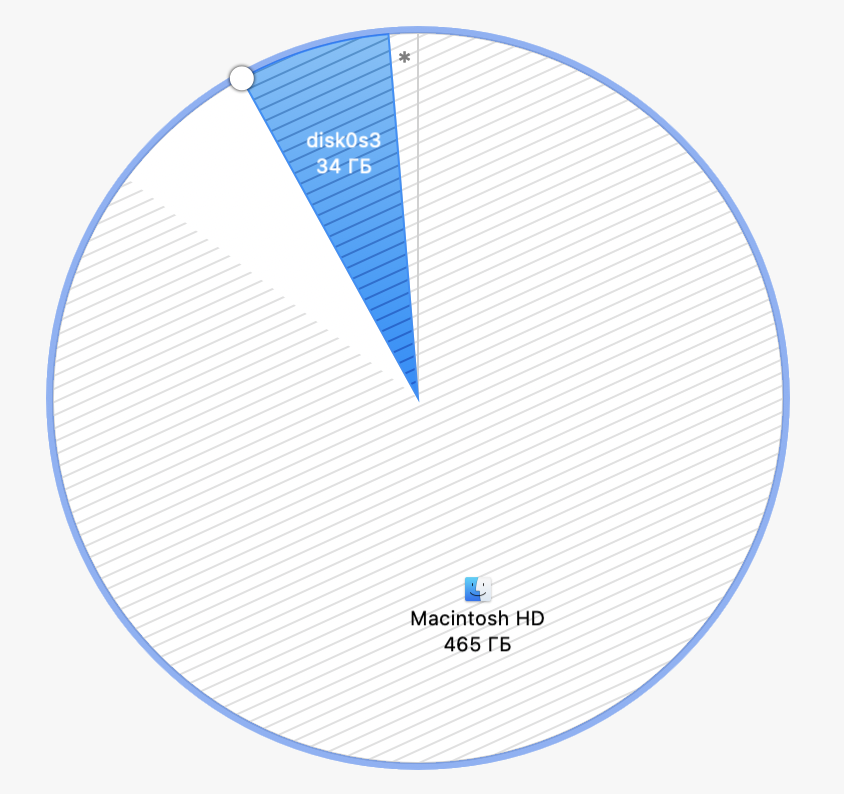
In this image, u can see that I have a Macintosh (for MacOS), disk0s3 - system Linux, small partition with asterisks * - swap area for Linux.
Modify the system boot mechanism to allow boot selection
To be able to load different systems we should somehow be able to select a boot start point. To do so, we can use rEFInd - a great tool designed specifically for this purpose.
Note, that the process below may harm your pc, so be ready ;]
The very first thing that needs to be - noted, is that I have an old Mac - MacBookPro14,3 with arch x86_64 - this means that all steps and approaches applicable only to this kind of arch, for M1 need to use a different approach.
To set rEFInd u need to do the following:
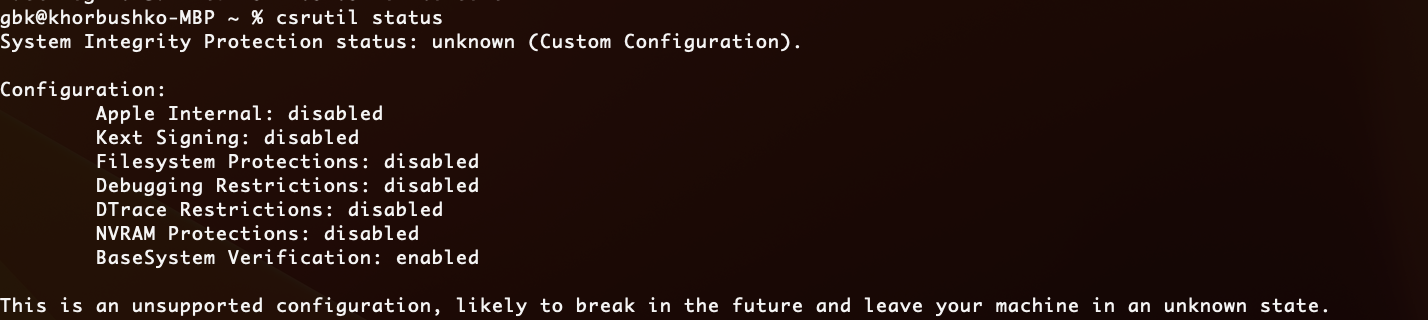
- disable System Integrity Protection:
- boot in recovery mode (CMD+R during Mac start)
- execute
csrutil disable - boot anch check
csrutil status- should beSystem Integrity Protection status: disabled.
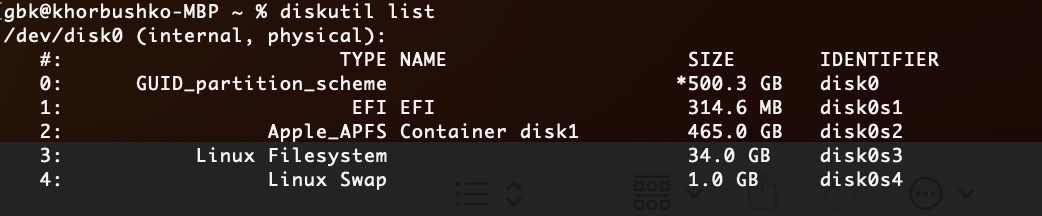
U can also use diskutil list command to inspect u’r drive:
- mount EFI partition:
- run
mkdir /Volumes/ESP - run
mount -t msdos /dev/disk0s1 /Volumes/ESP
- run
- create directory
REFINDmkdir REFINDat the EFI volume ->/EFI/REFIND
- from the rEFInd archive grab files and copy them into just created dir
REFINDrefind/drivers_x64/refind/icons/refind/refind_x64.efirefind/tools_x64/
- grab config example, rename it to
refind.conf, and copy it to just the created dirREFIND - bless the new created partition with rEFInd using
bless --mount /Volumes/ESP --setBoot --file /Volumes/ESP/EFI/REFIND/refind_x64.efi --shortform

Note some commands require
sudo
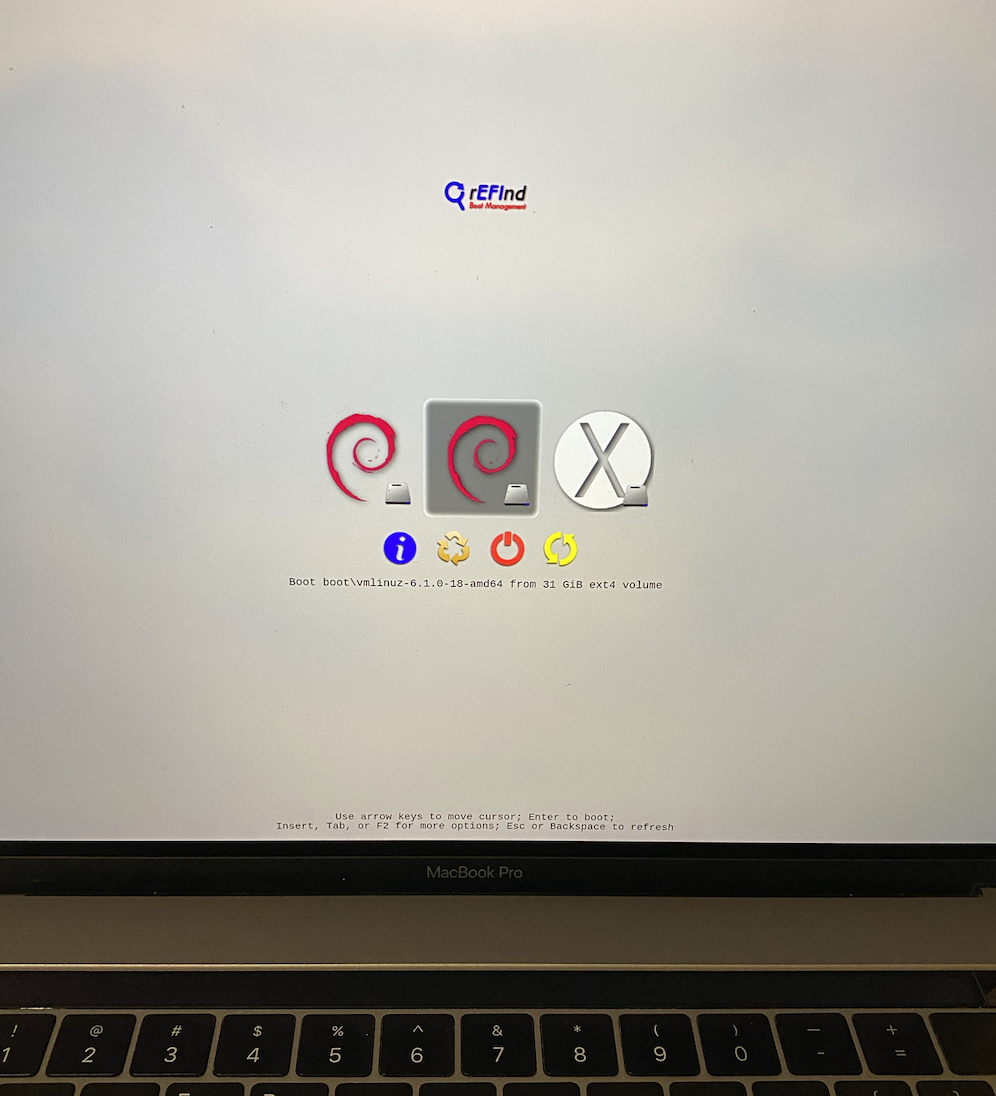
Restart u’r Mac, u should be able to see rEFInd screen:
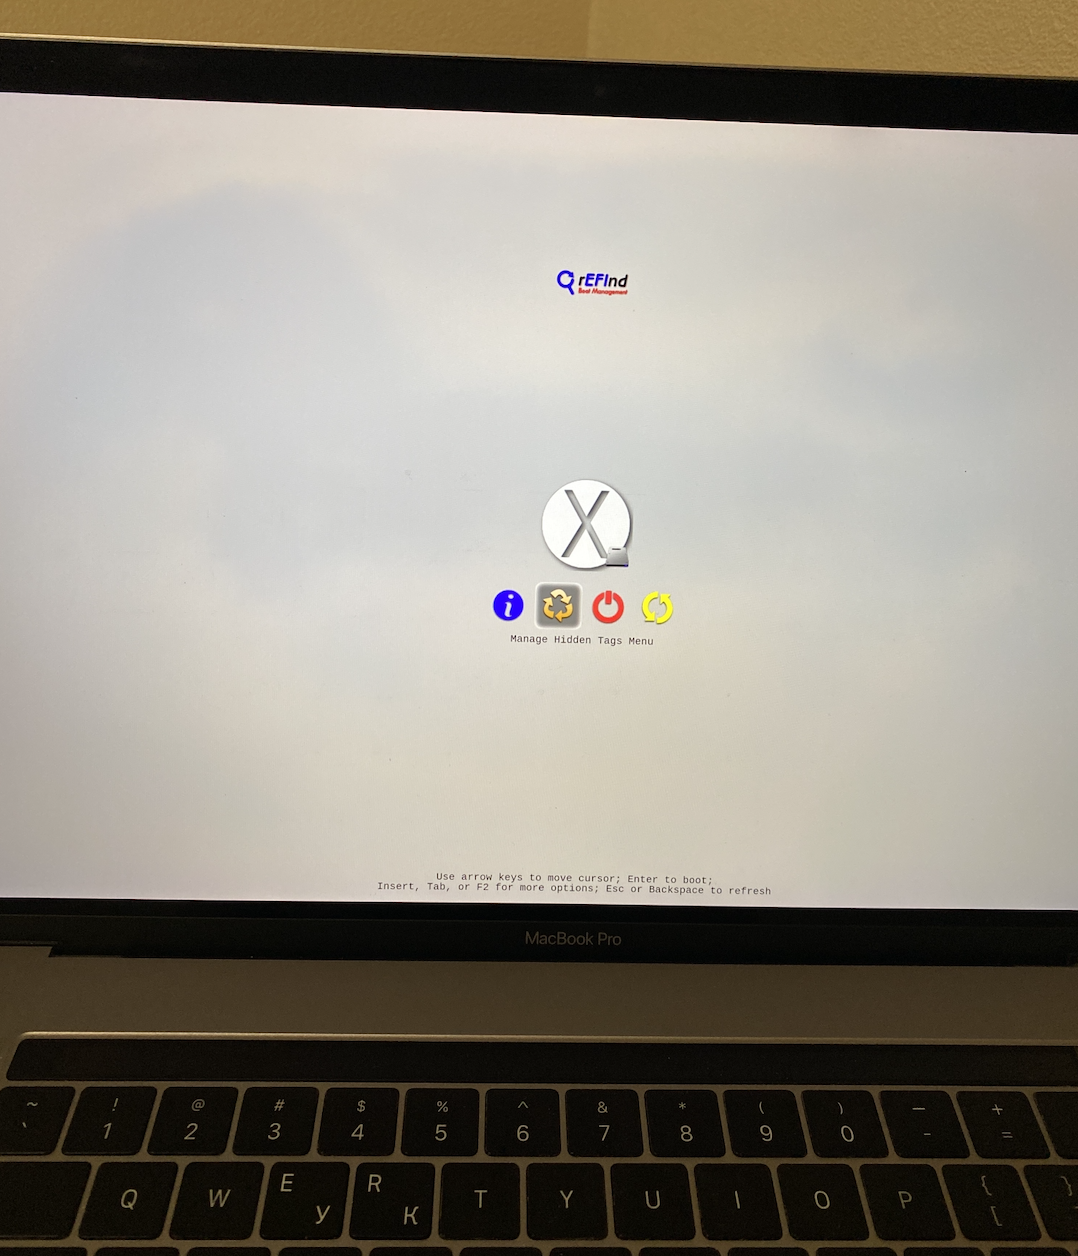
Huh.. done for now.
After reading docs and googling around I found a perfect guide for this here, so maybe u should look at also.
There is a good moment described - after u install a new system, the blessing disappears from Refind, so u need to repeat the bless. To do so, u can use a small script:
#!/bin/bash
mkdir /Volumes/ESP
mount -t msdos /dev/disk0s1 /Volumes/ESP
bless --mount /Volumes/ESP --setBoot --file /Volumes/ESP/EFI/REFIND/refind_x64.efi --shortform
source - link above
Prepare installation image
To make a bootable stick u need to do a few things:
- obtain an image of the OS u want to install
- flash stick with that image
Obtain an image of the OS u want to install
As I mentioned earlier, I need a Debian system, but u may use any u like. To select an image - go to official web page and select dedicated architecture under stable releases.
To check which arch is u’r -
uname -p.
In my case, I selected this image.
Now, we need to create a bootable stick. This process involves a few steps also:
- download and prepare
.isofile - done as described above - convert the
.isofile into a.img.dmg. To do so, we can usehdiutil convert
khb@MacBook-Pro-kyryl ~ % hdiutil convert -format UDRW -o linux1.img /Users/khb/Downloads/debian-12.5.0-amd64-DVD-1.iso
Reading Master Boot Record (MBR : 0)…
Reading Debian 12.5.0 amd64 n            (Apple_ISO : 1)…
..................................................................................................................................
Reading  (Type EF : 2)…
...................................................................................................................................
Elapsed Time: 75799.157ms
Speed: 658.6MB/s
Savings: 0.0%
created: /Users/khb/linux1.img.dmg
- identify the flash drive, using
diskutils list:
khb@MacBook-Pro-kyryl ~ % diskutil list
/dev/disk0 (internal, physical):
   #:                       TYPE NAME                    SIZE       IDENTIFIER
   0:      GUID_partition_scheme                        *500.3 GB   disk0
   1:             Apple_APFS_ISC Container disk1         524.3 MB   disk0s1
   2:                 Apple_APFS Container disk3         494.4 GB   disk0s2
   3:        Apple_APFS_Recovery Container disk2         5.4 GB     disk0s3

....

/dev/disk8 (external, physical):
   #:                       TYPE NAME                    SIZE       IDENTIFIER
   0:     FDisk_partition_scheme                        *2.1 GB     disk8
   1:                 DOS_FAT_32 UNTITLED                2.1 GB     disk8s1
As u can see, in my case the name of the disk - disk8.
- unmount disk for flashing
diskutil unmountDisk /dev/disk8:
khb@MacBook-Pro-kyryl ~ % diskutil unmountDisk /dev/disk8
Unmount of all volumes on disk8 was successful
- copy dmg to flash drive:
khb@MacBook-Pro-kyryl ~ % time sudo dd if=/Users/khb/Downloads/linux.img.dmg of=/dev/disk8 bs=1m
3808+0 records in
3808+0 records out
3992977408 bytes transferred in 241.202992 secs (16554427 bytes/sec)
sudo dd if=/Users/khb/Downloads/linux.img.dmg of=/dev/disk8 bs=1m  0.02s user 6.89s system 2% cpu 4:04.80 total
Note, that the last operation can take some time.
I also found a very useful guide with 3rd party tool balenaEtcher. The downside of this - is that this tool asks u for u’r root password without a system popup, but it works a bit faster than the approach described above.
The complete guide is here: Create a bootable USB stick on macOS
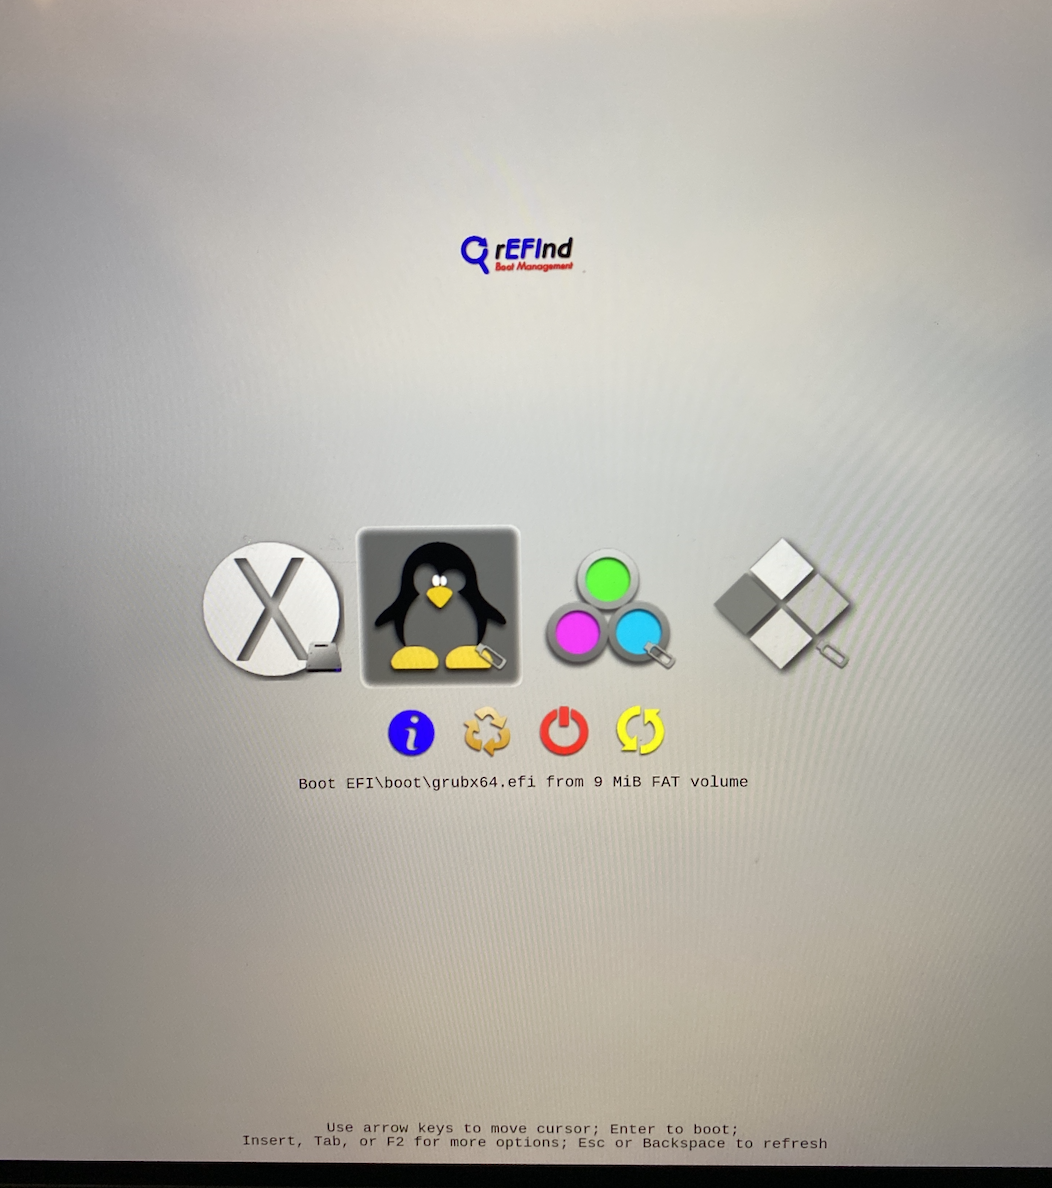
Note: if u select incorrect arch - when u boot, rEFIt will not show u anything in the menu. If everything is ok, u will see an additional installation menu on the next boot of u’r Mac:
Install the system
The last part of this story - Debian installation ;]. Now we just need to go through installation and we are good to go. Pretty easy.
The pitfall is next - some hardware is not recognized and so not workable during this process, so u need an additional mouse and keyboard and also a USB-C to USB-A adapter. Also note, that only 2 USB-C ports are working (active one).
I didn’t know that, so was not prepared - as a result, I had wait to until the morning so I could buy a mouse and keyboard and complete the installation.
Note, also wifi, audio, video, and some other stuff are dead, so u can’t connect to them until u complete the installation.
Later I found a workaround for wifi - just create a fresh access point on u’r phone and connect to it - after that, u can connect to other networks - not sure about the reason.
If u interested in a detailed guide to the Debian GUI installation wizard - here is one of many that u can find.
The most tricky moment here - is the part related to the hard disk. Previously we already created it and configured the file system, but, as u remember, I mentioned that Linux may use a swap disk for better performance. So the best choice here - is to erase the newly created partition on the disk and to allow the installation wizard to perform the partition with automatic swap space configuration.
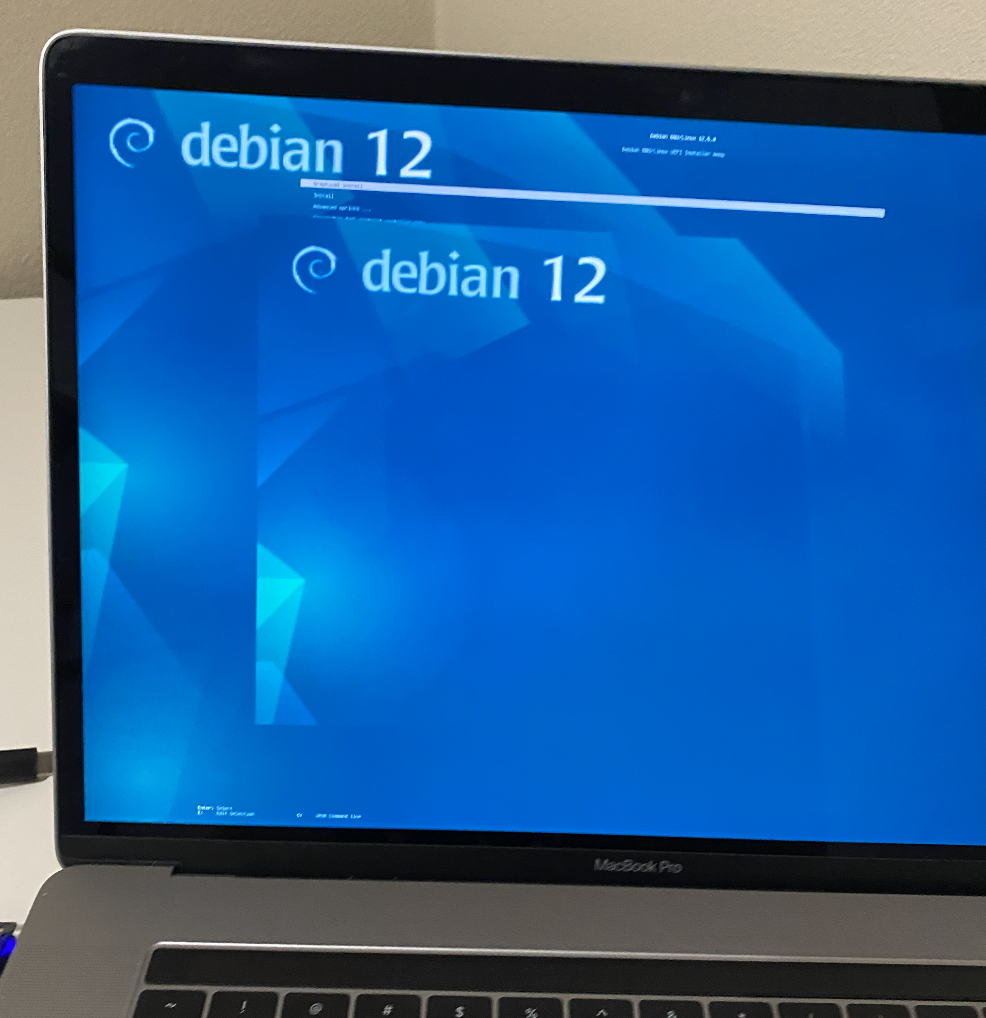
When u done, reloading Mac, u will be redirected to the Linux system, so u need to perform rebless (as described earlier, above).
After rebless, my system looks like this:
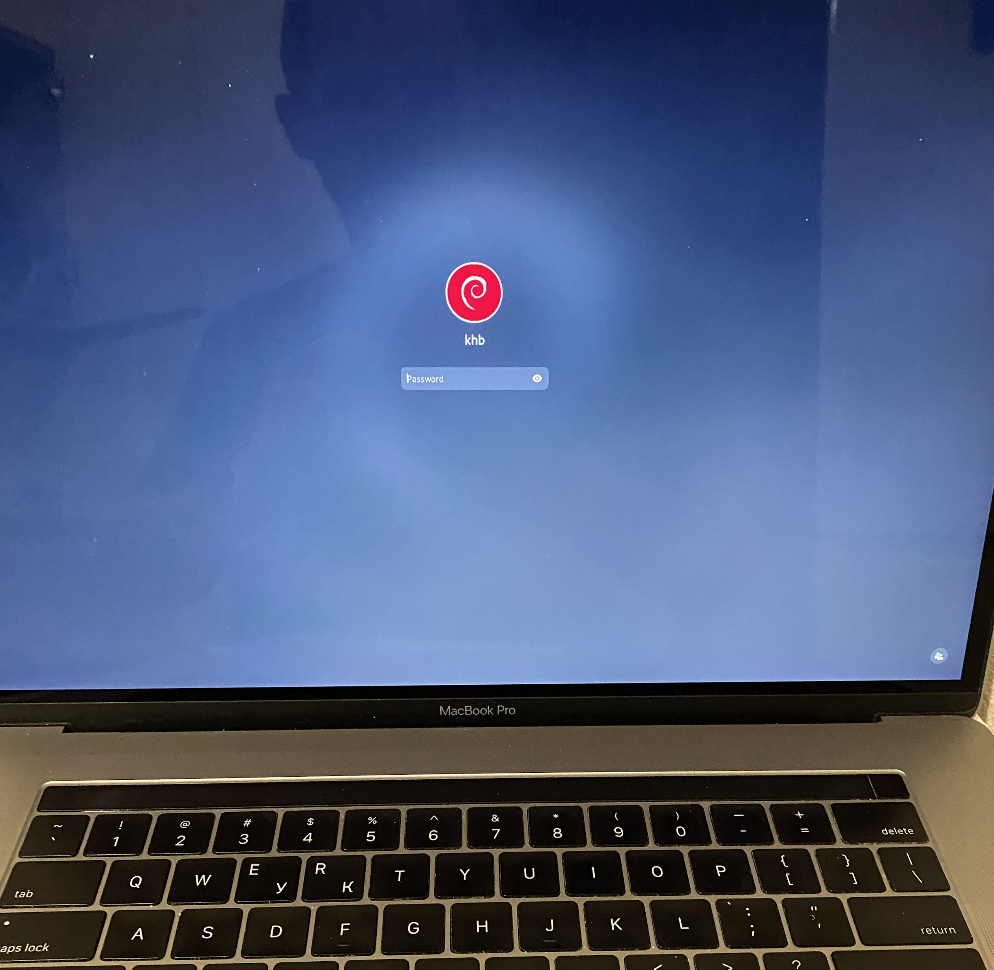
And the loaded Debian:
Problems
Of course, as I expect, some hardware is not working. The problem list contains the following items:
In the next articles, I will cover how to fix these problems to make u’r Debian shine.
Resources
Share on: