2D transformation in iOS
iOS UIKit SwiftUI CoreGraphics GeometryEffect CGAffineTransform Estimated reading time: 13 minutesRich animations and some cool effects - it’s always something that I try to add when dealing with UI.
In my opinion, a nicely animated transition is much better than just “blink” and simple state change. Off-cause, this requires a bit more time and sometimes no-one didn’t expect to get this animation effect or even didn’t notice that state is changed without animating View, but the process of creating animation bring some inner satisfaction for me, and as u know “dress for success”.
Today I would like to tell u about transformation in 2D coordinate space and how it can be done in iOS.
Transformation
Transformation is a process of modifying and re-positioning the existing graphics
The process of changing something in some coordinate space is called transformation. we may apply different rules of this change, and when we do the same operation we always receive the same result. Transformation in 2D is called 2D transformation.
What can be done in 2D space? Well, the list is next:
- translation
- rotation
- scaling
- reflection
- shear
- combination of these effects
We may imagine this all operations as a simple XY transformation (in Cartesian space).
There is 3 main transformation - translate, rotate, scale, all other transformation may be done using a combination of them or by using specific value as input.
The problem
If we think a bit about transformation and projective space, we may be faced with an issue - 2 parallel lines can be intersected (in infinity point). The best sample - is a view of the railroad - near the horizont rails meet each other, and so Cartesian or Euclidian space is not working for us anymore…

Photo by Tiago Gerken on Unsplash
This problem is quite old (more than a few centuries), but luckily for us, mathematicians found the solution.
This is the point where matrix plays a very important role. If someone from my teachers in school or university tells me the purpose of matrix and how they actually can be used, I think I spend way more time learning this theme.
When lines meet at the infinity point, in the play comes Homogeneous coordinates. Cartesian is a subset of this coordinate space. Homogeneous coordinates are created to express points within N-dimensional coordinates. How? Simply by adding a variable, so
X = X/variable
Y = Y/variable
A real example would be like next
if we have a point
P = {x=1, y=1}in Homogeneous coordinates we get
P = {x=1, y=1, z=1} // because X = X/1 and Y = Y/1and for infinity point
P = {x=1, y=1, z=0} // because X = X/0 (=∞) and Y = Y/1 (=∞)Homogeneous because…
It’s always good to know why something is called in such a way and not in another. So If u wondering why the name is Homogeneous and not something else, we may review a simple sample of coordinate transformation to discover this as described here.
So to make things a bit simpler and easier, let’s review a simple sample
P1 = {x=1, y=1, z=5}
P2 = {x=10, y=10, z=50}
P3 = {x=100, y=100, z=500}
and representation will be
P1 = { 1/5; 1/5 }
P2 = { 10/50; 10/50 } => { 1/5; 1/5 }
P3 = { 100/500; 100/500 } => { 1/5; 1/5 }
so the rule is
P1 = { 1a/5a; 1a/5a } => {x=1a, y=1a, z=5a}This means that 1 point in Cartesian space may be represented by a few points. This means that these points are “homogeneous” which according to dictinary means : of the same or a similar kind or nature.
Now, when we know how this transformation in a 2D system can be done, let’s review each variant in detail.
The proof that 2 lines can intersect can be found here
PerformingChanges
Good - now we know how everything works in terms of each point in coordinate space. it’s time to review each transformation one-by-one, to make sure that we understood every operation.
Translation
Transformation is a process of modifying and re-positioning the existing graphics.
To translate the point we simply should add X' and Y' to the original coordinate:
Xnew = Xold + Tx
Ynew = Yold + Ty
and if we move this to Homogeneous coordinate space:

if u wondering why we should use 3x3 matrix here is good and simple exeplanation, but making a long story short - for simplicity
So we use matrix 3x3 for modification. As u can see, by modifying diff values of the matrix we may achieve a different result.
How read the matrix data
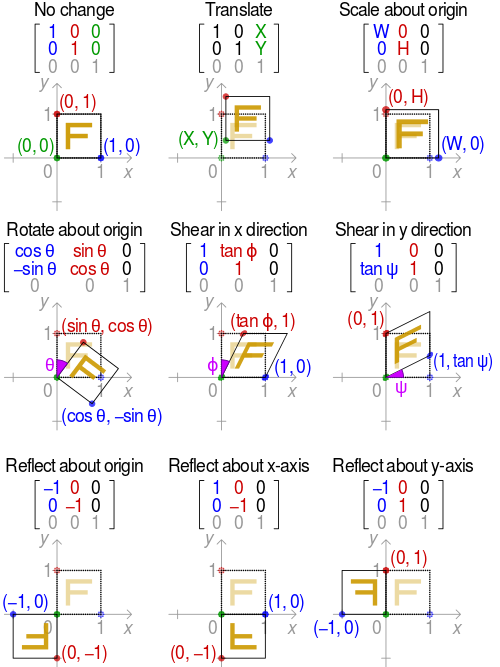
Before we contrinue, it’s good to mention, that matrix that contains no changes is Identity matrix - and this matrix contains 1 in diagonal from top left corner to bottom:

As u maybe already think, “from the top left corner to the bottom” is not a quite good explanation. Indeed, each component has its name.

Another alternative may be simply named elements with “m” following index of row and column: m11, m12… etc.
How this all data represented in CocoaTouch? Well, for this purpose we have a slightly simplified version of matrix - called CGAffineTransform:
public struct CGAffineTransform {
   public var a: CGFloat
   public var b: CGFloat
   public var c: CGFloat
   public var d: CGFloat
   public var tx: CGFloat
   public var ty: CGFloat

   public init()
   public init(a: CGFloat, b: CGFloat, c: CGFloat, d: CGFloat, tx: CGFloat, ty: CGFloat)
}
As u can see, this is a simple struct, and as mention in docs - “because the third column is always (0,0,1), the CGAffineTransform data structure contains values for only the first two columns.”

If we look at both matrix - from theory and CGAffineTransform provided by Apple, it’s not so hard to see, Apple’s variant it’s something that should be read downstairs.
So, let’s compare how calculation is done:

So Apple’s matrix is read downstairs instead of by row, 3rd column not important because it’s always 001 and the result does nothing.
Good sample of how the calculation is done can be found here
This means that u can’t change index m13; m23 and m33 - these items responsible for factor scale in Homogeneous space.
Because the third column is always (0,0,1), the CGAffineTransform data structure contains values for only the first two columns.
Rotation
2D Rotation is a process of rotating an object with respect to an angle in a two-dimensional plane.
Rotation is a bit hardener operation than translation, and to do this, we should generate new coordinates of point using rotation angle and basic math operation:

for simplicity Apple provides a convenient way to perform each operation - like
init(rotationAngle:)that perform the same operation as described above:
X' = X x cosθ – Y x sinθ
Y' = X x sinθ + Y x cosθ
Scaling
Scaling is a process of modifying or altering the size of objects
To make scale operation we only need scale koef. Scale operation described below:

X' = X x Sx
Y' = Y x Sy
If scaling factor > 1, then the object size is increased. If scaling factor < 1, then the object size is reduced.
Reflection
Reflection is a kind of rotation where the angle of rotation is 180 degree
As was mention at the very beginning of this article - the 3 main transformations are translated, rotate, and scale. This one is marked as separate because it’s quite often used.
As u probably already know - reflection can be done within 2 axis - X and Y. This means that we simply rotate the point. To do so, we need to multiply the coordinate value by -1:
for reflection over X:
X' = X x 1
Y' = Y x -1
for reflection over Y:
X' = X x -1
Y' = Y x 1
Shear
Shearing is an ideal technique to change the shape of an existing object in a two-dimensional plane
Shear can be done in 2 X and Y axis. To perform shear we need to define shearing parameter toward X direction and Y direction:
X' = Xold + Shx x Y
Y' = Yold + Shy x X
Now we know all the needed thoery and ready to start coding. But before we continue, here is perfect image that desceibe all common trnasformation in 2D space:
composition
Composing Transformation – the process of applying several transformations in succession to form one overall transformation
As was mention above, we may also use a combination of these effects. But we can be faced with some pitfall - the order of computation is important: as standard in GDI the order is Scale, Rotate and Translate (SRT). If u perform the same operation in another order (for example TRS) - the result will be different. This is because all changes are done with respect to the origin of coordinates.
Thus u can achieve the same result within non SRT order and different matrix, but it’s always better to use standardized order of operation, so everyone who works within u’r code has the same idea of how it works.
check this explanation for more, also this discussion about same topic and comparison of result
So the Rule is:
When we write transformations using standard math notation, the closest transformation to the point is applied first:
T R S = T(R(S))first, the object is scaled, then rotated, then translated
check this lecture for additional explanation
Affine transformation – transformed point P’ { x’, y’ } is a linear combination of the original point P { x, y }:
| x’|   | m11 m12 m13 |  x
| y’| = | m21 m22 m23 |  y
| y |   | 1   0    0  |  1
And remember - any 2D affine transformation can be decomposed into a rotation, followed by scaling, followed by shearing, and followed a translation. (source)
Affine matrix = translation x shearing x scaling x rotationPractice
It’s time to go from theory to practice and get your hands dirty.
UIKit
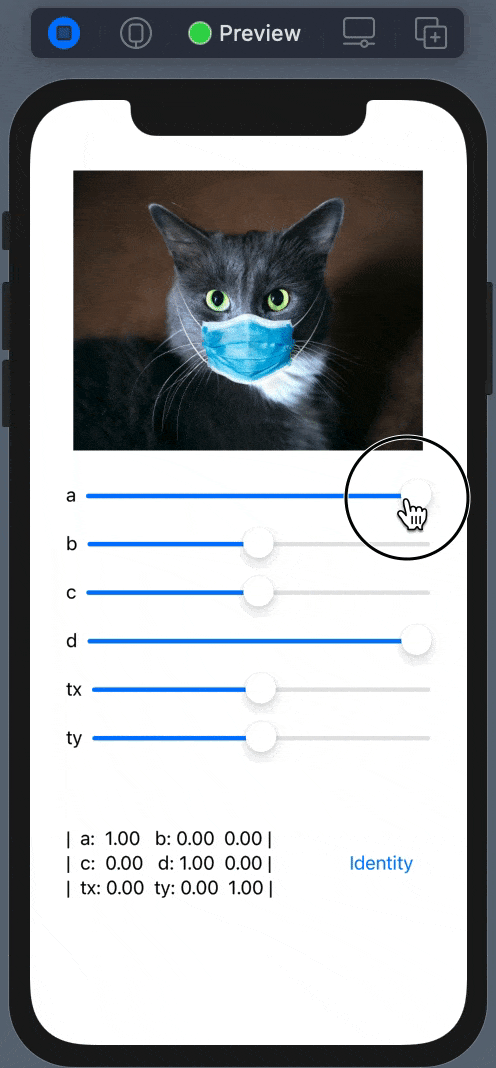
Let’s create a simple app, that modifies CGAffineTransform value in UIImageView.
So, UI will be simple one:
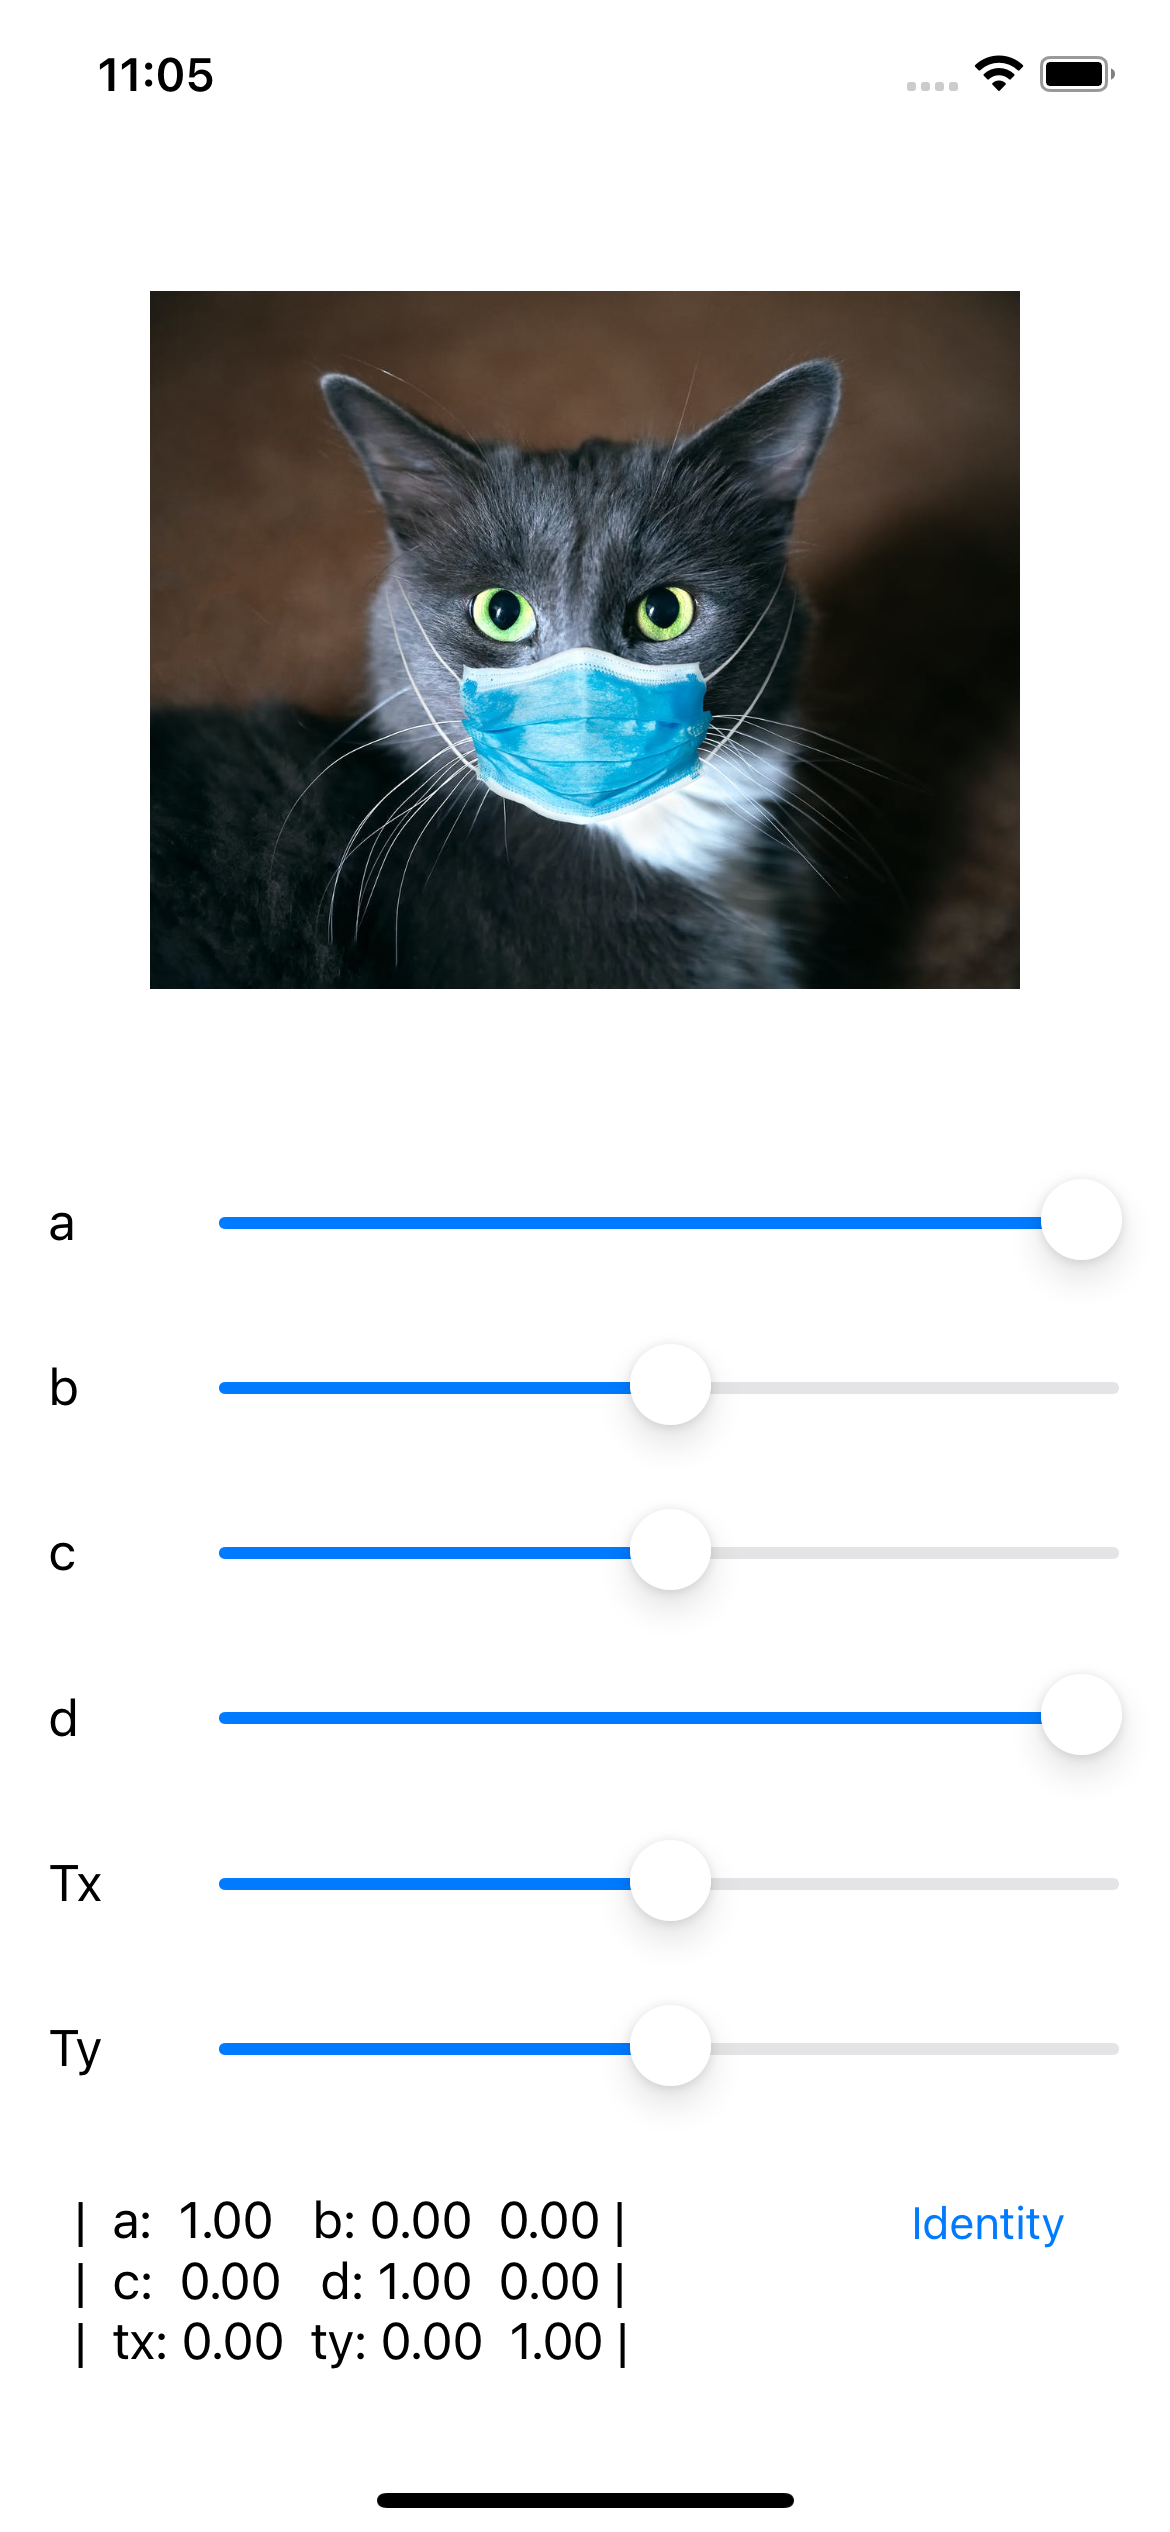
Code, that under the hood will change this behavior is just modify property transform of UIView (UIImageView):
func changeAndDisplayAffineTransform(
									a: CGFloat? = nil,
									b: CGFloat? = nil,
									c: CGFloat? = nil,
									d: CGFloat? = nil,
									tx: CGFloat? = nil,
									ty: CGFloat? = nil
									) {
	let current = targetImageView.transform
	let new = CGAffineTransform(a: a ?? current.a,
	                            b: b ?? current.b,
	                            c: c ?? current.c,
	                            d: d ?? current.d,
	                            tx: tx ?? current.tx,
	                            ty: ty ?? current.ty)
	targetImageView.transform = new
}
Now we can test and observe all transormation, that was discussed earlier:
Thanks to Apple’s engineers we even may not think about each of these values in the matrix and use convenience functions to change translation, scale, or rotation:
func rotated(by: CGFloat) -> CGAffineTransform
func scaledBy(x: CGFloat, y: CGFloat) -> CGAffineTransform
func translatedBy(x: CGFloat, y: CGFloat) -> CGAffineTransform
Composition can be done, using
concatenating(_:)function.
SwiftUI
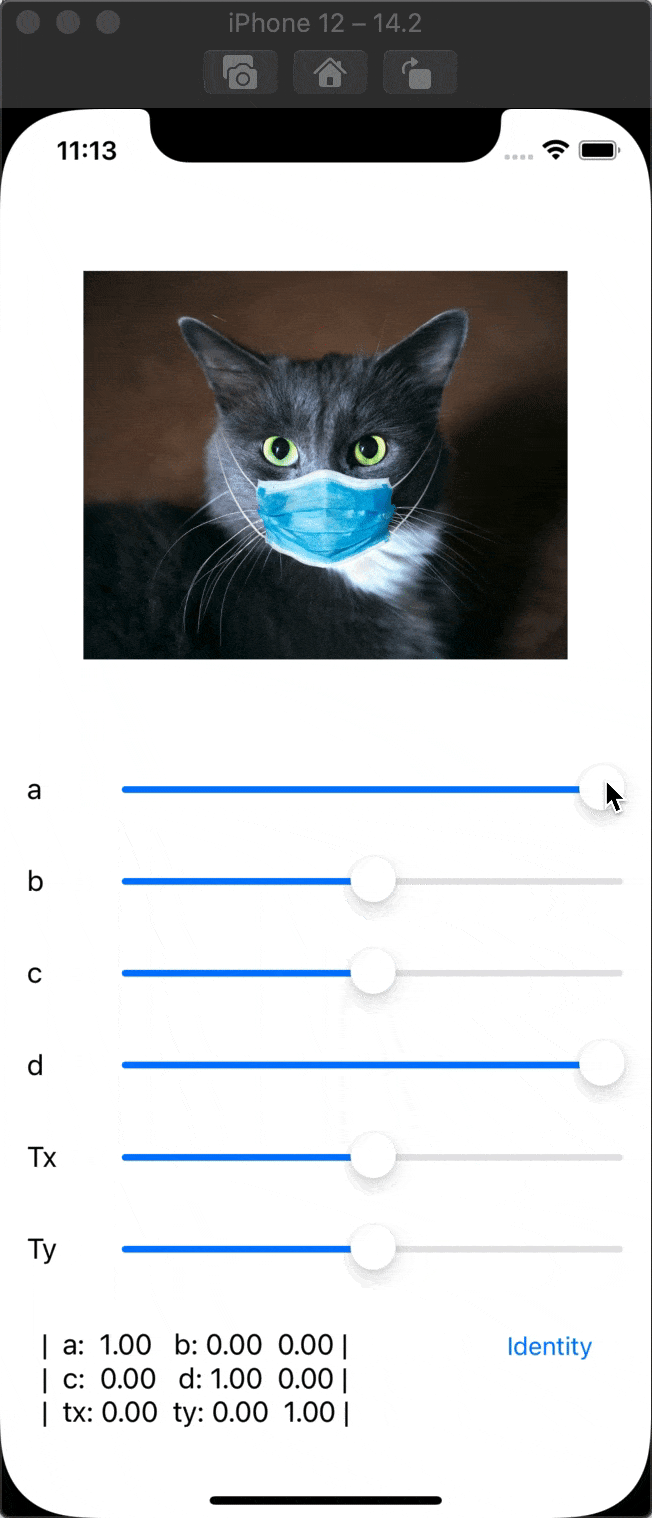
To make testing easier. let’s build the same UI as we build for UIKit.
The code for such screen may be as follow:
struct ContentView: View {

    @State private var aTransform: CGFloat = 1
    @State private var bTransform: CGFloat = 0
    @State private var cTransform: CGFloat = 0
    @State private var dTransform: CGFloat = 1
    @State private var txTransform: CGFloat = 0
    @State private var tyTransform: CGFloat = 0

    var body: some View {
        VStack {
            Image("cat")
                .resizable()
                .aspectRatio(1.25, contentMode: .fit)
                .frame(height: 250, alignment: .center)
                .animation(.linear)

            VStack {
                VStack {
                    Slider.buildFor(value: $aTransform, in: -1...1, text: { Text("a") })
                    Slider.buildFor(value: $bTransform, in: -1...1, text: { Text("b") })
                    Slider.buildFor(value: $cTransform, in: -1...1, text: { Text("c") })
                    Slider.buildFor(value: $dTransform, in: -1...1, text: { Text("d") })
                    Slider.buildFor(value: $txTransform, in: -1000...1000, text: { Text("tx") })
                    Slider.buildFor(value: $tyTransform, in: -1000...1000, text: { Text("ty") })
                }
                Spacer()
                HStack {
                    Text(
"""
|  a:  \(String(format:"%.02f", aTransform))   b: \(String(format:"%.02f", bTransform))  0.00 |
|  c:  \(String(format:"%.02f", cTransform))   d: \(String(format:"%.02f", dTransform))  0.00 |
|  tx: \(String(format:"%.02f", txTransform))  ty: \(String(format:"%.02f", tyTransform))  1.00 |
"""
                    )
                    .lineLimit(3)
                    .minimumScaleFactor(0.5)

                    Spacer()
                    Button(action: {
                        withAnimation {
                            makeIdentityTransform()
                        }
                    }, label: {
                        Text("Identity")
                    })
                    .padding()
                }
                Spacer()
            }
            .padding()
        }
        .padding()
    }

    private func makeIdentityTransform() {
        aTransform = 1
        bTransform = 0
        cTransform = 0
        dTransform = 1
        txTransform = 0
        tyTransform = 0
    }
}

extension Slider where Label == EmptyView, ValueLabel == EmptyView {

    static func buildFor<V, C>(
        value: Binding<V>,
        in bounds: ClosedRange<V> = 0...1,
        text: () -> C,
        onEditingChanged: @escaping (Bool) -> Void = { _ in }
    ) -> some View where V : BinaryFloatingPoint,
                         V.Stride : BinaryFloatingPoint,
                         C: View {
        HStack {
            // swift UI bug workaround https://stackoverflow.com/a/64821300/2012219
            text()
            Slider(
                value: value,
                in: bounds,
                onEditingChanged: onEditingChanged,
                label: { EmptyView() }
            )
        }
    }
}
Thats produce for us:
Now, let’s add transform modification for Image. To do so, we should use special GeometryEffect:
    .transformEffect(
        .init(
            a: aTransform,
            b: bTransform,
            c: cTransform,
            d: dTransform,
            tx: txTransform,
            ty: tyTransform
        )
    )
add this after
.frame(height: 250, alignment: .center)line applied to image.
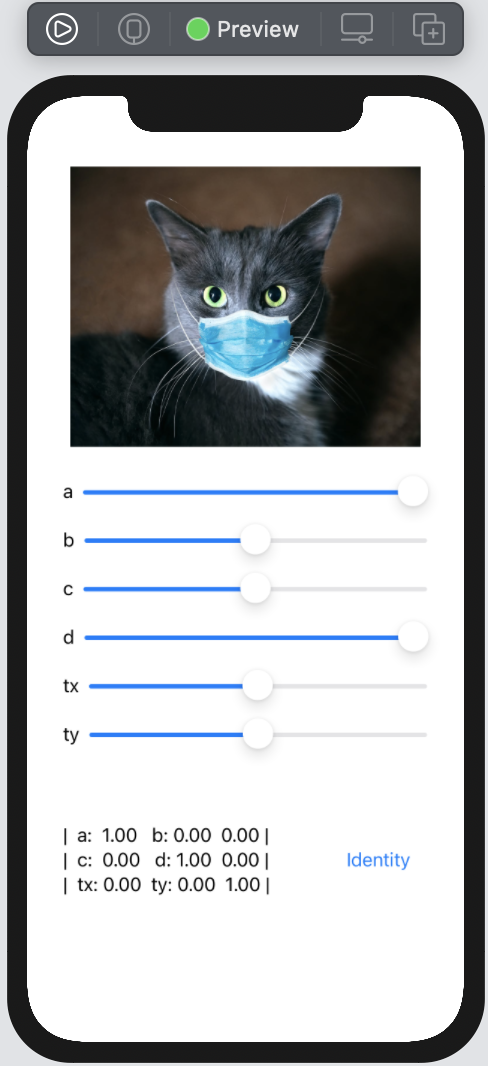
Run and observer the result:
The API for SwiftUI also contains similar functions for modification of the transform property from the View. Under the hood, it’s using the GeometryEffect protocol - a mechanism for changing the appearance of the View.
GeometryEffect- An effect that changes the visual appearance of a view, largely without changing its ancestors or descendants.
If u wondering how GeometryEffect works, we may create our modification for affine transformation. The effect should return ProjectionTransform (matrix 3x3) with the result at the end of the transform and for any “transitioned point” of transformation (e.g if all change if 1 and identity are 0, the transition from 0 to 1 can contain few steps).
The simplest version of Effect can be next:
struct AffineTransformEffect: GeometryEffect {

    var transform: CGAffineTransform

    init(
        a: CGFloat? = nil,
        b: CGFloat? = nil,
        c: CGFloat? = nil,
        d: CGFloat? = nil,
        tx: CGFloat? = nil,
        ty: CGFloat? = nil
    ) {
        transform = CGAffineTransform(
            a: a ?? 1,
            b: b ?? 0,
            c: c ?? 0,
            d: d ?? 1,
            tx: tx ?? 0,
            ty: ty ?? 0
        )
    }

    func effectValue(size: CGSize) -> ProjectionTransform {
        ProjectionTransform(transform)
    }
}
than, replace transformEffect to :
	.modifier(
	    AffineTransformEffect(
	        a: aTransform,
	        b: bTransform,
	        c: cTransform,
	        d: dTransform,
	        tx: txTransform,
	        ty: tyTransform
	    )
	)
build and run the project - the result is the same.
Share on: