Schedulers in Combine: Part 3: DispatchQueue Scheduler
iOS Combine Estimated reading time: 7 minutesThis is the 3rd article in my mini-series dedicated to Schedulers in Combine. And this one is about the most powerful one - DispatchQueue Scheduler.
Yet to his power, the usage is still pretty simple. At the same moment, it allows us to perform a lot of various operations with full control of how and when it will be done. So simplicity and functionality are what DispatchQueue Scheduler brings into Combine for us.
Before we go to the details of this Scheduler, I believe we need to recap CGD and DispatchQueue. This is a very powerful component of Foundation framework, that does all heavy and error-prune work with Threads for us.
CGDis just a name ofDispatchframework that provides for us this object within a set of very useful friends. I won’t cover this topic fully here, instead, just check officical documentation for details.
DispatchQueue is an object that helps manage the execution of code using a serial or concurrent approach within different Threads. U probably use DispatchQueue.main every day and already know that this simple line brings enormous power into our code. DispatchQueue has its area of responsibility, including a pool of Threads in which our code can be executed.
Using
DispatchQueue, we may be sure thatmain Thread- always main, and if we work within background queue we can`t be sure that Thread is the same, but we can be sure that priority at which task will be executed - will be correct.
Related articles:
- Schedulers in Combine. Part 1: ImmediateScheduler
- Schedulers in Combine. Part 2: RunLoop Scheduler
- Schedulers in Combine. Part 3: DispatchQueue Scheduler
- Schedulers in Combine. Part 4: OperationQueue Scheduler
DispatchQueue Scheduler
As it was done in previous articles, we will review both aspects of the current Scheduler - HOW and WHEN operation can be executed.
Let’s start with HOW approach. To do so, we may create simple example as following:
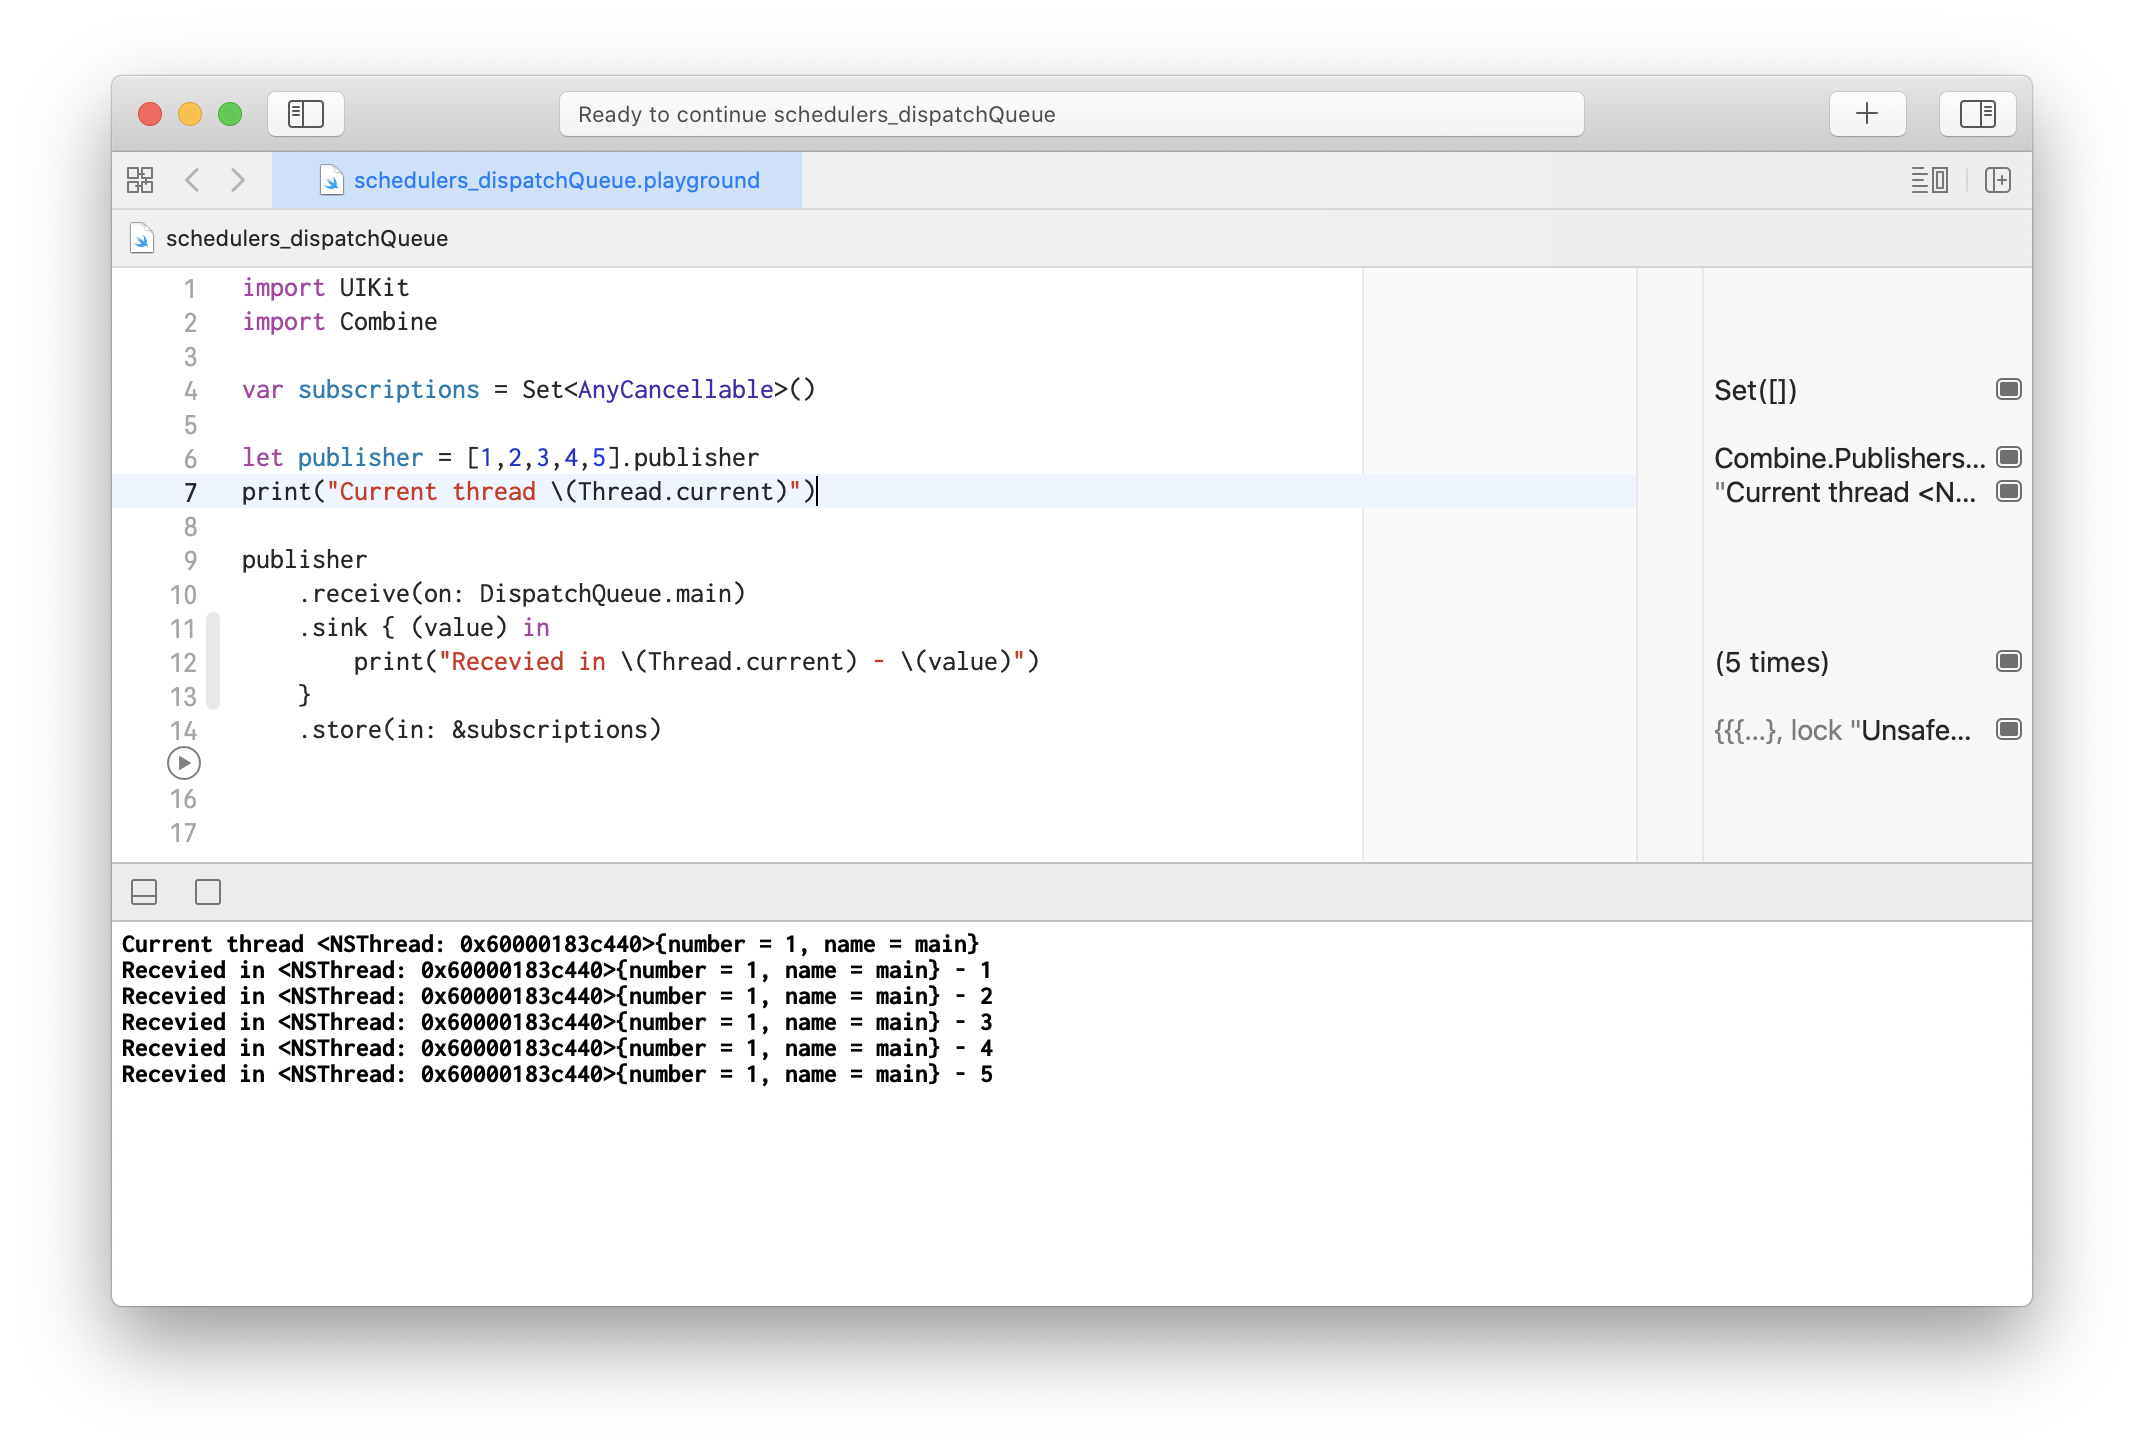
var subscriptions = Set<AnyCancellable>()

let publisher = [1,2,3,4,5].publisher
print("Current thread \(Thread.current)")

publisher
    .receive(on: DispatchQueue.main)
    .sink { (value) in
        print("Recevied in \(Thread.current) - \(value)")
    }
    .store(in: &subscriptions)
Output will be pretty simple and as we expect, everything will be executed on same Thread - the mainThread:
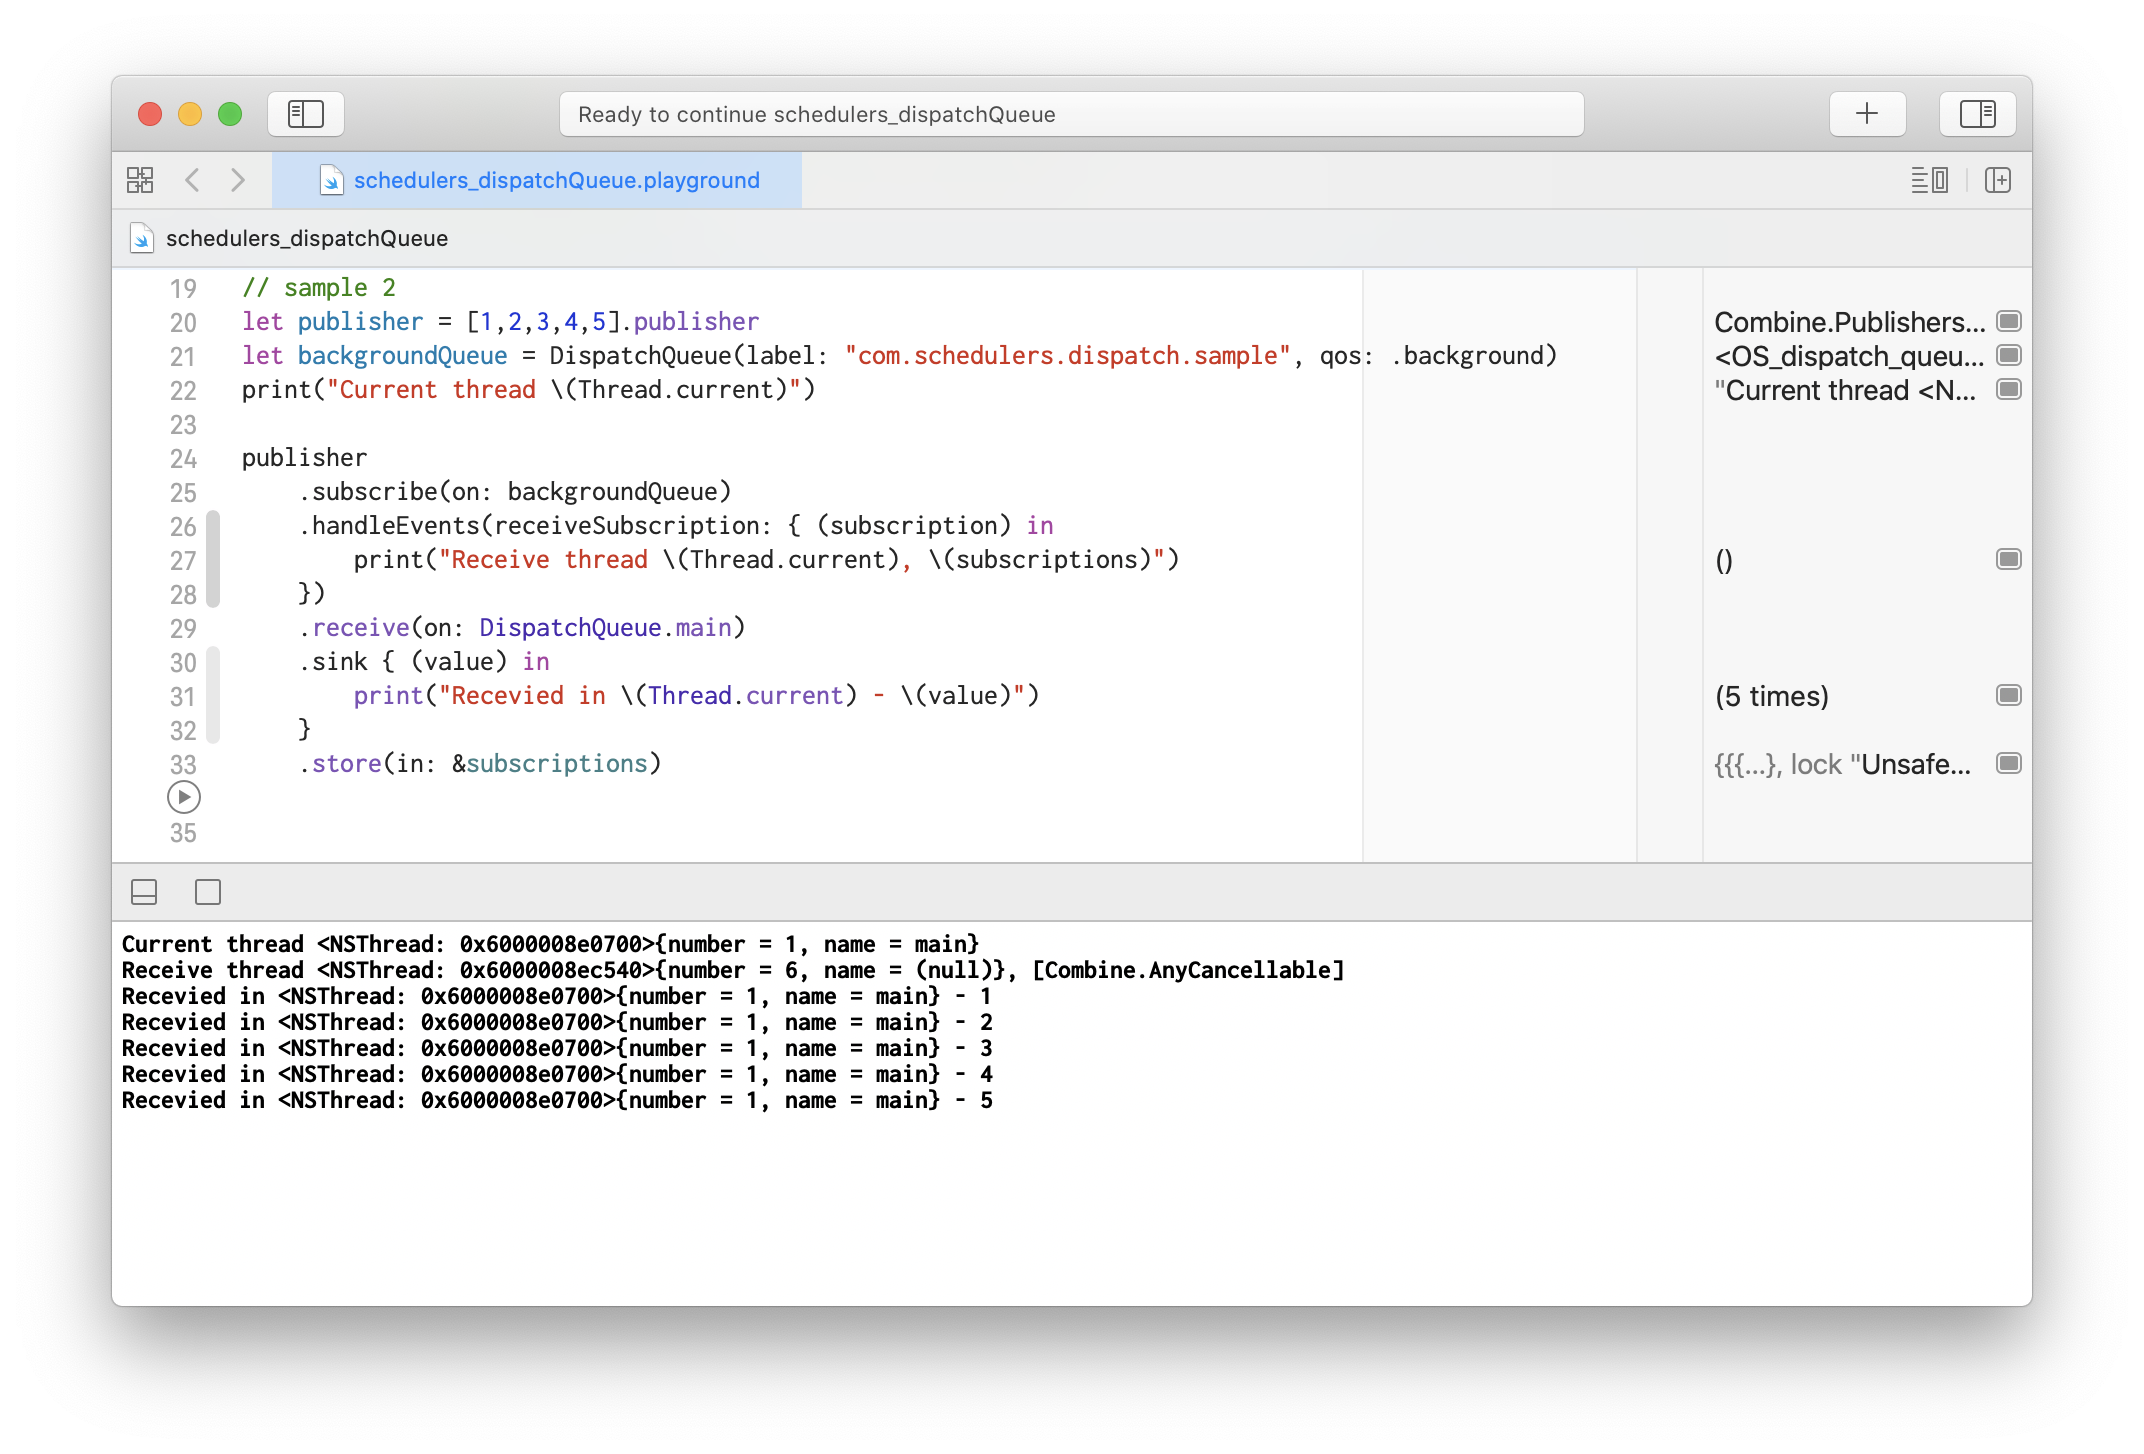
But, as I mentioned previously - this is the most simple case of usage. Instead, usually, this Scheduler is used for switching the context Thread. For example in case when u have started heavy computation on the main Thread and u won’t block it but want to receive the result on it, DispatchQueue is the most elegant way to do so:
let publisher = [1,2,3,4,5].publisher
let backgroundQueue = DispatchQueue(label: "com.schedulers.dispatch.sample", qos: .background)
print("Current thread \(Thread.current)")

publisher
    .subscribe(on: backgroundQueue)
    .handleEvents(receiveSubscription: { (subscription) in
        print("Receive thread \(Thread.current), \(subscriptions)")
    })
    .receive(on: DispatchQueue.main)
    .sink { (value) in
        print("Recevied in \(Thread.current) - \(value)")
    }
    .store(in: &subscriptions)
Output will be exectly as we would like to have - subscription, work are done on backgroundQueue, but ouptut - on main:
The good point here is that combination of subscribe(on:) and receive(on:) can be anyone - u may do this as u needed.
As we remember from pres articles, a subscription is done on current Thread, so in case if u subscribe on some background Thread, u may omit
subscribe(on:)call or use is explicit.
In general, thanks to DispatchQueue Scheduler we may simplify our code and instead
sink {
	DispatchQueue.main.async {
	   // do something with data
	}
}
we can simply do it like this:
publisher
	.receive(on: DispatchQueue.main)
	.sink {
		// do something with data
	}
If u prefer to use
GCDapproach - it’s also allowed and nobody can’t forbid do that. As we all know - every problem has at least 2 solutions, so it’s up to u decide which one is more suitable ;] .
SchedulerOptions
As u may notice, when we create DispatchQueue, we may specify a lot of parameters:
let backgroundQueue = DispatchQueue(
    label: String,
    qos: DispatchQoS,  // <--
    attributes: DispatchQueue.Attributes, // <--
    autoreleaseFrequency: DispatchQueue.AutoreleaseFrequency, // <--
    target: DispatchQueue?
)
All of them allow us to modify different aspects of the queue, so we may configure priority (DispatchQoS), execution approach (DispatchQueue.Attributes), or even control lifecycle event’s a bit (DispatchQueue.AutoreleaseFrequency). All of them are pretty useful, so we expect that some of them will be available for change/configuration during usage of DispatchQueue Scheduler.
As expected, Apple indeed provides few options for DispatchQueue Scheduler, making this Scheduler even more powerful. So, what are the options? To check it we may simply dive into API:
DispatchQueue.SchedulerOptions(
    qos: DispatchQoS,
    flags: DispatchWorkItemFlags,
    group: DispatchGroup
)DispatchQoS- control quality of service. For example, we may specify that work should be done on.utilitypriority. Default -.unspecifiedDispatchWorkItemFlags- allow us to control the behavior of work item (for example do we need to add a barrier for it or should we spawn this task on a separate thread or copy attributes of the current context into its thread) Default =[]
more about flags here
 public static let barrier: DispatchWorkItemFlags
 public static let detached: DispatchWorkItemFlags
 public static let assignCurrentContext: DispatchWorkItemFlags
 public static let noQoS: DispatchWorkItemFlags
 public static let inheritQoS: DispatchWorkItemFlags
public static let enforceQoS: DispatchWorkItemFlagsDispatchGroup- specify to which group of a task this task should be added. Default -nil.
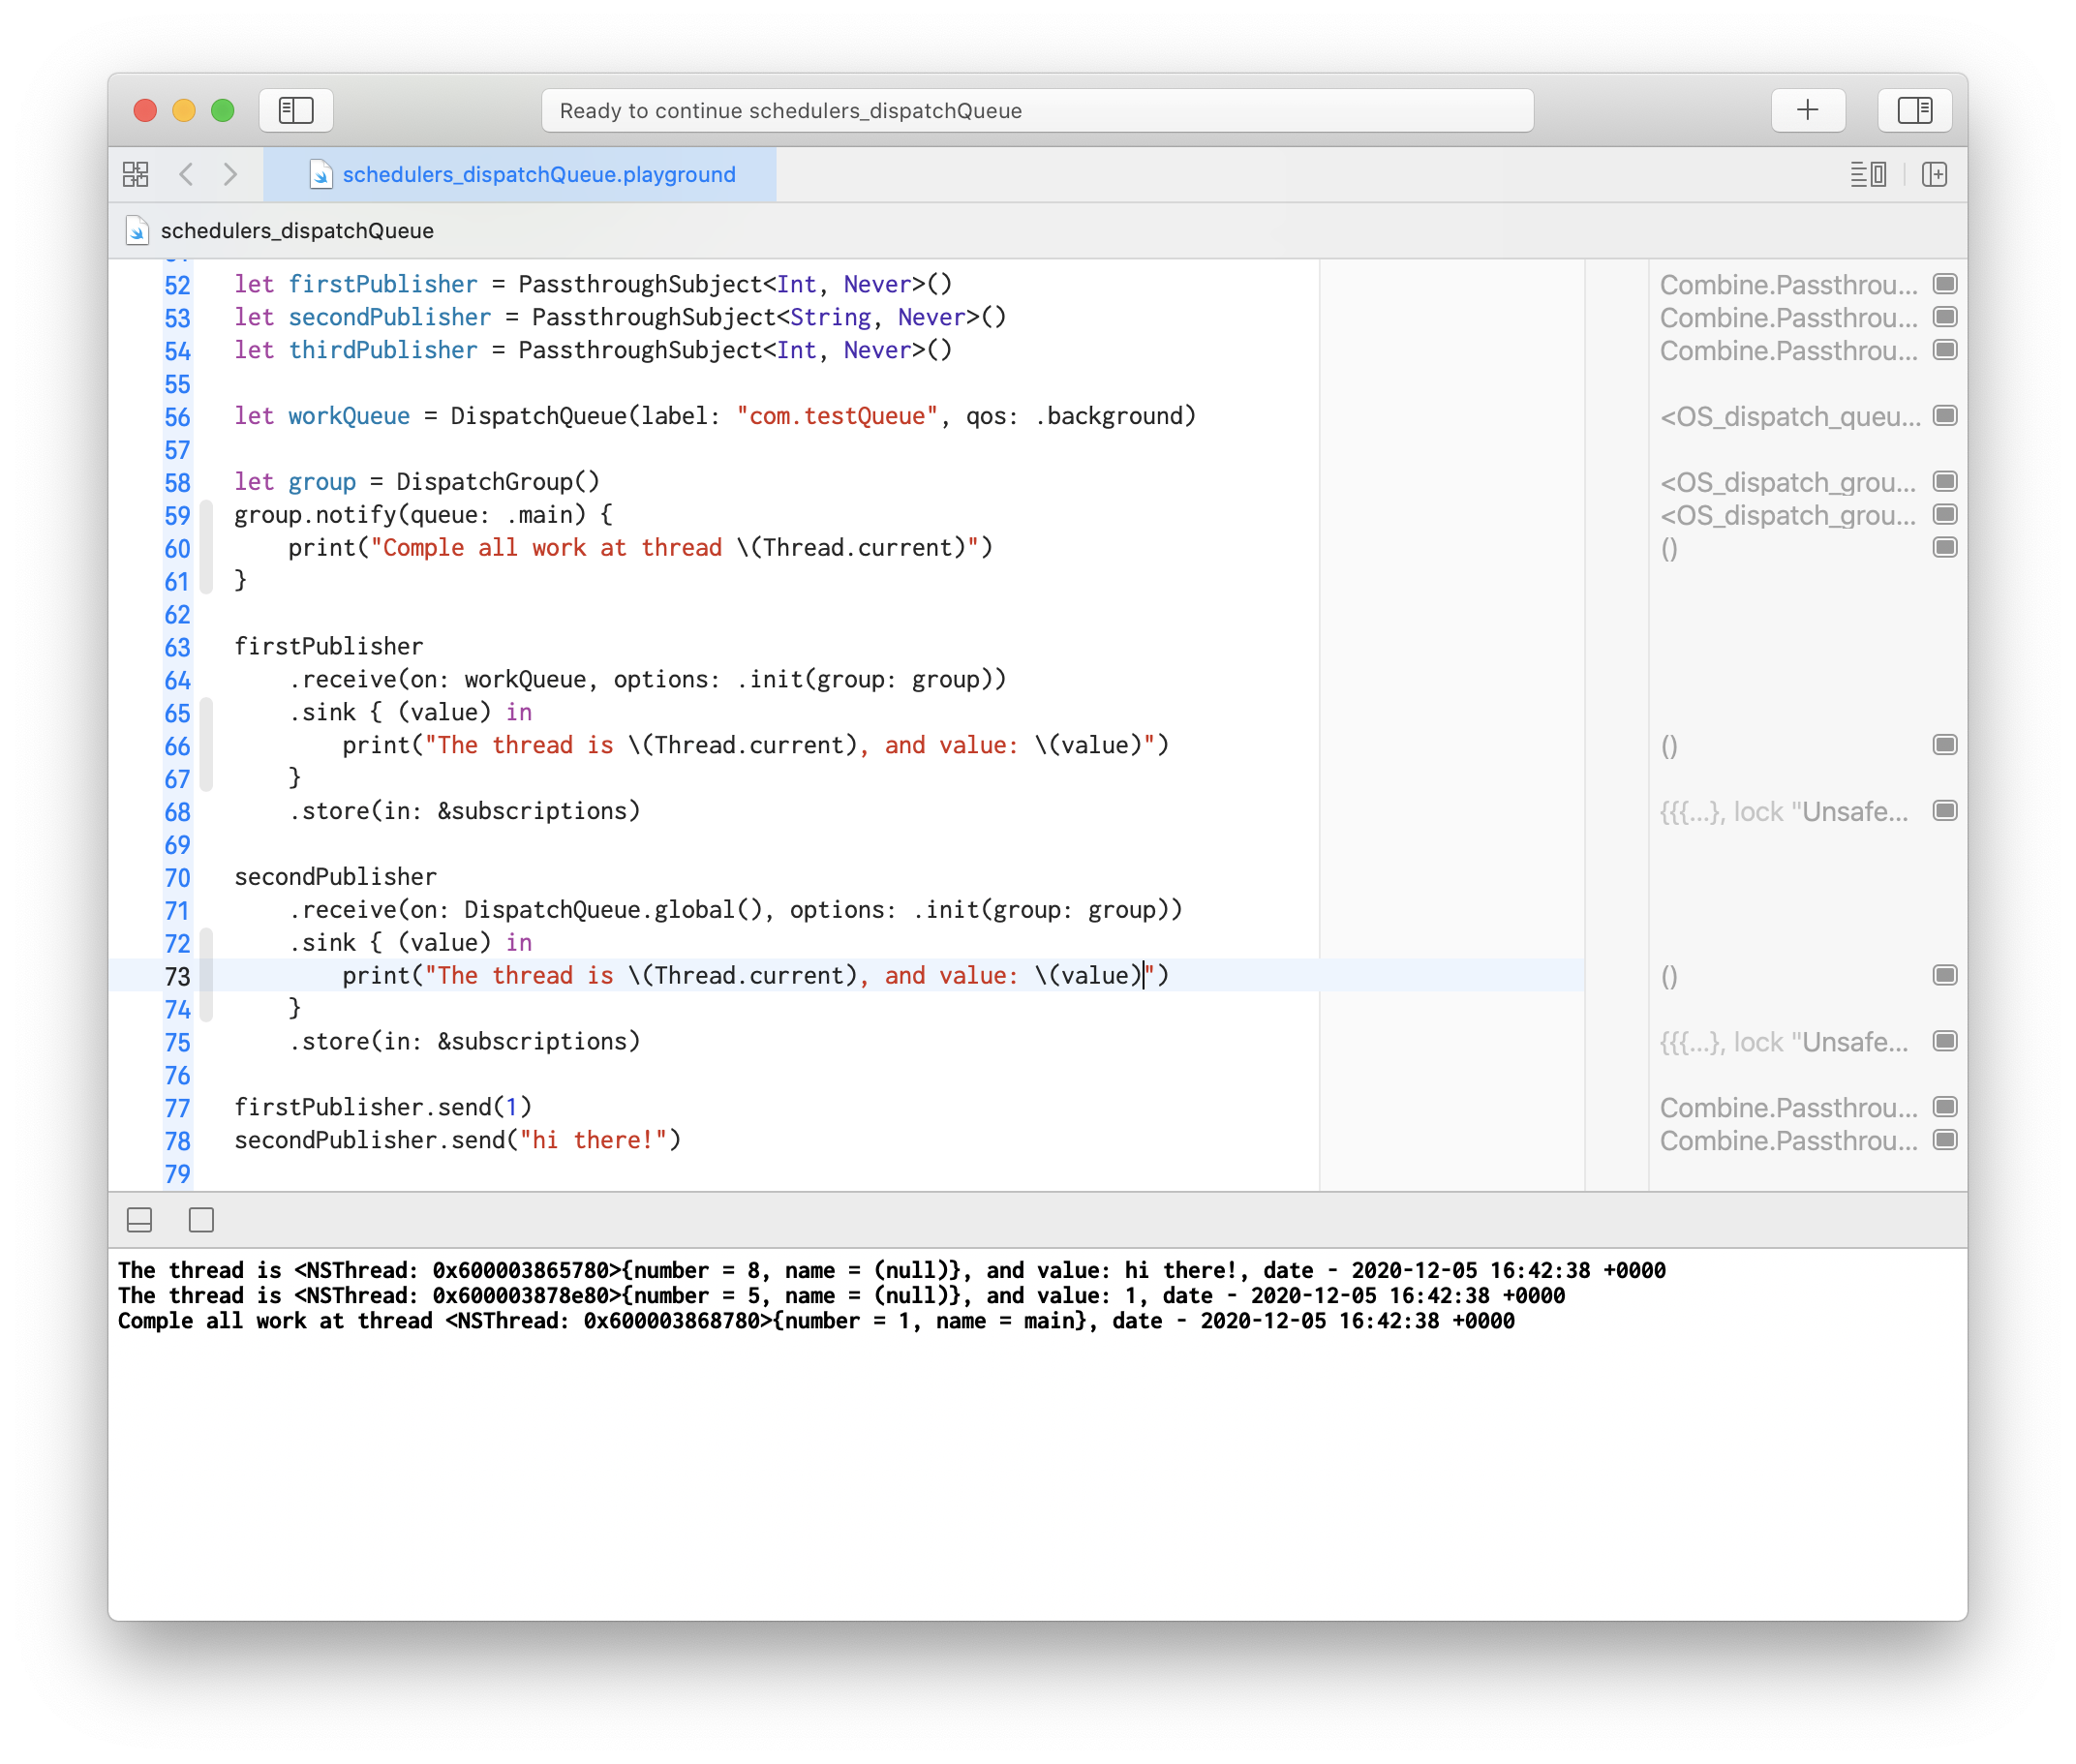
To demonstrate this example we may create something like:
let firstPublisher = PassthroughSubject<Int, Never>()
let secondPublisher = PassthroughSubject<String, Never>()
let thirdPublisher = PassthroughSubject<Int, Never>()

let workQueue = DispatchQueue(label: "com.testQueue", qos: .background)

let group = DispatchGroup()
group.notify(queue: .main) {
    print("Comple all work at thread \(Thread.current)")
}

firstPublisher
    .receive(on: workQueue, options: .init(group: group))
    .sink { (value) in
        print("The thread is \(Thread.current), and value: \(value)")
    }
    .store(in: &subscriptions)

secondPublisher
    .receive(on: DispatchQueue.global(), options: .init(group: group))
    .sink { (value) in
        print("The thread is \(Thread.current), and value: \(value)")
    }
    .store(in: &subscriptions)

firstPublisher.send(1)
secondPublisher.send("hi there!")
This is equilalent to similar code:
let dispatchGroup = DispatchGroup()
workQueue.async(group: dispatchGroup, execute: {
    // work 1
})
DispatchQueue.global().async(group: dispatchGroup, execute: {
    // work 2
})
dispatchGroup.notify(queue: dispatchQueueGlobal) {
    // done
}
And result is:
Under the hood group works in the same way as
async(group:qos:flags:execute)To check how everything is done - u can follow this link to open source DispatchQueue+Scheduler
SchedulerTimeType
The next point to review is the possibility to control WHEN this scheduler will execute the task. To do so, we may use as and within already discussed Schedulers, SchedulerTimeType.
As we already checked, this type is created for configuring when in the future we may execute the task. The best things we can do before testing is to check sorce code or API:
/// Creates a dispatch queue time interval from the given dispatch time interval.
///
/// - Parameter timeInterval: A dispatch time interval.
public init(_ timeInterval: DispatchTimeInterval) {
    magnitude = Int(timeInterval.nanoseconds)
}
As we can see now, under the hood this type works with DispatchTimeInterval. This type is pretty known from GCD, so no mystery here.
Let’s check functionality with code:
let queue = DispatchQueue(label: "sample.scheduler.dispatchQueue")
queue.async {
    print("Create on \(Thread.current)")
    let source = Timer
        .publish(every: 1, on: .main, in: .common)
        .autoconnect()
        .scan(0, { counter, _  in
            let value = counter + 1
            print("tick ", value)
            return value
        })

    source
        .receive(on: DispatchQueue.main)
        .sink { (value) in
            print("The value is \(value) in \(Thread.current) at \(Date())")
        }
        .store(in: &subscriptions)

    DispatchQueue.main
        .schedule(
            after: .init(.now() + 5),
            tolerance: .seconds(1),
            options: nil
        ) {
            print("cancelation")
            subscriptions.removeAll()
        }
}
Result:

Alternative implementation of DispatchQueue Scheduler in openSource OpenCombine
Notes
I believe u already raised a question - what’s the difference between DispatchQueue.main Scheduler and RunLoop.main?
From a technical point of view - almost .none, but (we always have some but), if u check how
RunLoopdispatch work from inputSources (I wrote an article about it - here) and what’s done withinDispatchQueue'sasync function, u may observe, thatRunLoopwill execute this task within next loop (so with some minimal delay) andDispatchQueuemay/or may mot optimize this call and execute it immediately (check this).
-
DispatchQueuemay execute the task for a bit faster thanRunLoop.main, but for a real-world example, this is almost always nothing. -
DispatchQueue.mainruns callbacks in all of the.commonmodes, which include the modes used when tracking touch and mouse events. (check this link and this link for more).
In the next article, I will cover OperationQueue Scheduler.
Related articles:
- Schedulers in Combine. Part 1: ImmediateScheduler
- Schedulers in Combine. Part 2: RunLoop Scheduler
- Schedulers in Combine. Part 3: DispatchQueue Scheduler
- Schedulers in Combine. Part 4: OperationQueue Scheduler
Share on: