First look at WindowGroup
iOS macOS SwiftUI WindowGroup SceneBuilder Estimated reading time: 6 minutesWithin SwiftUI 2.0 we got an option to create a pure SwiftUI app (at least a minimal one). To make this possible, Apple introduces WindowGroup - “a scene that presents a group of identically structured windows.”
This view has power only for platforms, that support multi-windows - macOS and iPadOS. In addition to this, this view allows to group opened windows into the tabbed interface.
@SceneBuilder
WindowGroup can be used within @main attribute (an attribute that creates a new-style entry point for the app, introduces in SE-0281).
@main
struct TestApplication: App {
    var body: some Scene {
        WindowGroup {
            ContentView()
        }
    }
}
read more about
@main
If we check the declaration, we can see, that WindowGroup conforms to Scene protocol, as DocumentGroup and Settings. These types of views can be used as @SceneBuilder’s for the app. For other platforms such as WatchKit there are few other types (for example WKNotificationScene).
SceneBuilder- allows combining few scenes into one
@_functionBuilder public struct SceneBuilder {
    public static func buildBlock<Content>(_ content: Content) -> Content where Content : Scene
}
We also can create our custom View that conforms to Scene protocol and use it:
struct MyScene: Scene {
  var body: some Scene {
    WindowGroup {
      MyView()
        .frame(width: 200, height: 200)
        .background(Color.red)
    }
  }
}

struct MyView: View {
  var body: some View {
    Text("Aloha")
  }
}
In @SceneBuilder we also can create and use a few scenes - as I mentioned above, out of the box available WindowGroup, DocumentGroup and Settings.
If we do so, behavior directly depends on the order and used types of scenes that we have used.
Commands
Within any type we also receive an ability to create and modify menu-commands:
WindowGroup {
      ContentView()
        .frame(width: 200, height: 200)
    }
    .commands {
      CommandMenu("MyMenu") {
        Button("MyMenu Action") {
          // do stuff here
        }
        .keyboardShortcut("w")
      }
    }
@CommandsBuilderis used here - this is yet another builder, but it works only withinCommand

Note: u can use
.commandsviewModifier on any scene in your@SceneBuilder, all of them will take an effect, no matter on which type u define it.
If u would like to remove/replace any command in the menu, use specially designed view modifiers:
  .commands {
    CommandGroup(replacing: .newItem, addition: { })
  }
In addition to custom commands, u also receive a few free actions:
- new window
- all tabs
- preferences (later about it)
New window
Using File/New window app will create the same window one more time.
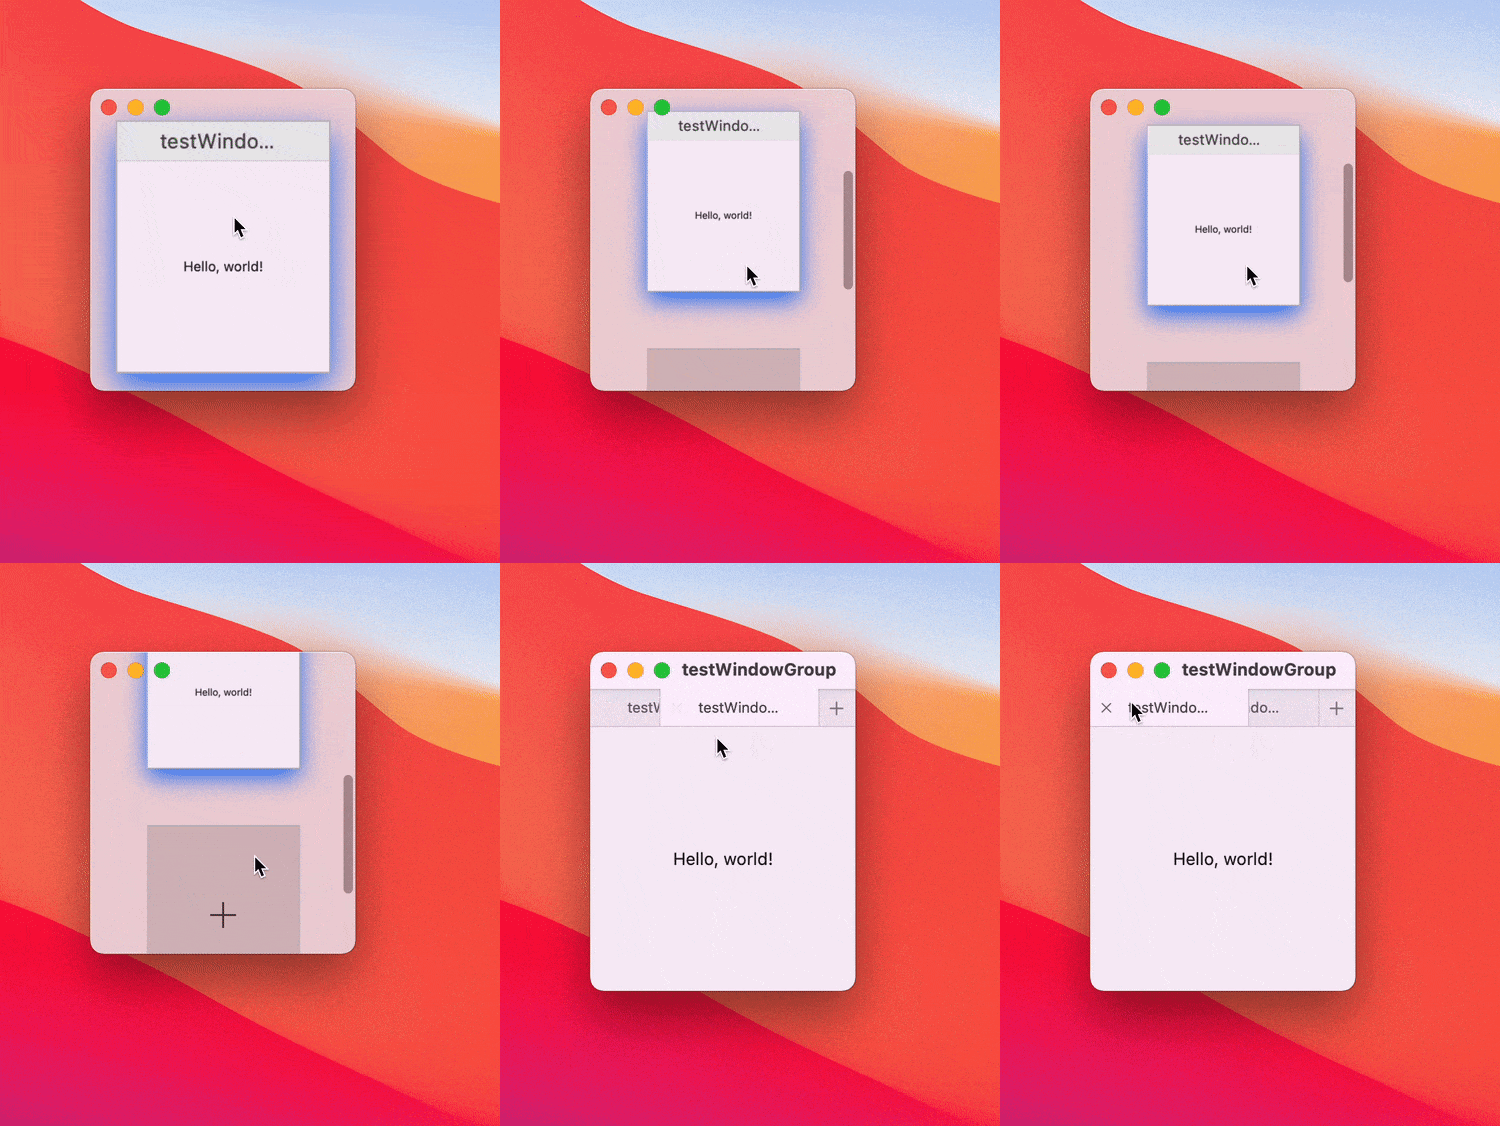
All tabs
Using View/Show all tabs - we can receive a preview of all related to this window tabs opened right now
Preferences
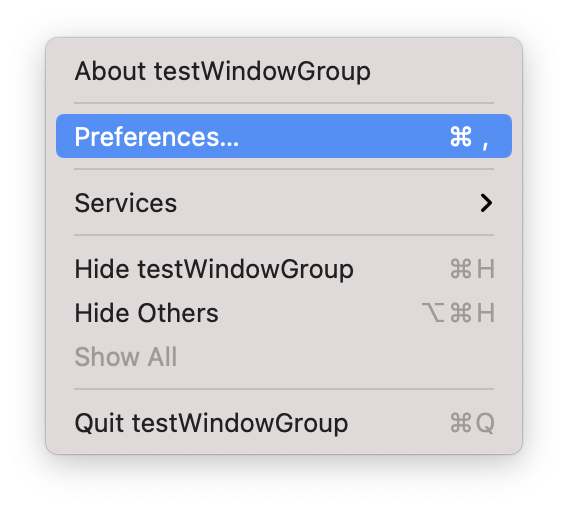
Preferences menu automatically bind Settings from u’r scene builder to this action.
Settings {
  VStack {
    Text("Bonjur")
  }
  .frame(width: 300, height: 400)
}
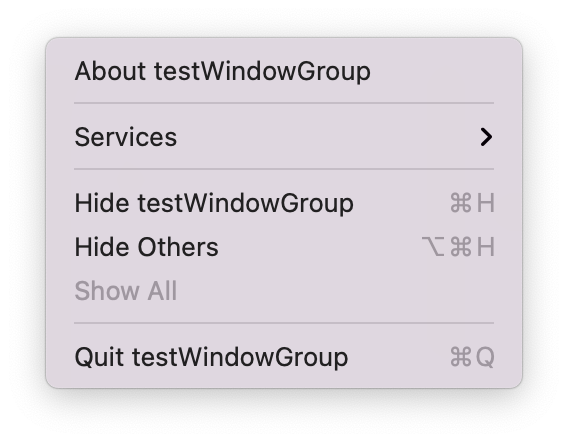
If u didn’t define Settings, then, nothing will be shown.
If u define few Settings in your @SceneBuilder, u get as many Preferences in menu as u define:
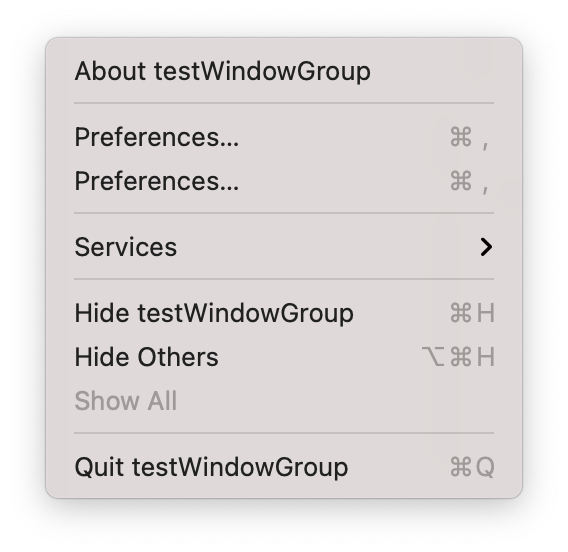
At the moment of writing (xCode Version 12.4 (12D4e) and Swift 5.4), as u can see on the screenshot, the hot-key combination is the same for each menu, and any of this submenu will display only the very first defined
Settingsfrom u’r scene builder. I believe this is a bug in SwiftUI, and this will be fixed in the next releases.
Multiple Scenes in builder
We can define also a few scenes in our scene builder, but, as I mentioned above, the first one only will be displayed.
WindowGroup {
  ContentView()
    .frame(width: 200, height: 200)
}
.commands {
  CommandMenu("MyMenu") {
    Button("MyMenu Action") {
      // do stuff here
    }
    .keyboardShortcut("w")
  }
}

WindowGroup {
  MyView()
    .frame(width: 200, height: 200)
    .background(Color.red)
}
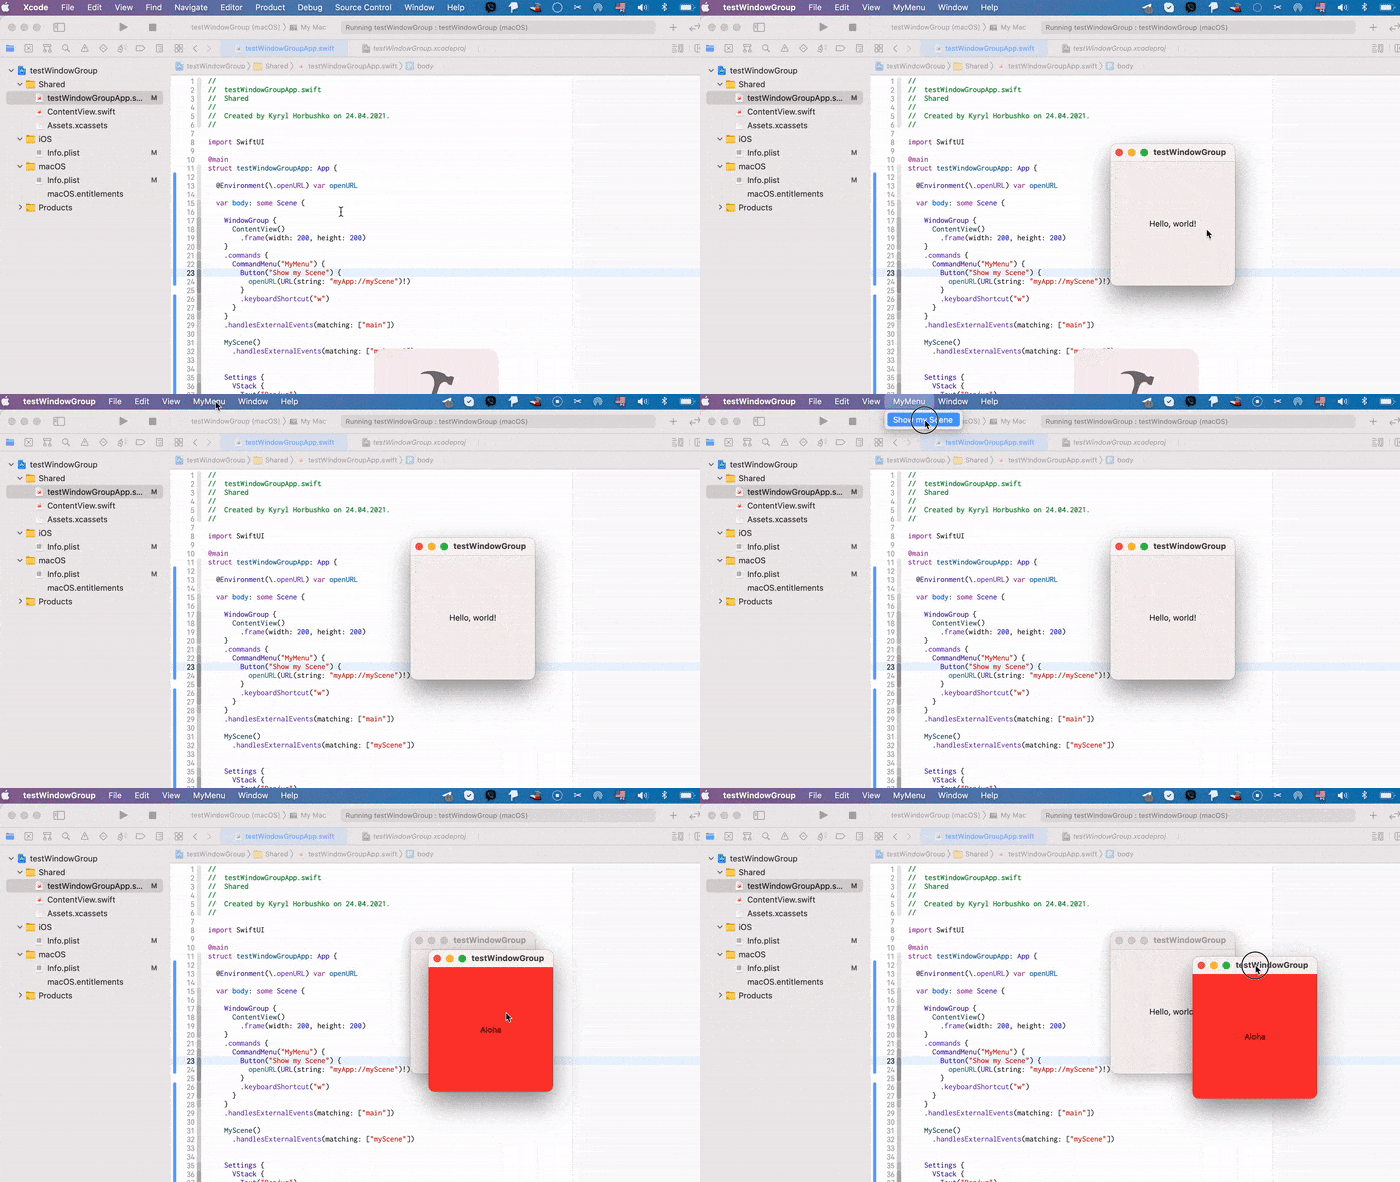
So, how to switch between them? The answer is - handlesexternalevents(matching:).
This view modifier ” specifies a modifier to indicate if this Scene can be used when creating a new Scene for the received External Event”.
External Event- is a bit intriguing definition of something. I didn’t find any explanation from Apple for this that include a complete list of this stuff, but I assume that this includes at least :
- universal links
- SiriKit
- Spotlight
- Handoff
- other ? (not sure about them)
Usage of this viewModifier a bit tricky. First of all - we have 2 versions of this modifier:
handlesExternalEvents(matching:)handlesExternalEvents(preferring:, allowing:)
The first one (as it mentioned in doc) - “is only supported for WindowGroup Scene types”. And to use it, we should use deep link:
.handlesExternalEvents(matching: ["myScene"])we can define a matching condition, that will be checked and if it succeeds, an appropriate window will be called.
To do so, we should :
- Define URL Scheme, for example: “myApp”:

- use
openURLusingOpenURLActionto call this deep link:
@main
struct testWindowGroupApp: App {

  @Environment(\.openURL) var openURL

  var body: some Scene {

    WindowGroup {
      ContentView()
        .frame(width: 200, height: 200)
    }
    .commands {
      CommandMenu("MyMenu") {
        Button("Show my Scene") {
          openURL(URL(string: "myApp://myScene")!)
        }
        .keyboardShortcut("w")
      }
    }
    .handlesExternalEvents(matching: ["main"])

    MyScene()
      .handlesExternalEvents(matching: ["myScene"])
...
additional post on Apple developer forum here or this SO question
Second, handlesExternalEvents(preferring:, allowing:), can be used on any view within any scene, but only for platforms, that supports it.
In our case, we can use it, to make sure, that main window will be only one:
WindowGroup {
  ContentView()
    .frame(width: 200, height: 200)
    .handlesExternalEvents(preferring: ["main"], allowing: ["*"])
}
Pitfalls and limitation
Full control of window
To get full control on an NSWindow object on macOS, u should still refer to AppKit (for example, by using NSViewRepresentable).
In some situations u still need to use good, old NSApplicationDelegate:
@NSApplicationDelegateAdaptor(AppDelegate.self) var appDelegateor by using some instance/static properties from NSWindow.
Data sharing between scenes
To share data between scenes in scene builder u can use one of the next approaches:
- share viewModel object and hold reference in view marked with
@mainattribute. Note, that eachScenehas its state management machine (if I can name it like this). This means, that each @State and other similar propertyWrappers and attributes work independently. - use serialization and shared storage
macOS menu bar extras app
If u want to create a pure SwiftUI macOS app that acts as LSUIElement and when u click on some of the menu items a new window should appear, u will get a lot of issues.
“Menu Bar Extras” is an official name for icons in the menu bar. Often it’s called status-bar items, but this is not an official name.
As on my trials, I got next:
- sometimes selected scene is not shown (needs to click a few times on the button to make it workable)
- sometimes copy of menu-bar extras created (even if u create an
NSMenuonly for a dedicated window)
Also, it’s good to note, that u should still use NSMenu and NSMenuItem to make menu bar extras (there is no mechanism in SwiftUI for this; yet?).
As a workaround to issues described above, I used
NSWindow.
Resources
Share on: