Navigation in Android
android navigation tutorial beginner Estimated reading time: 5 minutesNavigation - is an essential component of any app (or almost any - some can have just 1 screen ;]).
To create navigation we often use platform-specific tools provided by platforms authors.
For iOS, we use UINavigationController and for Android… well, we have a few options:
- an app with multiple activities that uses intents to navigate between them
- an app with fragments and navigation within a single activity and Navigation component
- an app that uses various architectures with a navigation drawer
- navigation with own solution
- mix of methods
I want to describe navigation with the Navigation component.
intro
The benefits that give us Navigation component:
- fragment transaction
- the box functionality for most used scenarios
- deep linking
- passing data with
ViewModelsandBundle - animations
- testing
It’s good to know that the Navigation component can work with both activities and fragments. With both of them, we have a back stack (LIFO type).
Before diving into details, it’s good to know the main components for the Navigation component:
-
Navigation graph - this is kind of a scheme with configuration. We can use it to visualize navigation and modify the way how screens interact with other
-
NavHost- a placeholder that is used to display the current screen selected from the navigation graph -
NavController- object that helps to control all components -
animations - can be added to animate transitions between screens
-
arguments - can be used to send data between screens
-
Deeplink component
step-by-step
Add dependencies:
Open build.gradle (Module: <name>.app) file and add next dependencies:
    def nav_version = "2.4.1"
    implementation "androidx.navigation:navigation-fragment-ktx:$nav_version"
    implementation "androidx.navigation:navigation-ui-ktx:$nav_version"
here and below I used parts of my project as a sample
Add Navigation graph
This is just an XML file with a special configuration.
<?xml version="1.0" encoding="utf-8"?>
<navigation xmlns:android="http://schemas.android.com/apk/res/android"
            xmlns:app="http://schemas.android.com/apk/res-auto"
            android:id="@+id/nav_graph">

</navigation>
To add this file to your project - go to res folder and create subfolder navigation, then - right-click on a folder and add the resource file with the type Navigation.
As result, navigation graph will be added:

note - u can have a few navigation graphs
Configure NavHost
NavHost is needed for determining the root and the place that will show u’r screens. I have one initial activity that will act as NavHost.
To tell the system about NavHost needs to add few attributes to fragment:
android:name- holds nameapp:navGraph- tells which graph to useapp:defaultNavHost="true"- indicate if this is a default one (for multiply graphs)
In my case I have activity_intro.xml, so I defined this 3 attributes as next:
<androidx.fragment.app.FragmentContainerView

    android:id="@+id/fragmentContainerView"
    android:layout_width="match_parent"
    android:layout_height="match_parent"
    app:layout_constraintBottom_toBottomOf="parent"
    app:layout_constraintEnd_toEndOf="parent"
    app:layout_constraintStart_toStartOf="parent"
    app:layout_constraintTop_toTopOf="parent"

    android:name="androidx.navigation.fragment.NavHostFragment"
    app:navGraph="@navigation/nav_graph"/>
    app:defaultNavHost="true"
If u did everything correctly, in ur nav graph u should see the host:

Add destinations to nav graph
To do so, u need either to modify xml directly by adding few attributes for parent framgent:
<fragment
	android:id="@+id/mainFragment"
	android:name="com.khorbushk.fragmentMain"
	android:label="@string/main_fragment"
	tools:layout="@layout/fragment_main" />
or by using add button from visual redactor in nav graph:

By adding a few destinations we then can create a connection between the - actions. Each action has its properties and name.
It’s good to mention, that we also should define the start destination. To do so, add additional attributes to one of your destinations:
app:startDestination
Later in code we can use navigation controller and id of this action to perform navigation:
findNavController()
	.navigate(R.id.action_introFragment_to_loginFragment)
In the same way, we can define a backward navigation path. We can select a destination - any of the available destinations in the graph.
And alternative - we can do this from code:
findNavController()
   .popBackStack(R.id.introFragment, false)
where R.id.introFragment - id of fragment, not action defined in graph.
Add animation for transitions (optional)
If u now test u’r navigation, u can observe, that everything works, but without any animation - screens just replace each other with a blink.
To improve the case, we can add iOS-like animations - slide from the left and the right.
To do so, first, one needs to create animations:
a) slide_left.xml
<?xml version="1.0" encoding="utf-8"?>
<set xmlns:android="http://schemas.android.com/apk/res/android"
android:shareInterpolator="false">
<translate
    android:duration="300"
    android:fromXDelta="100%"
    android:fromYDelta="0%"
    android:toXDelta="0%"
    android:toYDelta="0%" />
</set>
b) slide_right.xml
<?xml version="1.0" encoding="utf-8"?>
<set xmlns:android="http://schemas.android.com/apk/res/android"
    android:shareInterpolator="false">
    <translate
        android:duration="300"
        android:fromXDelta="0%"
        android:fromYDelta="0%"
        android:toXDelta="100%"
        android:toYDelta="0%" />
</set>
c) delay animation wait.xml:
<?xml version="1.0" encoding="utf-8"?>
<translate xmlns:android="http://schemas.android.com/apk/res/android"
    android:duration="300">
</translate>
put this animations into res/anim folder
Each action in the navigation graph can have a few additional attributes:
app:enterAnim- Entering a destinationapp:exitAnim- Exiting a destinationapp:popEnterAnim- Entering a destination via a pop action, an action that pops additional destinations off of the back stack when navigating.app:popExitAnim- Exiting a destination via a pop action
These animations described here.
Another simpler explanation, I grab from SO @dbm:
*all four attributes are targeting the same destination in the graph: the one defined by the
app:destinationattribute of the given. The `enterAnim` and `exitAnim` are applied when navigating to or from the destination the "regular way", while `popEnterAnim` is applied to the destination when it is shown as a result of the destination "above" it being popped from the backstack. Likewise, the `popExitAnim` is applied to the destination when itself is popped from the backstack*
Using prepared animations above, we now can configure our actions with attributes as follow:
app:enterAnim="@anim/slide_left"
app:exitAnim="@anim/wait"
app:popEnterAnim="@anim/wait"
app:popExitAnim="@anim/slide_right"
To make more complex animations, we can use shared elements
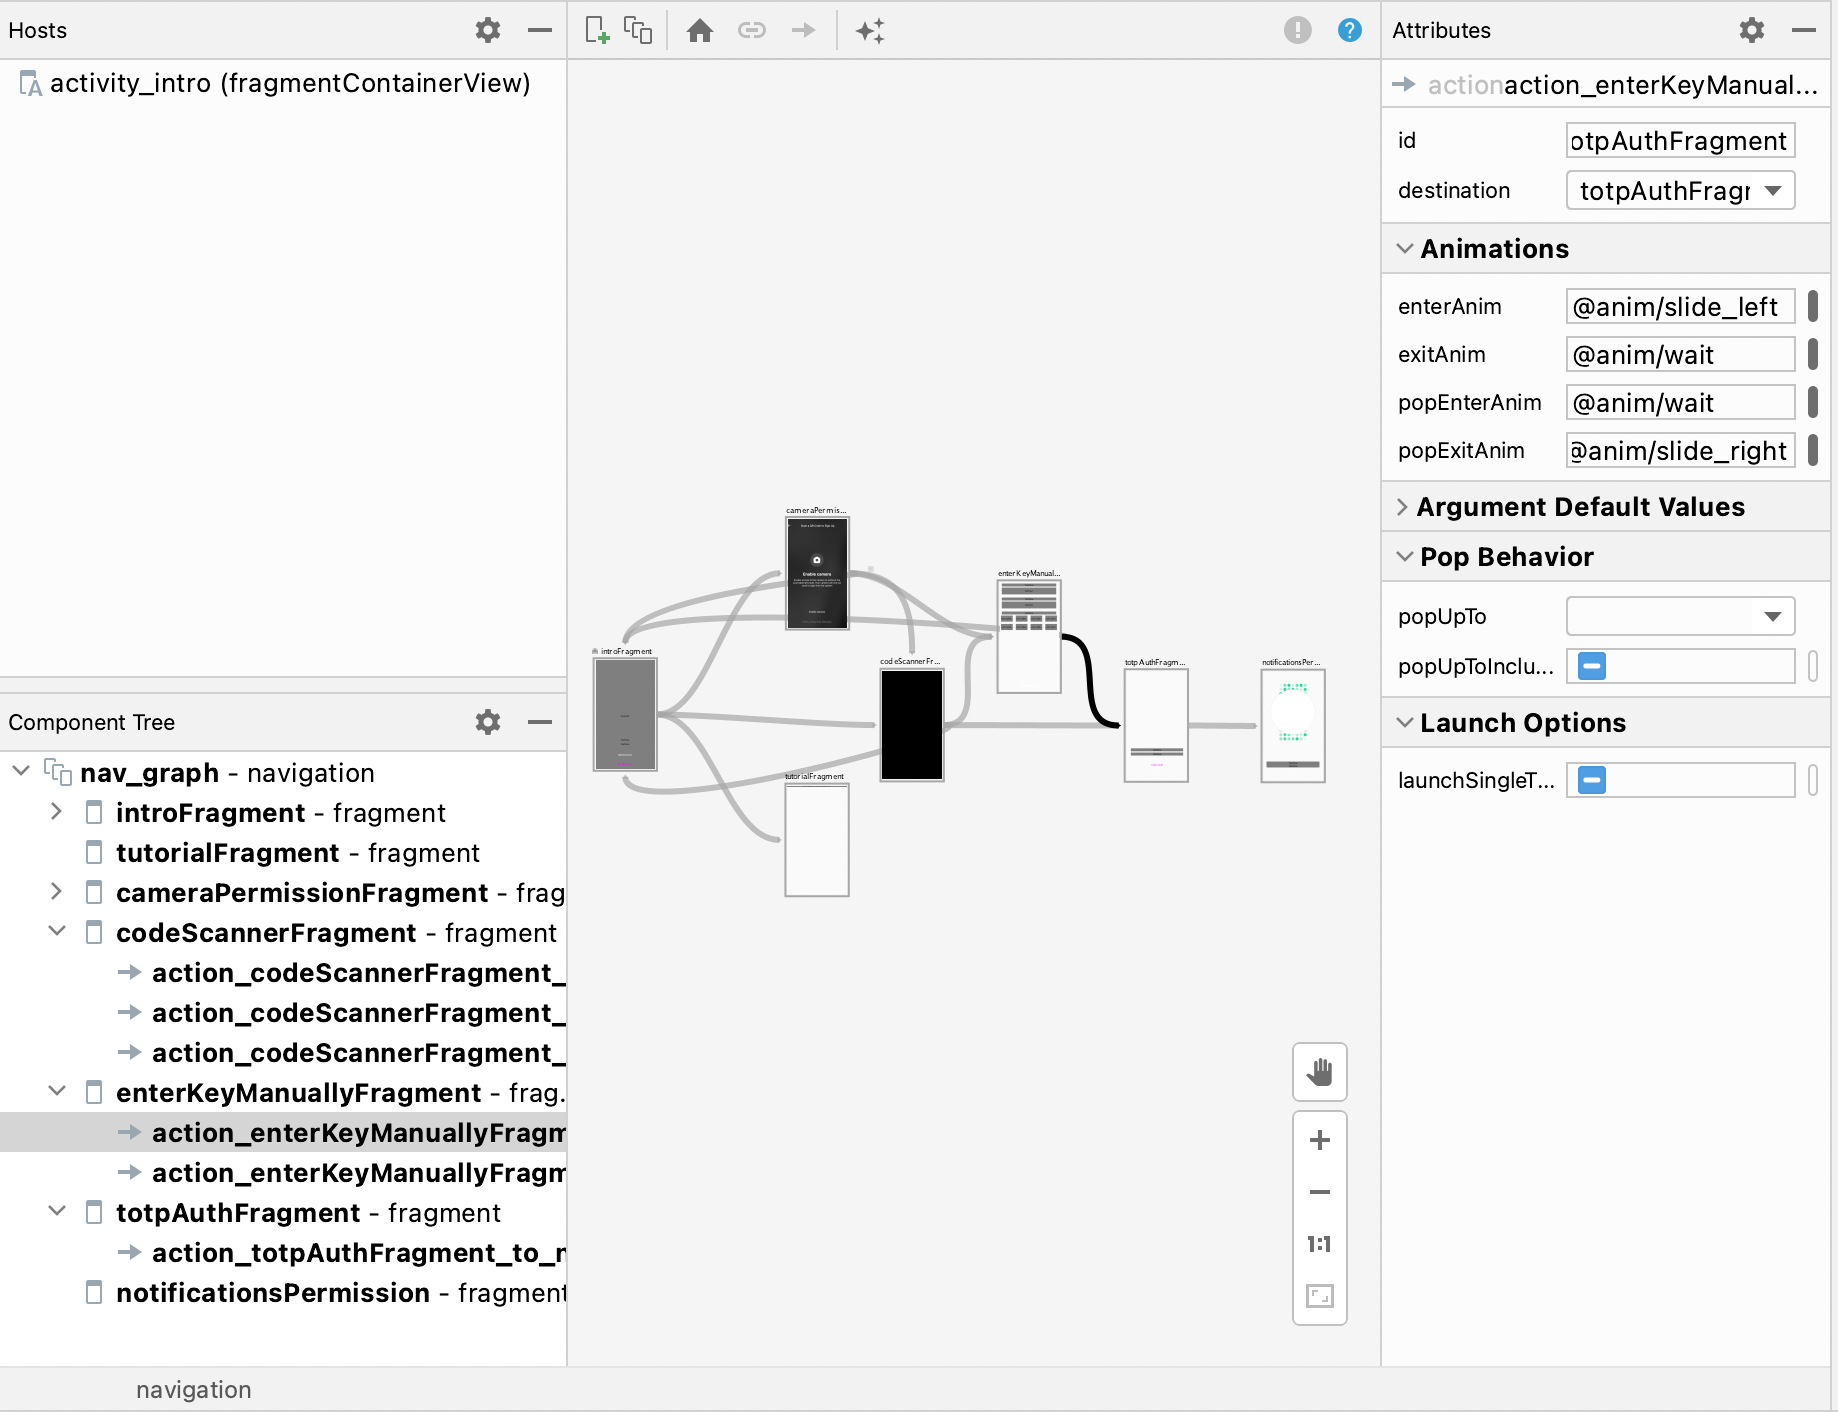
At the end of the day, my graph looks like this:
Additional moments
I didn’t cover here how to use drawer or pass data between destinations, and how to test or integrate deep linking, but it’s good to know that it’s possible and thus this is not a required step, I omit them.
The most useful - is data passing, but Android recommends using ViewModel data management instead of direct data passing via graph: In general, you should strongly prefer passing only the minimal amount of data between destinations. source
If u wondering, how u can pass data between navigations, check this article
The final result demo:
Conclusion
The Navigation component is very powerful and easy to use. It allows us to visualize navigation making app development clear and fast.
Resources
Share on: