Train the mind to solve
UI tutorial hack problem-solving flutter dart Estimated reading time: 5 minutesOften, during development and in real life we face various problems that are hard or even impossible (at first look) to solve. As a result, some of us look for alternatives or even give up by accepting simpler or different ways, and another part continues to gnaw the problem until it’s solved.
I want to believe that I’m a person from the second group - I like to solve problems and find solutions for unusual problems. Such an approach provides a lot of proc
- u’r mind becomes more flexible
- u can look at a problem from different points
- it’s simply interesting and fun
In this article, I want to describe one of such problem and how it can be solved.
Problem
I’m still playing a bit with Flutter, and during one more task, I faced with problem, one of the UI components used in the project did not support dedicated functionality. Pretty usual use-case.
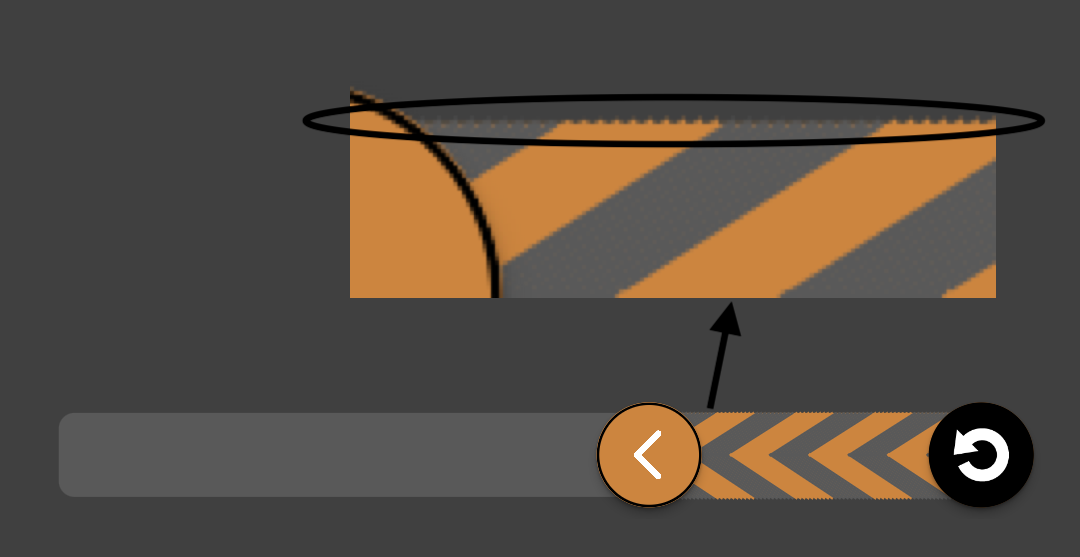
I have a slider, a range slider, and this slider works just great, but, it does not support a mask for a track bar with some image pattern.
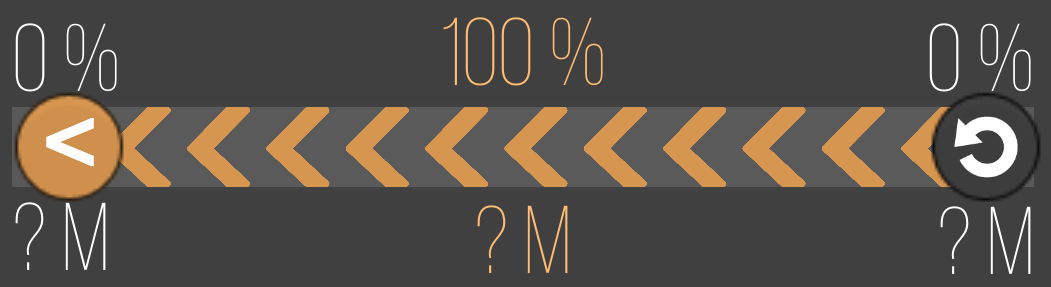
Expected design:
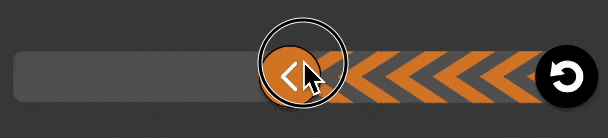
Existing UI:

API for UI element does not allow to put image with repeat pattern - the only thing it allows - is to send Paint object:
...
Paint activePaint,
Paint inactivePaint,
...
To be more precise, here is a library for slider used SfSlider
Solution
As usual, we must have at least a few options to solve this, the tricky moment is to see them:
- to remake the components from scratch and to add all required functionality
- copy the library and remake functionality by converting UI-element to one that can do everything we need (in other words - same as solution 1 but with prepared code)
- find an alternative ui-element library
I decided to go in the next way:
- inspect Paint and all related objects, also inspect in more detail API and then decide either
- re-create components from scratch
- find the option to modify the existing components to make them work as I need
Painting
Thus I have quite a long background in iOS, especially with CGContext, painting in flutter is pretty similar and it’s easy to compare and see that the same things exist here but with different name.
The most interesting thing from all the APIs available for use is the possibility of creating a custom object for TrackShape with a rich paint function:
/// Paints the track based on the values passed to it.
void paint(PaintingContext context, Offset offset, Offset? thumbCenter,
  Offset? startThumbCenter, Offset? endThumbCenter,
  {required RenderBox parentBox,
  required SfSliderThemeData themeData,
  SfRangeValues? currentValues,
  dynamic currentValue,
  required Animation<double> enableAnimation,
  required Paint? inactivePaint,
  required Paint? activePaint,
  required TextDirection textDirection})
the most interesting for us - is access to PaintingContext context - a canvas for drawing. So in theory we can draw there anything we want.
So, quick inspection means, that in theory, we don’t need to rewrite UI components (a huge time-saver), the only thing left - is to prepare a custom drawing that represents a repeating drawing pattern.
In my case, I need to draw kind of arrows - pretty simple shapes:
So, we need to draw a few lines one by one in a kind of arrow shape.
If I need to draw some shape, I always prepare a draft - that simplifies everything dramatically:
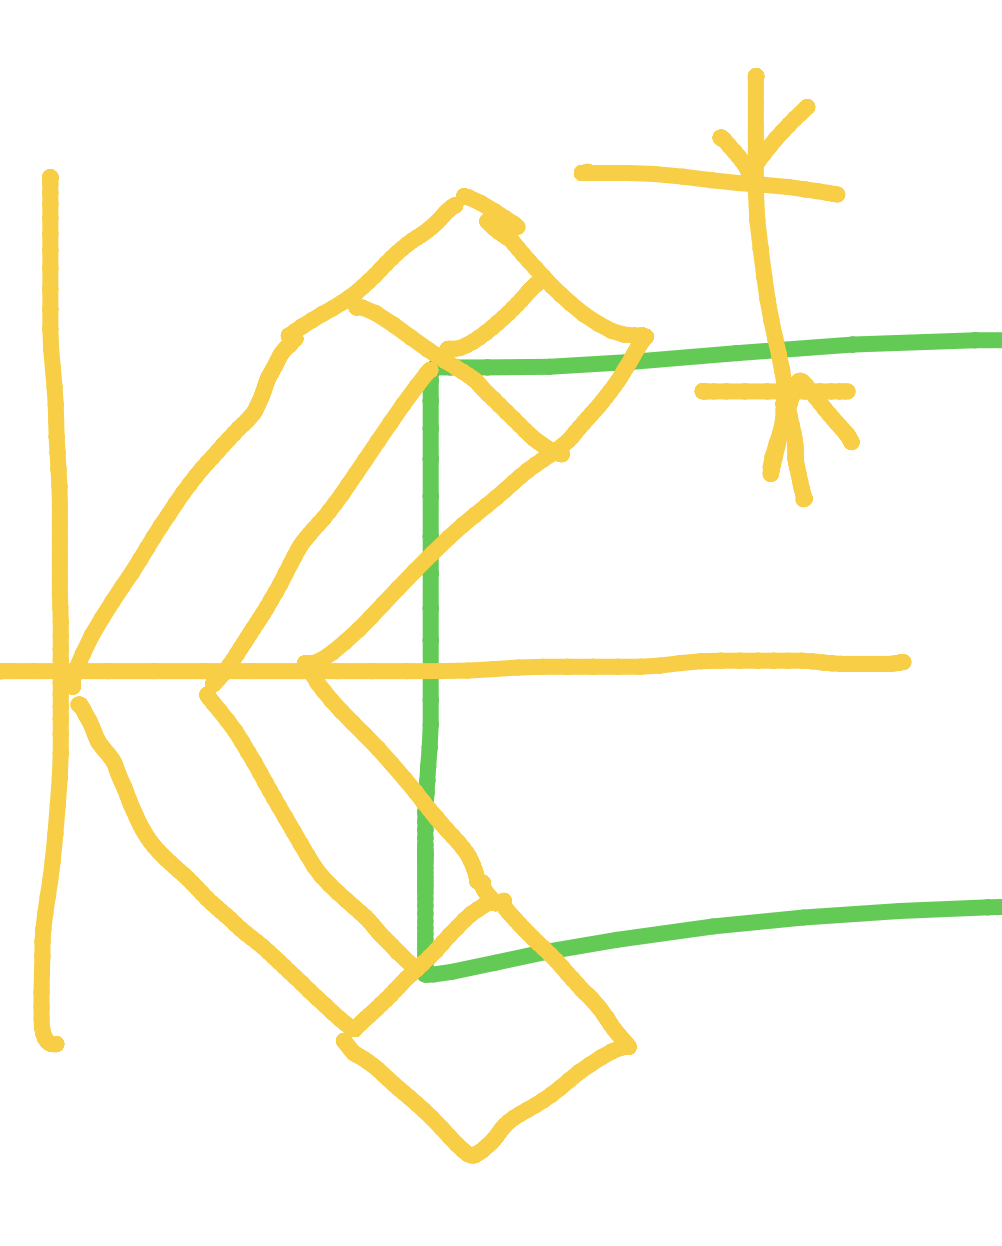
Now we can see, that it’s not a problem to calculate the line points needed to be drawn to get the dedicated pattern. Lines according to design must have some width.
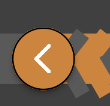
According to Scatch, we can see, that if we have a line, with some width - that part of the line will be out of the track border. We can apply some clip behavior (kind of mask), but as u can see, everything in the component is drawn on canvas, including thumbs, that intersects with the track.. so applying clip behavior will affect thumbs.
Quick test showing this behavior, as expected:
As a quick hack, we can reduce the thickness of the line to 1px, and repeat the same color of the line as many times until we receive the required width. In other words, we repeat the same process N times, but the outer part will be much smaller.
Repeating the same math for drawing with smaller thickness gave us a dedicated result:
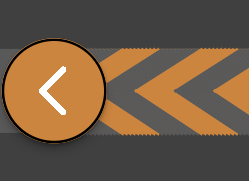
This option still has the same problem, but I’m much, much smaller way:
The demo of the result:
The full code is here
...
  //calculating rect and other stuff here

  context.canvas.drawRect(activeTrackRRect, activePaint);

  // Drawing hatch
  const double drawLineWidth = 1;
  final height = activeTrackRRect.height - drawLineWidth;

  // a/sin(A) = c/sin(C)
  const angle = 50;
  const angle2 = 180 - (90 + angle);
  final distance =
      (height / sin(degreeToRadian(angle))) * sin(degreeToRadian(angle2));

  var colorOne = Paint()
    ..color = hatchFirstColor ?? Colors.grey
    ..strokeJoin = StrokeJoin.round
    ..strokeWidth = drawLineWidth;

  var colorTwo = Paint()
    ..color = hatchSecondColor ?? Colors.black
    ..strokeJoin = StrokeJoin.round
    ..strokeWidth = drawLineWidth;

  const double yPoint = 0;
  double yOffset = activeTrackRRect.topLeft.dy;
  double xOffset = activeTrackRRect.topLeft.dx;

  const double hatchThinkness = 10;

  for (double i = drawLineWidth * 1.5 + drawLineWidth * hatchThinkness + xOffset, j = 0;
      i <= activeTrackRRect.width + xOffset + drawLineWidth * hatchThinkness;
      i += drawLineWidth * 1.5, j++) {
    var p1 = Offset(i, yPoint + yOffset);
    var p2 = Offset(i - distance + drawLineWidth / 3,
        startThumbCenter.dy + drawLineWidth / 3);
    var p3 = Offset(i - distance + drawLineWidth / 3,
        startThumbCenter.dy - drawLineWidth / 3);
    var p4 = Offset(i, (p2.dy - p1.dy) * 2 + yOffset);

    final colorSelector = (j ~/ hatchThinkness).isOdd;
    final colorPainter = colorSelector ? colorOne : colorTwo;
    context.canvas.drawLine(p1, p2, colorPainter);
    context.canvas.drawLine(p3, p4, colorPainter);
  }
Conclusion
Do not hurry up in making a decision - invest some time into a detailed review of the problem, in the worst case just learn something new.
Resources
Share on: