Introduction into SwiftUI animations
iOS SwiftUI animation GeometryEffect Estimated reading time: 10 minutesiOS provides for us a lot (really, a lot) different variants of animation mechanisms. CoreAnimation, UIKit animations, SpriteKit, SceneKit, OpenGL ES etc. When Apple introduces for us SwiftUI, animation can’t be just skipped. Instead, the new mechanism for animation was introduced for us.
Animation brings life and a better experience (UX) into your application. It can be small, it can be short, even hardly noticeable, but it always improves UX. Even if most users didn’t see it in most cases, u can notice that when u remove animation - everyone feels that something is wrong, something is missing.
Animations
Some aspects of our apps can be animated implicitly, other explicitly.
I always prefer the second approach - in this way u always sure, that result will be the same, the one that u expect to have.
Different versions of iOS can behave in a different way (especially with
SwiftUIon iOS 13 and iOS 14). This may bring inconsistency to our app. This is one more reason, why u always should control your animations.
As I mention, animations can be divided into 2 groups - explicit and implicit.
If we switch back to UIKit, we remember the same behavior - some properties can be animated automatically for us:
/* The position in the super layer that the anchor point of the layer's
 * bounds rect is aligned to. Defaults to the zero point. Animatable. */

open var position: CGPoint
To animation this property from CALayer, for example, the system requires no code from us - every time we change it, the system will animate this change for us implicitly.
Same true and for SwiftUI.
From the very first minute of testing it, u can notice, that some transformations and changes can be animated for u automatically. This is a great approach that sometimes simplifies things for us.
As u can remember from UIKit, UIView has a lot of properties that can be animated for u. animatable - such comment can be found in a header file for some of the props in UIView. Same true and for various layers:
/* The bounds of the layer. Defaults to CGRectZero. Animatable. */

/** Geometry and layer hierarchy properties. **/
open var bounds: CGRect
Such comments open for us different possibilities of animations. We know what we can animate and what, well, we can with additional effort.
check about
UIVewanimation here
Animatable
SwiftUI introduces for us even more possibilities - we can use the Animatable protocol.
public protocol Animatable {

    /// The type defining the data to animate.
    associatedtype AnimatableData : VectorArithmetic

    /// The data to animate.
    var animatableData: Self.AnimatableData { get set }
}
Requirements are pretty simple - provide the value that u would like to animate via special variable animatableData that should adopt VectorArithmetic. In other words - something that can be changed depending on animation progress.
To make thing even more comfortable for usage Apple added an extension for this protocol:
extension Animatable where Self : VectorArithmetic {

    /// The data to animate.
    public var animatableData: Self
}
U may wonder, how to animate few properties of one type in the same moments? The answer is - use AnimatablePair or a combination of it:
@frozen public struct AnimatablePair<First, Second> : VectorArithmetic where First : VectorArithmetic, Second : VectorArithmetic {

    /// The first value.
    public var first: First

    /// The second value.
    public var second: Second

    ...
AnimatablePairscan contain nestedAnimatablePairs- so the number of elements that can be animated are limited only to your imagination
For now, half of the process should be clear - the selection of WHAT to animate. Another half of the question - HOW to determine the progress of animation and HOW it can be calculated.
For this purpose, SwiftUI uses the same idea as was used in UIKit - duration of animation and animation curve in a combination of initialValue with a target value.
Let’s review each component of this.
The very first one is duration. It’s pretty simple - we just specify how long animation should be:
Animation.easeOut(duration: 5.0)As u can see, here we use .easeOut - one of the predefined animation curves. The other few predefined are - linear, easeIn, easeOut, easeInOut.
The animation curve describes the relative frame rate for the animation; predefined curves are linear, ease in (slow down near end), ease out (slowly speed up at the start), and ease in-ease out (S-curve). from Apple doc
U can play a bit with animation curves and check how they work using a great source for this available here

To summarize, duration and curve are used to determine how to change progress over time. These values as a result return for us progress.
InitialValue with target value is used to determine how to get value that used to build and show the object in a concrete moment during the animation. Imagine for example Rect that changes size - from 2x2 to 5x5 over 3 sec with a linear curve. This means that every second the size will be changed by 1. so in a second after animation started the size will be (2+1)x(2+1) where 1 calculated as (5-2) / 3 * 1 and 5 - is targetValue, 2- initial value, 3 duration and 1 is current progress. So the fraction of change can be calculated as follows:
(targetValue - initialValue) / duration * progressAnd the whole value should also include initialValue intho this approach:
initialValue + (targetValue - initialValue) / duration * progressNow, it’s more visible, why the animatableData property from the Animatable protocol required to adopt VectorArithmetic.
I should also mention that explicit animation in SwiftUI can be created using withAnimation function.
Button(action: {
                withAnimation { // <- here
                    showCircle.toggle()
                }
            }, label: {
                Text("Animate Circle")
            })
Normally, in this function, we perform some change(s), and everything that depends on value(s) change will be animated. If we go a bit in detail, SwiftUI checks all available animatableData and animate it using the described above approach.
Adepts of Animatable
Few types used in SwiftUI already adopt Animatable. That’s how we can use animate viewModifier without even writing a line of code.
Available ready to use options are:
AnimatableModifierEdgeInsetsGeometryEffectShapeStrokeStyleUnitPointAngleCGSize,CGPoint- other
All these types already conform to Animatable and ready to use and to make alive u’r animations.
That’s how when u animate change of available Shapes or Edges of Rect we got animation.
I wrote small sample about
GeometryEffecthere
Example
Let’s now taste the code.
I won’t create something complex and difficult here. Instead, I will try to provide very simple examples of usage of every mechanism that was described above.
You can refer to SwiftUI-lab samples, ObjC.io samples or Hacking with Swift. These resources are great. Some samples idea I grab from these articles, but I tried to make them even more simple. I also cover here my own experience within animations in
SwiftUIwith the hope, that someone can found it useful in some way.
To experiment with animations we will use a very simple view with some buttons and objects that can be animated.
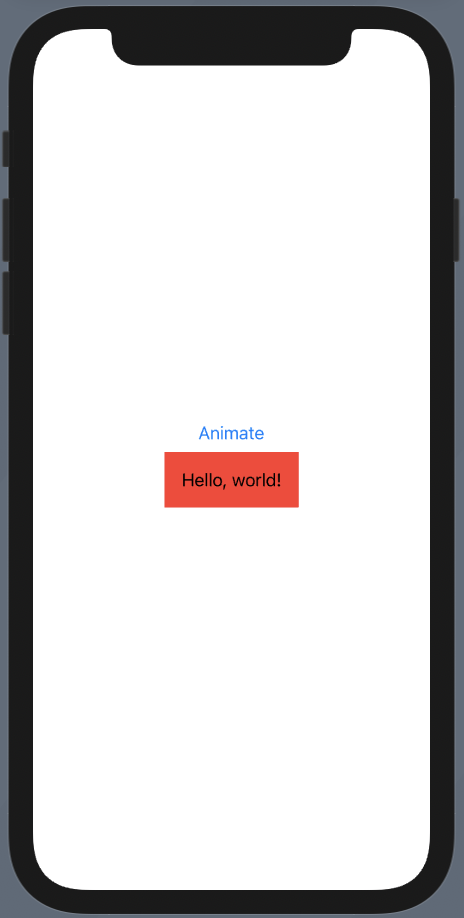
The most simple sample - is to create our own AnimatableModifier. We may create it using the already created for us by Apple modifier. This will allow us to focus on the process itself instead of some logic required for modification. To do so, we will use scaleEffect:
struct Scale: AnimatableModifier {
    var scaleAmount: CGFloat

    var animatableData: CGFloat{
        get { scaleAmount }
        set { scaleAmount = newValue }
    }

    func body(content: Content) -> some View {
        content.scaleEffect(scaleAmount)
    }
}

extension View {
    func scaleTo(_ value: CGFloat) -> some View {
        modifier(Scale(scaleAmount: value))
    }
}
We adopt AnimatableModifier protocol and provide animatableData. In the body, we provide logic - what we do within content to achieve the required effect (as I mention above, for simplicity we just use the existing modifier). All other things SwiftUI will handle for us.
Result:
To change a few properties we should use AnimatablePair. To demonstrate this, let’s create a modified version of the same effect.
struct ScaleEffect: GeometryEffect {
    var scaleAmountX: CGFloat
    var scaleAmountY: CGFloat

    var animatableData: AnimatablePair<CGFloat, CGFloat> {
        get {
            AnimatablePair(scaleAmountX, scaleAmountY)
        }
        set {
            scaleAmountX = newValue.first;
            scaleAmountY = newValue.second
        }
    }

    func effectValue(size: CGSize) -> ProjectionTransform {
        ProjectionTransform(
            CGAffineTransform(scaleX: scaleAmountX, y: scaleAmountY)
        )
    }
}

extension View {

    func scaleWithGeometryEffectBy(
        _ valueX: CGFloat,
        valueY: CGFloat
    ) -> some View {
        modifier(
            ScaleEffect(
                scaleAmountX: valueX,
                scaleAmountY: valueY
            )
        )
    }
}
We used GeometryEffect as a modifier in which AnimatablePair of X and Y values are used to describe animatable change of X and Y scale.
Result:
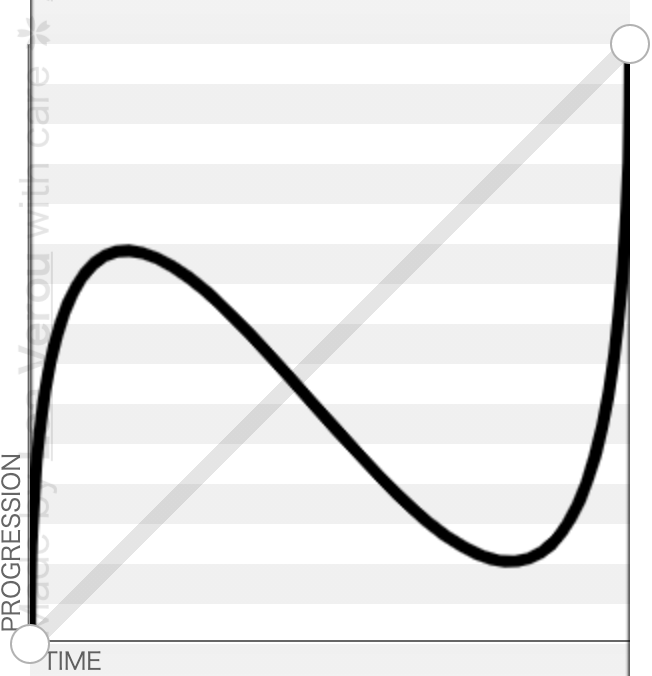
To modify How animation is executed we may use an animation curve. To create a custom one we should describe a duration curve.
For example, if u want to make something like “jump” animation (when progress will return a bit after processing, something similar to spring) we may create next:
extension Animation {

    static var reverseJump: Animation {
        Animation.timingCurve(0, 2, 1, -2)
    }

    static func reverseJump(duration: TimeInterval = 0.35) -> Animation {
        Animation.timingCurve(0, 2, 1, -2, duration: duration)
    }
}
Result:
Now we can switch to transition. The most simple one we create again by using an existing modifier, just to get the idea of how it works. Let’s use opacity this time.
struct Opacity: ViewModifier {
    var isActive: Bool
    func body(content: Content) -> some View {
        content
            .opacity(isActive ? 1 : 0.5)
    }
}

extension AnyTransition {
    static var opacity50: AnyTransition {
        .modifier(
            active: Opacity(isActive: false),
            identity: Opacity(isActive: true)
        )
    }
}
Remember, to make the transition work, a view should be added/removed from hierarchy, in other cases, u can’t see any transitions
The test UI will display the Button and Circle shape.
...
if showCircle { // <- state variable changed on button tap
    Circle()
        .fill(Color.blue)
        .transition(.rectShaped)
...
Result:
We can use various techniques to create the transition we want.
With a shape fill effect:
extension AnyTransition {

    private struct Rect: Shape {

        var fillAmount: CGFloat
        var animatableData: CGFloat {
            get { fillAmount }
            set { fillAmount = newValue}
        }

        func path(in rect: CGRect) -> Path {
            Path { path in
                let width = rect.width * fillAmount
                let height = rect.height * fillAmount
                let originX = (rect.width - width) / 2.0
                let originY = (rect.height - height) / 2.0

                path.addRect(
                    CGRect(
                        x: originX,
                        y: originY,
                        width: width,
                        height: height
                    )
                )
            }
        }
    }

    private struct ClipRect: ViewModifier {
        let rect: Rect

        func body(content: Content) -> some View {
            content.clipShape(rect)
        }
    }

    static var rectShaped: AnyTransition {
        .modifier(
            active: ClipRect(rect: Rect(fillAmount: 0)),
            identity: ClipRect(rect: Rect(fillAmount: 1))
        )
    }
}
Result:
Or using GeometryEffects:
extension AnyTransition {

    private struct HorizontalOffsetEffect: GeometryEffect {

        var maxOffset: CGFloat
        var animatableData: CGFloat {
            get { maxOffset }
            set { maxOffset = newValue }
        }

        func effectValue(size: CGSize) -> ProjectionTransform {
            ProjectionTransform(
                CGAffineTransform(translationX: maxOffset, y: 0)
            )
        }
    }

    static var horizontalOffset: AnyTransition {
        .modifier(
	         // hardoce just for demo
            active: HorizontalOffsetEffect(maxOffset: -350),
            identity: HorizontalOffsetEffect(maxOffset: 150)
        )
    }
}
Result:

Or even combining any of transitions:
Conclusion
SwiftUI is not an exception element in regards to animation from Apple toolset. Instead, it brings us even more possibilities to create from simple to insane animations and to enhance app UX.
In this article, I tried to cover the basic techniques required for work with animations in SwiftUI.
I strongly recommend everyone who interested in animation to try all techniques by own and taste how it works.
Reading list:
Share on: