BeagleBone® Blue - initial config via serial port
linux Debian BeagleBone® Blue Estimated reading time: 3 minutesConfiguring Beaglebone Blue board requires a few additional steps before we can use the ssh connection. In this article, I want to cover how to prepare a board to comfort development by configuring ssh and wifi.
Related articles:
- BeagleBone® Blue - initial config via serial port
- Beaglebone® Blue - environment setup
- BeagleBone® Blue - remote debug
- BeagleBone® Blue - debug remote app with root
- BeagleBone® Blue - duplicate & distribute
First connection
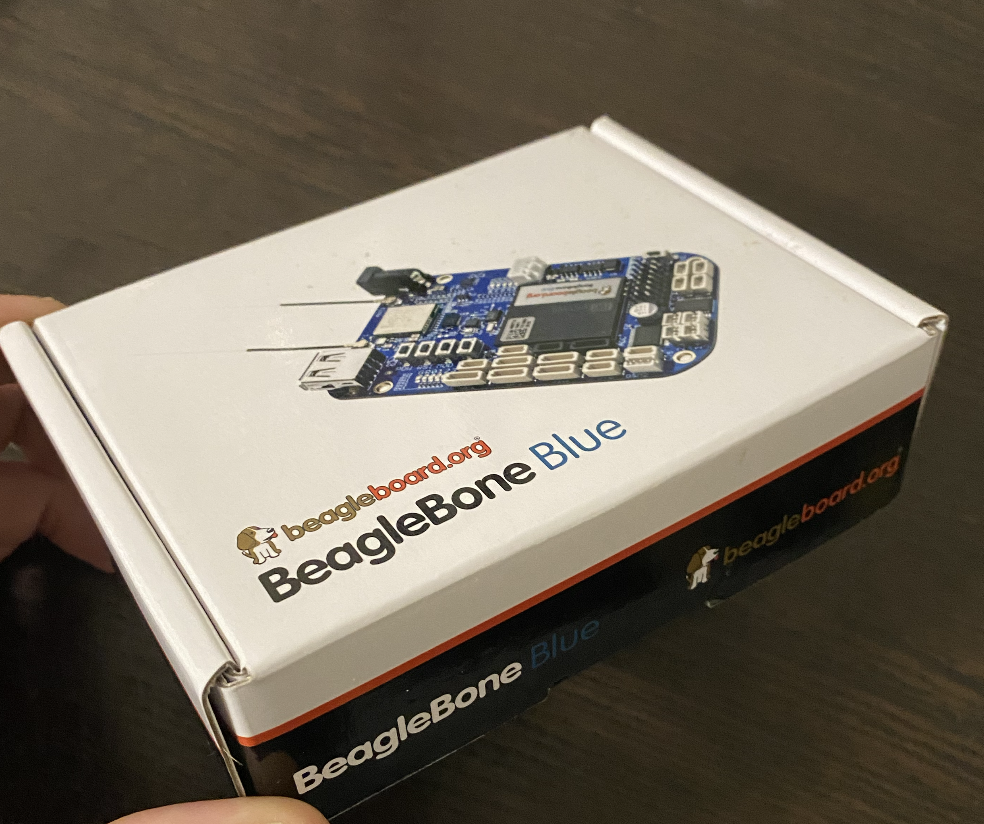
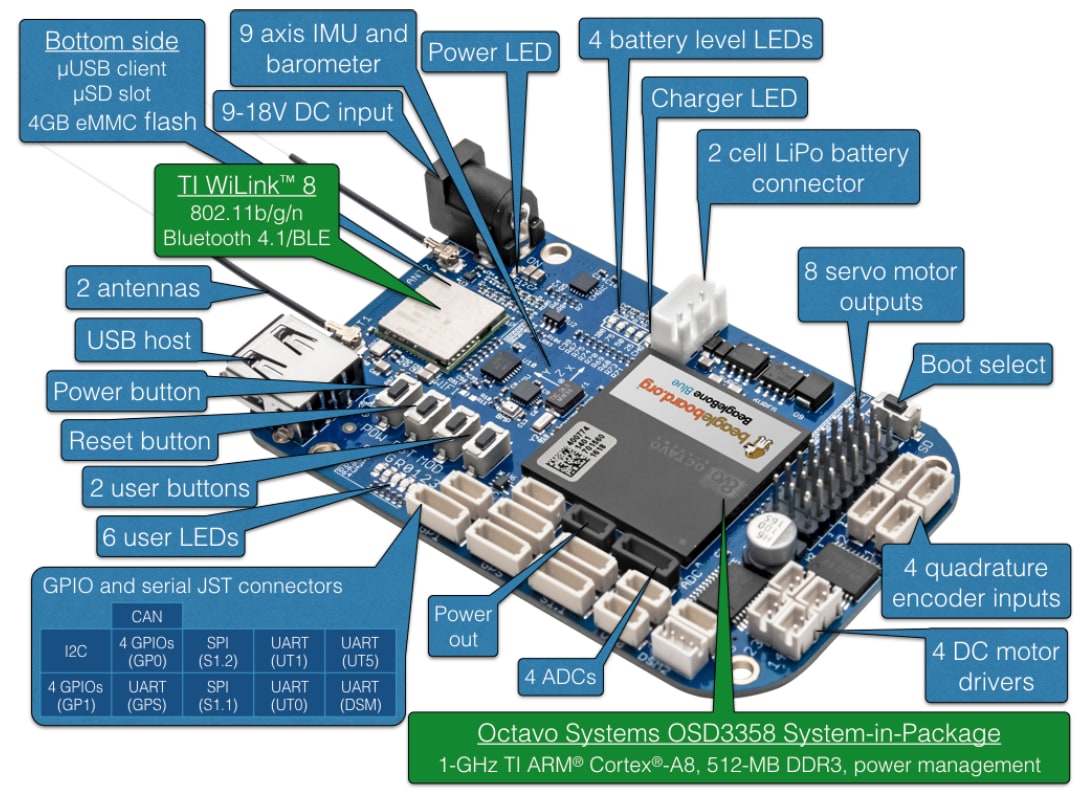
The board is nice:
The very first action that we can do - is to connect to the board via a USB port, because wifi is not yet configured.
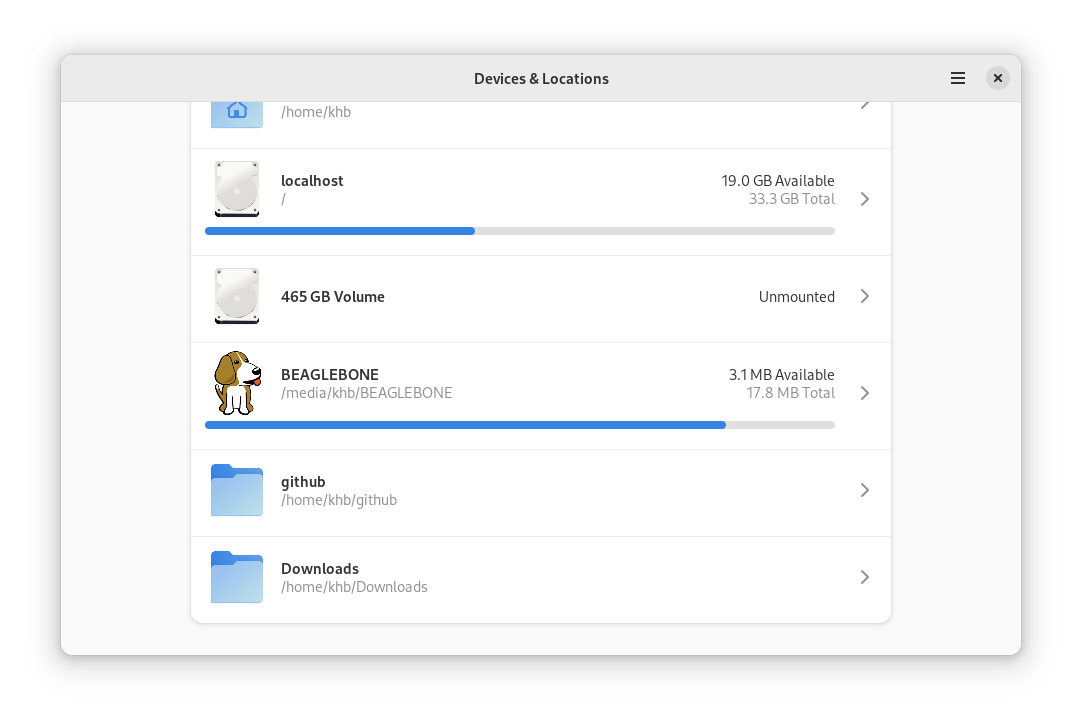
After connection, the system determines the board as /media/khb/BEAGLEBONE:
Now we can connect to the system using serial port tty*.
To determine the name of the tty port that belongs to the connected board we can use one of the available ways:
find /sys/bus/usb/devices/usb*/ -name dev | grep tty
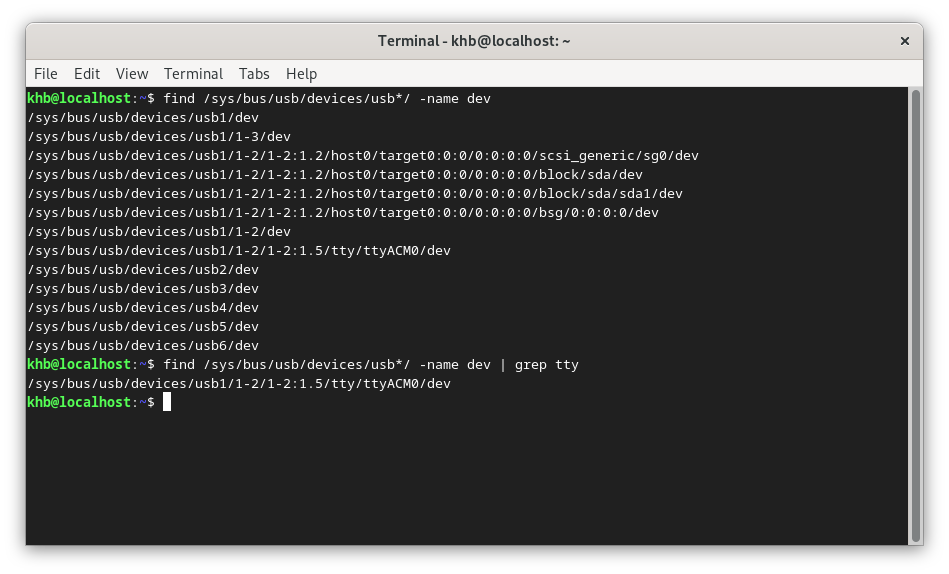
In my case, the output is /sys/bus/usb/devices/usb1/1-2/1-2:1.5/tty/ttyACM0/dev, where the name of the port is ttyACM0.
To connect to the serial port, we can use putty:
sudo apt install putty-tools
putty
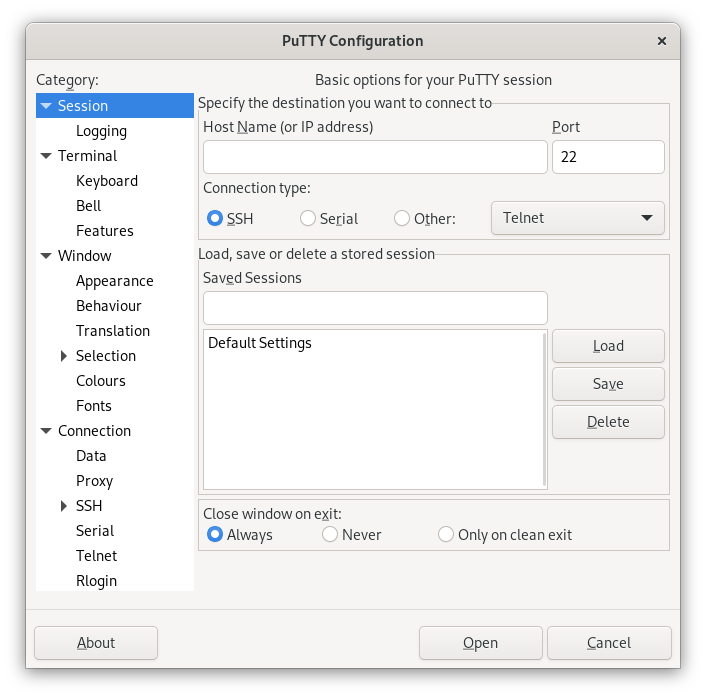
Now we can connect using our serial port via putty GUI or terminal:
sudo putty /dev/ttyACM0 -serial -sercfg 9600,8,0,1,N
u also may need to add permission
sudo chmod a+rw /dev/ttyACMObefore connect
Now the system will ask u for a login with a default hint, as shown below:
Debian GNU/Linux 10 beaglebone ttyGSO
BeagleBoard.org Debian Buster IoT Image 2020-04-06
Support/FAQ: http://elinux.org/Beagleboard:BeagleBoneBlack_Debian
default username:password is [debian: temppwd]
beaglebone login:
On success, u will see some welcome message and a command line waiting for u’r input:
Debian GNU/Linux 10 beaglebone ttyGSO
BeagleBoard.org Debian Buster IoT Image 2020-04-06
debian@beaglebone:
If u have some issues - visit official site for more details. Also check other ways to connect, as described in this post.
Configuring wifi and ssh
Now we can configure wifi and ssh.
wifi
To configure wireless access, a few additional steps need to be done.
To manage wifi, first run the command ifconfig - the list of available resources will be printed:
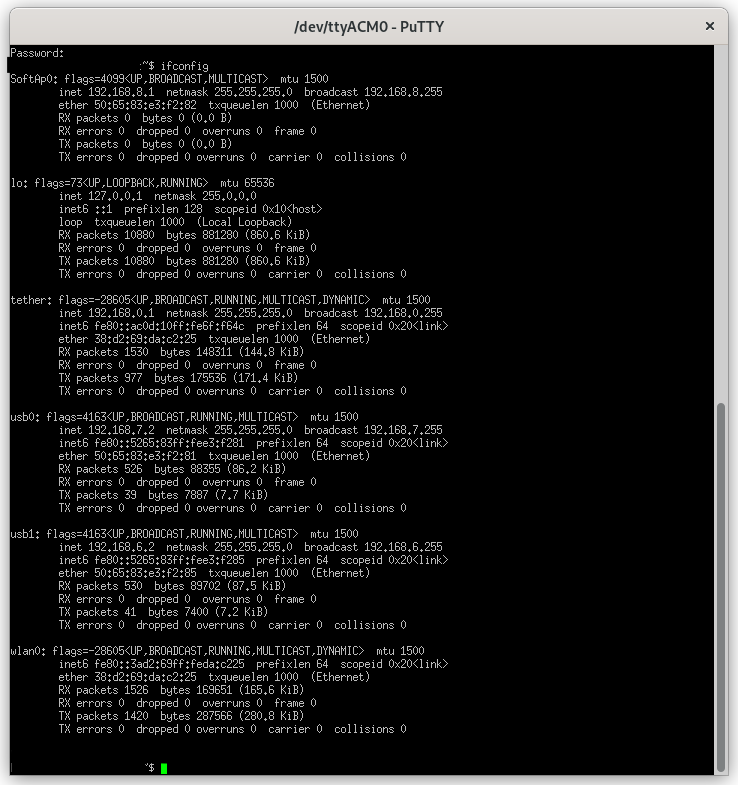
Note: I did a screenshot after configuration, so your output will be a bit different.
In the list u can see different addresses:
lo- local loopback connectionusbX- a connection that is available over the USB cablewlan0- connection for WLAN devicetether- already configured tethering in my case (as I mentioned, screenshot done after config)softAp0- virtual router
A fresh device will have only softAp0, lo, usb0, and wlan0.
Wifi configuration is placed here - /var/lib/connman/settings, and powered by ConnMan.
If we open this file, we can see the configuration for WiFi that is currently used and broadcasted by the board - we can connect to it, using the config specified in the fields under the [WiFi] section:
[WiFi]
Enable=true
Tethering=false
Tethering.Identifier=BeagleBone-136F
Tethering.Passphrase=BeagleBone
In this file u also can configure wifi name and passwd:
[WiFi]
Enable=true
Tethering=true
Tethering.Identifier=NewBoard
Tethering.Passphrase=ababaglamaga
To use wifi not as a broadcast device we must complete a few steps:
- run
connman, by calling
connmanctl> sudo connmanctl
Error getting VPN connections: The name net.connman.vpn was not provided by any
ignore that message
- enable wifi with
connmanctl> enable wifi
Error wifi: Already enabled
- scan wifi possible with
connmanctl> scan wifi
Scan completed for wifi
- list available wifi
connmanctl> services
Vseodno wifi_a1c2eaf2f4495_45646f7c4fe6572_managed_psk
...
If the list is empty
tether wifi offand repeatscan
- register locations with
connmanctl> agent on
- connect to wifi
connmanctl> connect wifi_a1c2eaf2f4495_45646f7c4fe6572_managed_psk
Passphrase?
Connected to wifi_a1c2eaf2f4495_45646f7c4fe6572_managed_psk
- close utility with
connmanctl> quit
Type again ifconfig, and now wlan0 should show your IP address under inet addr.
At this moment u have access via terminal and u’r board is connected to the internet - so u can download update and install required tools with apt for example.
More about connmanctl
ssh
Ssh configuration now is easy - u already have access to the filesystem, so just proceed with this in the usual way.
The connection can be done either via gui of putty and ssh type selection with connection address of IP listed in wlan0 from the ifconfig in the inet addr part or via terminal:
ssh debian@1<ip> -p 22
The default port for the
-pflag for SSH is 22
In theory u can also install the ui system for BBB (
sudo apt-get install xfce4) and vnc server (sudo apt-get install tightvncserver) for remote access to it later.
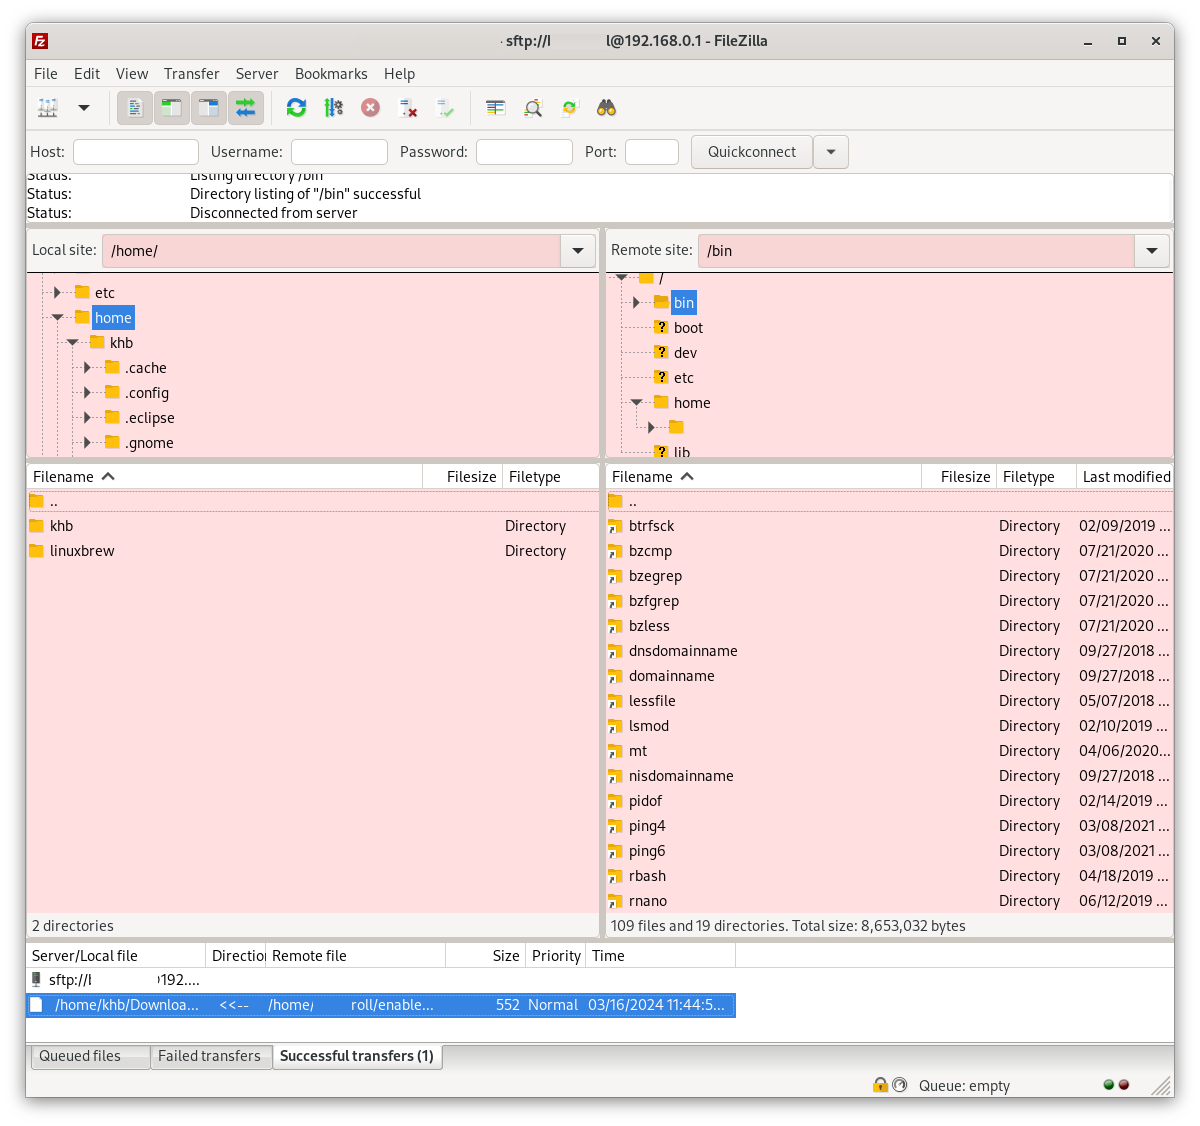
I personally use ssh and filezilla as FTP client:
Resources
Share on: