BeagleBone® Blue - remote debug
linux ssh ED25519 Eclipse remote-debug BeagleBone® Blue cross-compile Estimated reading time: 6 minutesIn the last few articles, I covered the intro theme related to Beaglebone® Blue. So for now, we already have configured connection to the board and Eclipse installed and configured for cross-compile process. But what we want - is an option to debug in real-time, reviewing and examining variables and executing commands.
To achieve this, we still need to cover a few more points:
- configure gdbserver on board
- configure remote connection for debugging in Eclipse
Related articles:
- BeagleBone® Blue - initial config via serial port
- Beaglebone® Blue - environment setup
- BeagleBone® Blue - remote debug
- BeagleBone® Blue - debug remote app with root
- BeagleBone® Blue - duplicate & distribute
gdbserver
gdbserver is specially designed for remote debugging. This set of tools is needed so we can perform our remote debug.
To install gdbserver pckg on the board we have (as always) a few options:
- connect the board to the internet (as described in prev posts) and execute the command. In our case, armhf version will be installed with all dependencies.
- without an internet connection, things become a bit more interesting - u need to manually download this pckg with all dependencies.
Installing using an internet connection
In this case, we simply run 1 command:
sudo apt-get update // optionally
sudo apt-get install gdbserver
-yoption can be used to bypass all questions with confirmation
to check:
gdbserver --version
done. :]
installing offline
In this case, we should download all packages manually - all dependencies should be downloaded with the correct versions. This looks like a bit tricky process, but with debian package description this can be done quite quickly.
We also can use some nice script, that does all the hard work for us.
Note: pkgdownload will download pckgs for u’r current architecture
Unfortunately - this script does not support downloading for the different arch, we can either use it for finding references or apply a few changes and use it.
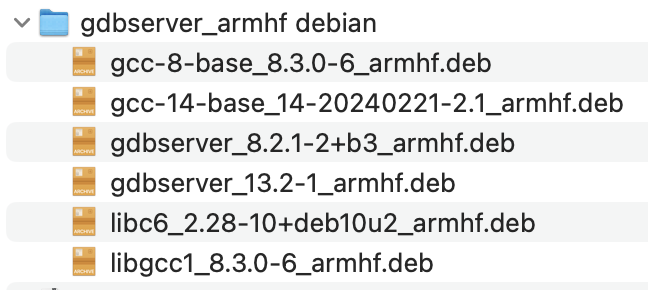
here predownloaded set of *.deb needed for gdbserver_armhf debian config.
Now, just install all packages on the board
sudo dpkg -i *.deb
-imeans install
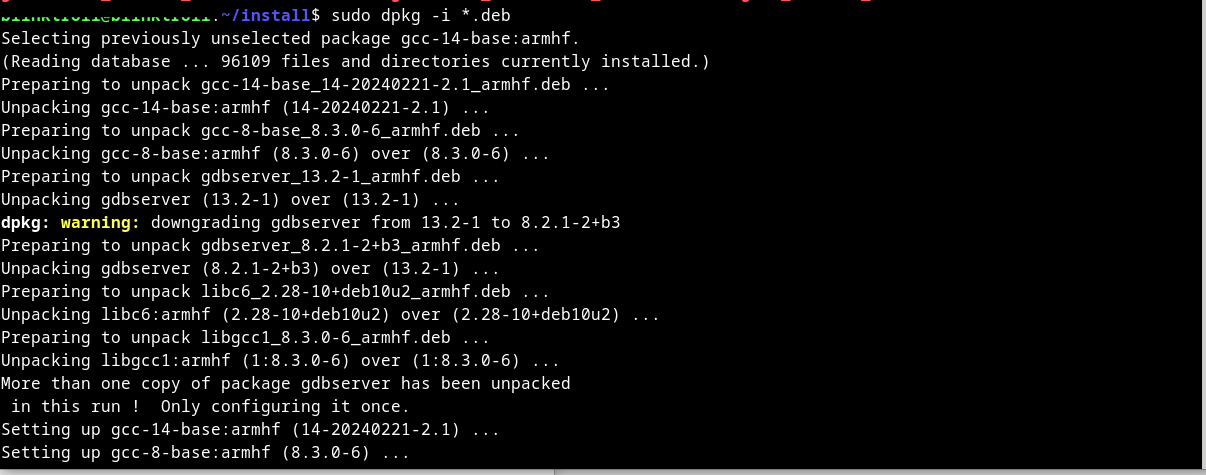
if everything is done correctly, u can now check the gdbserver
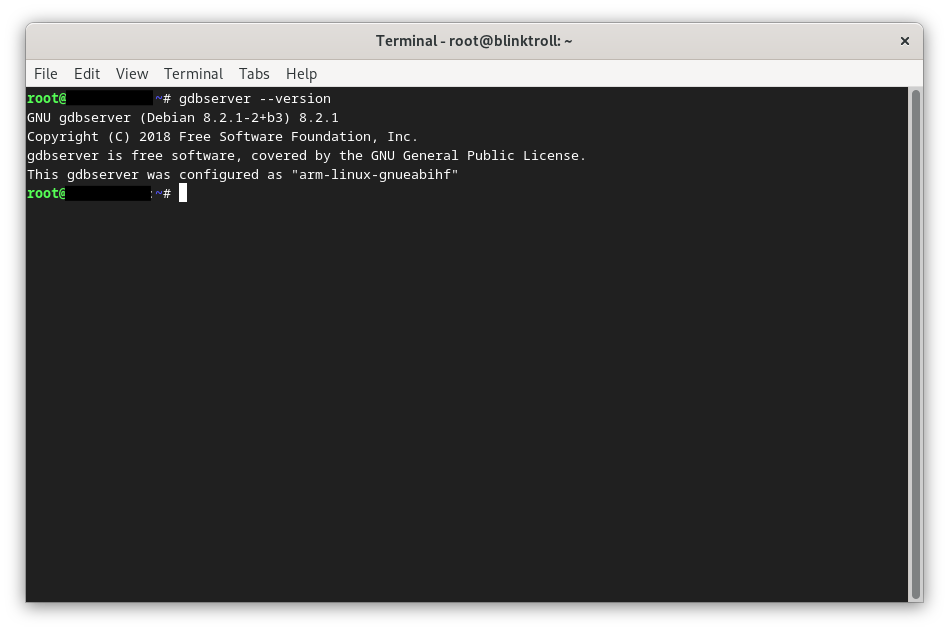
done.
Configuring Eclipse
To properly configure remote debugging we need to do a few things:
- create a project (as we did in this post)
- configure remote target for debugging
Create a project
In the last post I covered how to create and configure project helloWorldonBBB).
Now we have our toolchain configured and ready:
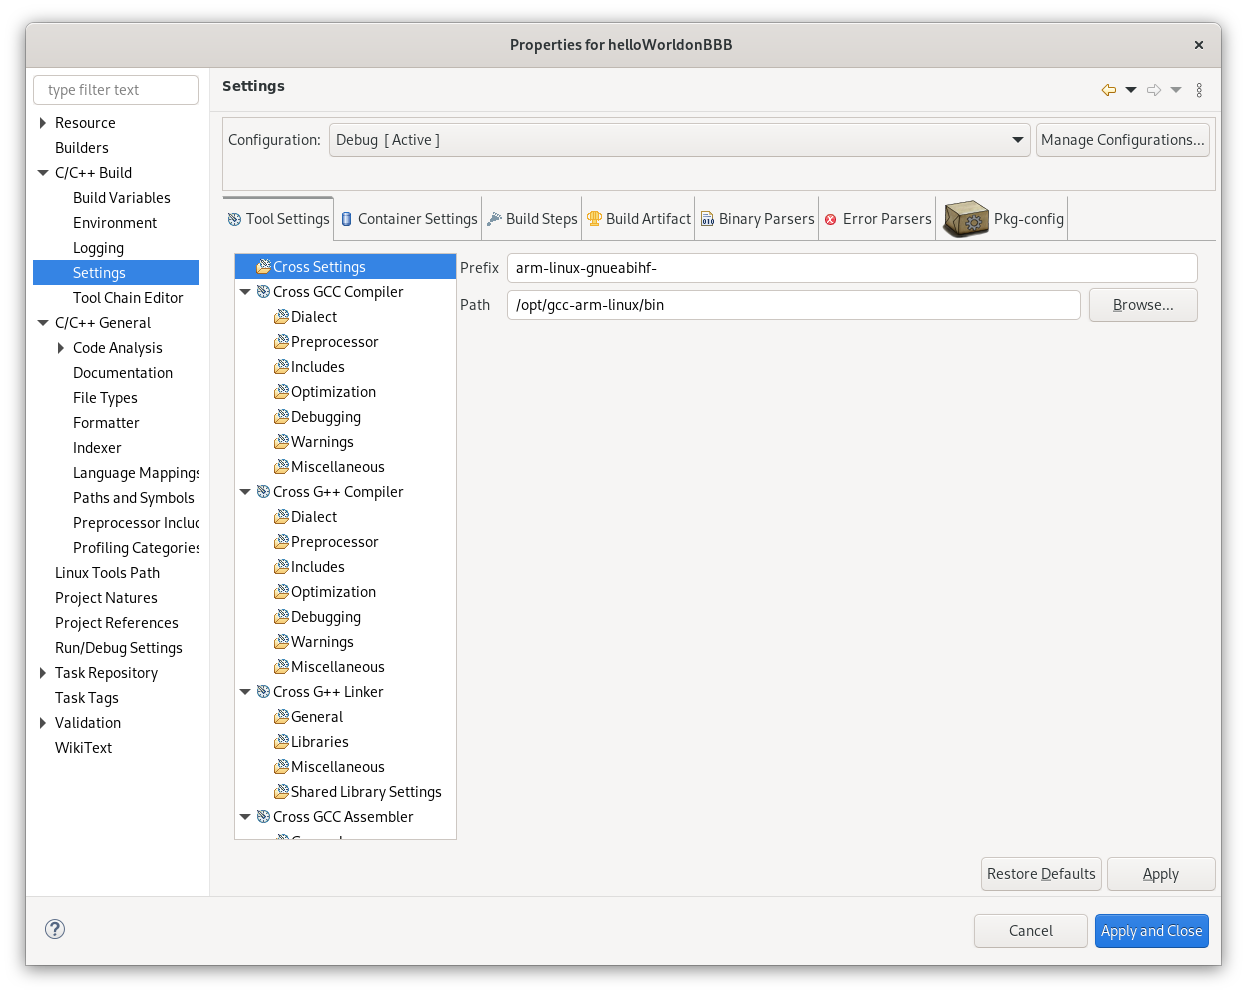
It’s time for Eclipse Remote Connection Setup.
We already have connected ssh to our board and remote explorer configuration.
assumed that u also created a dedicated user on board for debugging purposes.
sudo useradd -r -d /home/debugger -m -s /bin/bash -c "Debugger" -G dialout,i2c,spi,cdrom,floppy,audio,video,plugdev,users,sudo,gpio,pwm,kmem debugger # Some of these groups may not be necessary.
sudo passwd debugger
u may also want to modify
/etc/sudoers.d/debuggerto allow somesudocommands
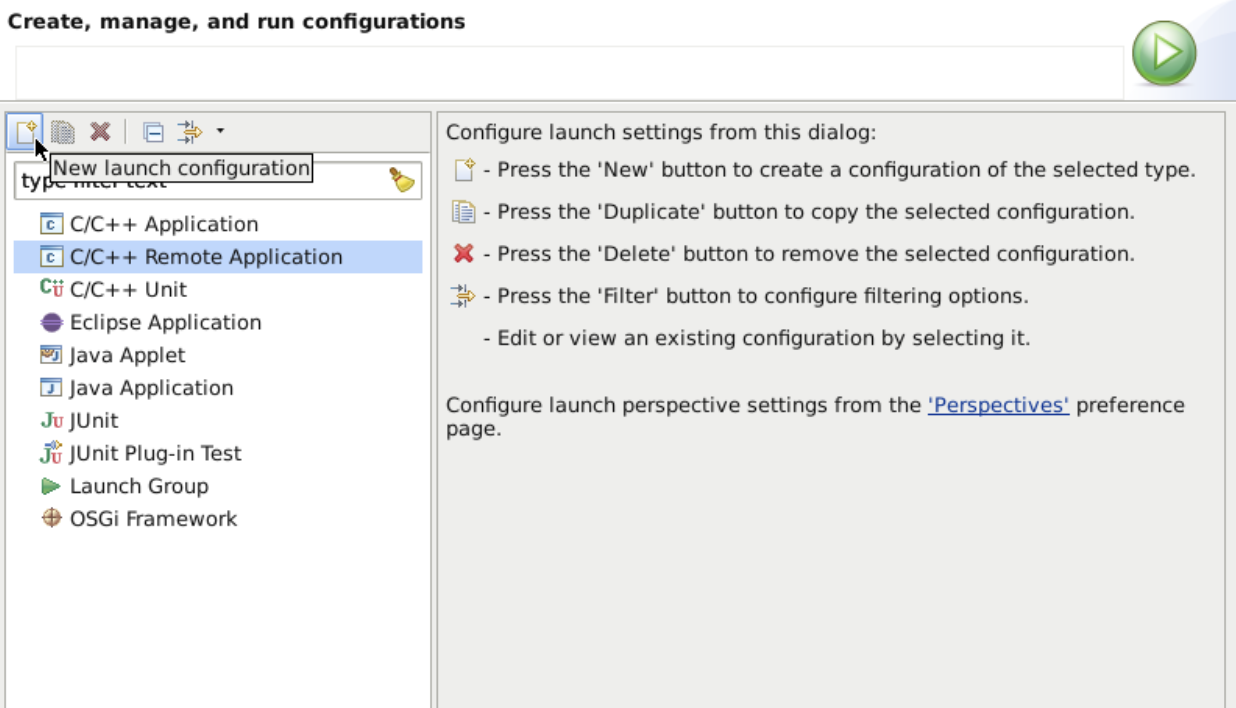
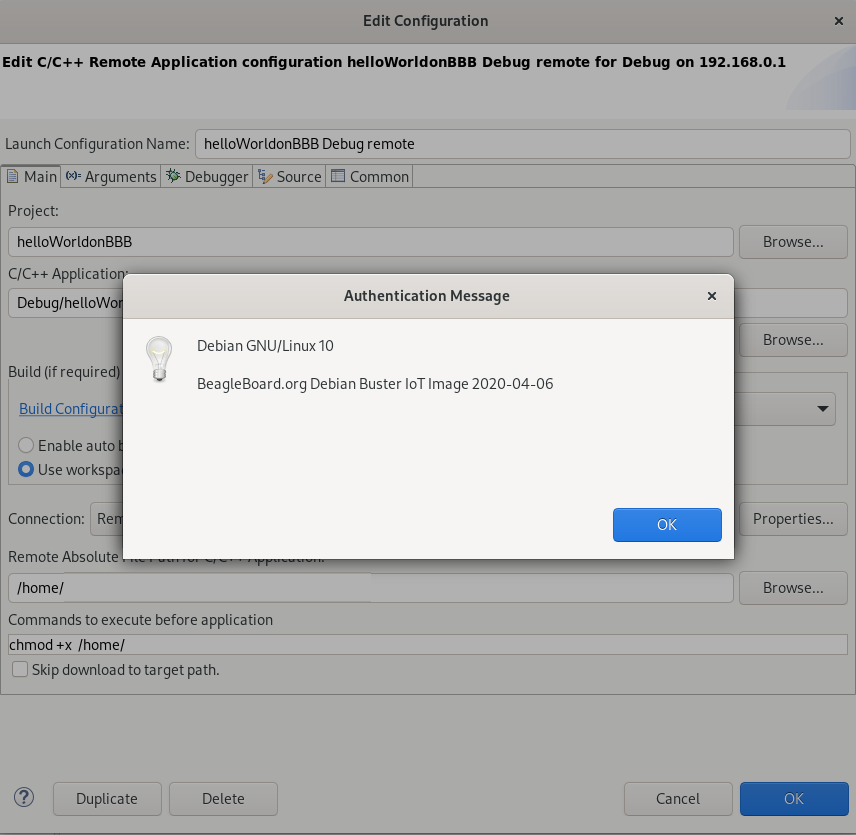
Now it’s time to create a new debug target. To do so, on the Eclipse Run menu, select Run Configurations -> C/C++ Remote Application, and choose New launch configuration at the top left corner.
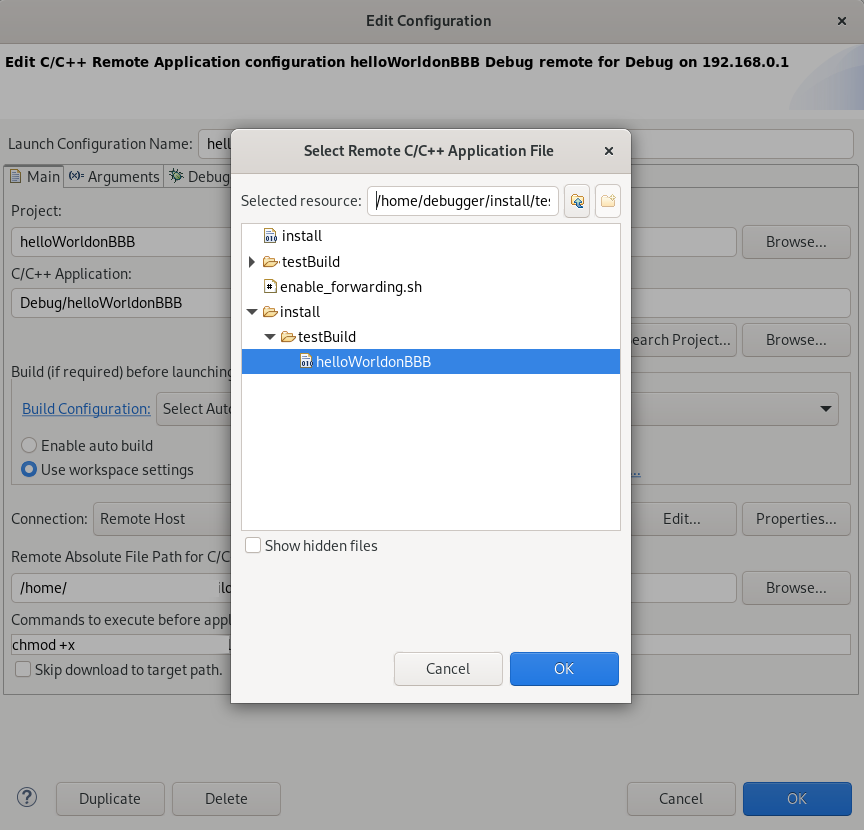
Now, we should configure our target, by specifying a project, application, and absolute path to the target on the board (where our binary will be placed):
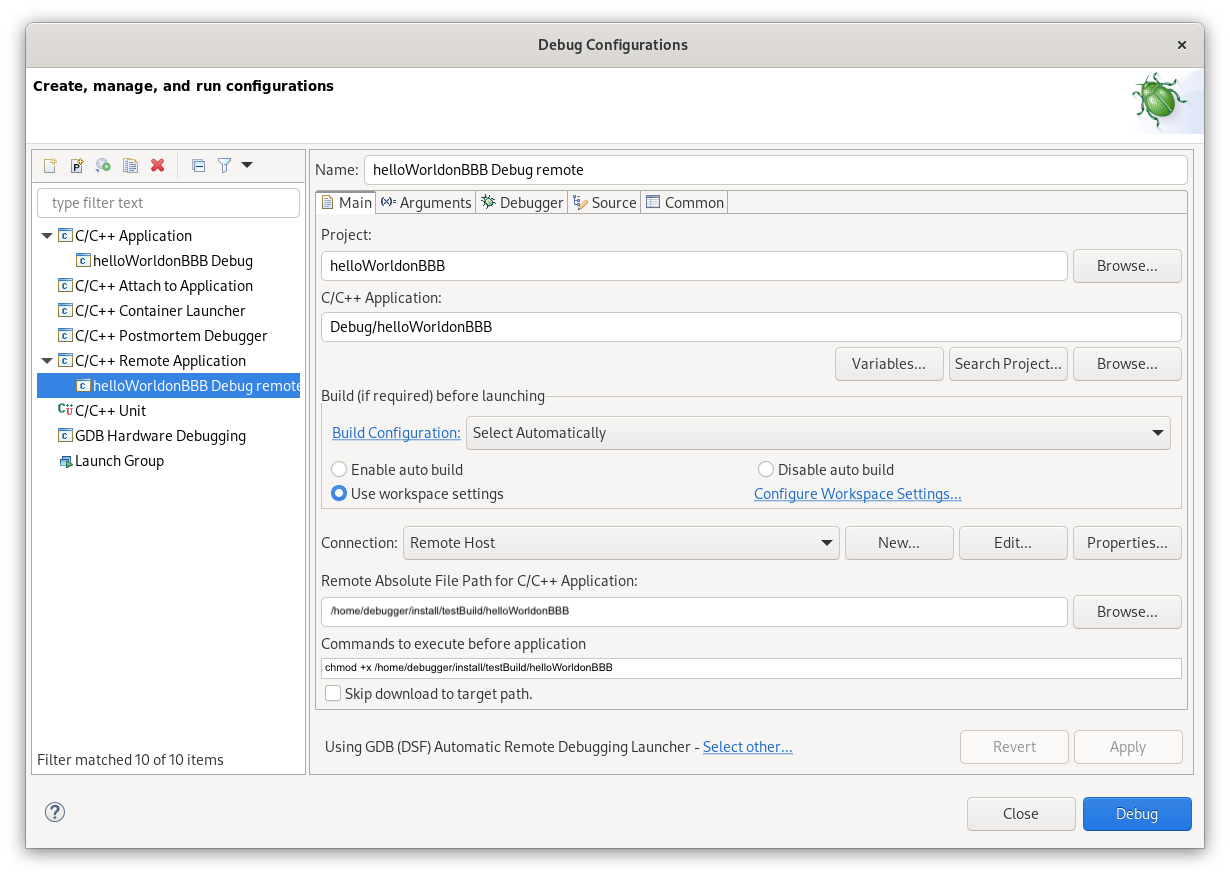
We also may need to configure commands before running - in this case, I added a command for setting execute permission to file, so gdbserver was able to run it and connect:
chmod +x /home/debugger/install/testBuild/helloWorldonBBB
We also should update our debugger config - so we become able to correctly understand symbols received from binary:
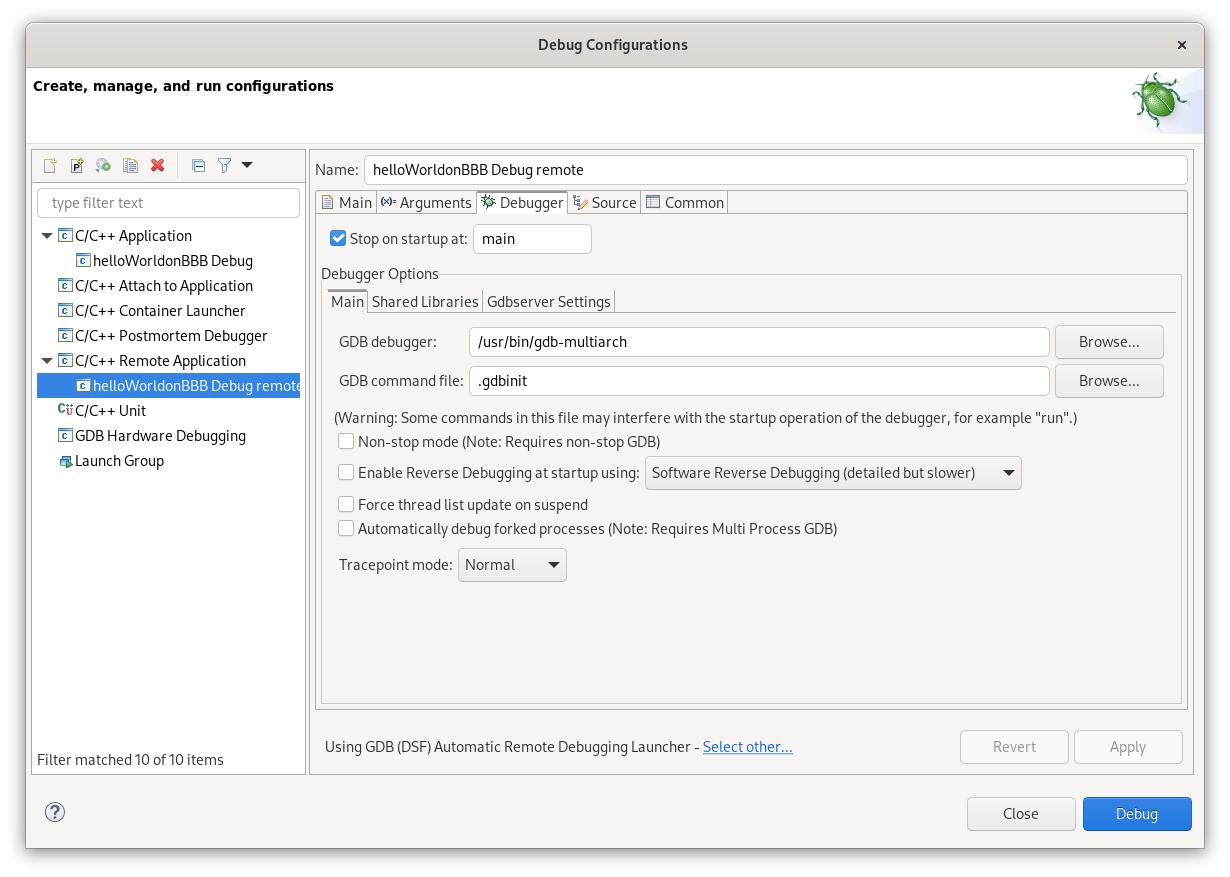
Here we just updated the path to the debugger - in my case multiarch one
/usr/bin/gdb-multiarch
.gdbinit file I didn’t change, but u can update it and add u’r own commands and other needed stuff there.
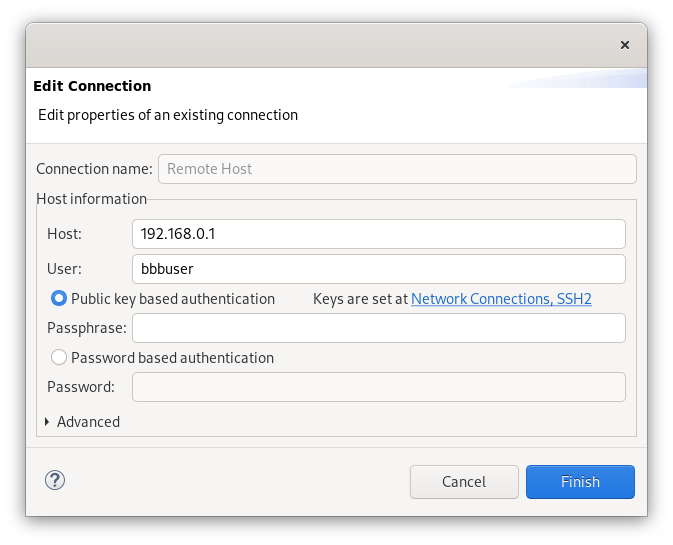
Last, but not least stuff - we should create a connection, a way how the eclipse will connect to the target:
Select New near Connection, choose type SSH, and enter the address and the port, as well as the Hostname. Select Public key-based authentication and click on Keys are set at Network Connections, SSH2 to specify the previously configured SSH key. finally press Finish.
U now should be able to press Browse - and navigate through the file system on the remote device.
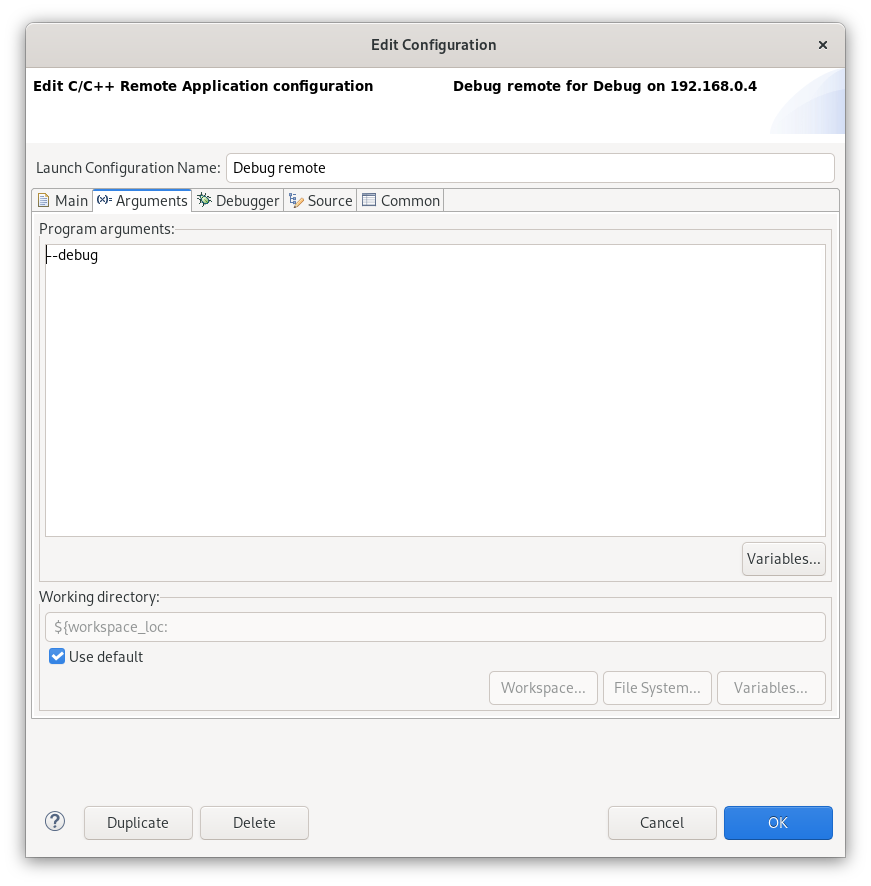
U may also include some arguments that will be run within your app, for example --verbose. Off cause u need to implement this on your own in the app u develop.
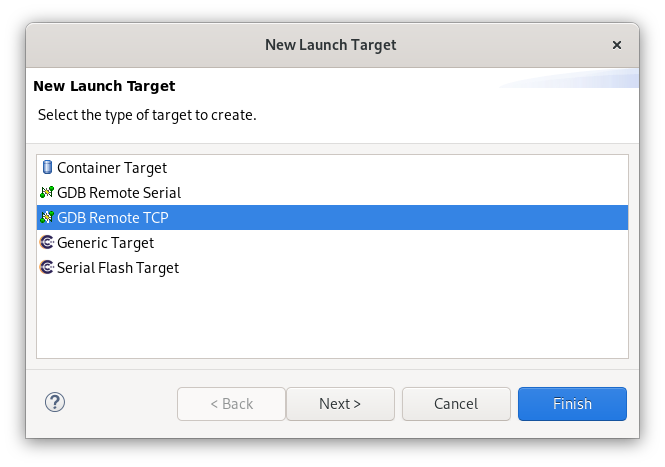
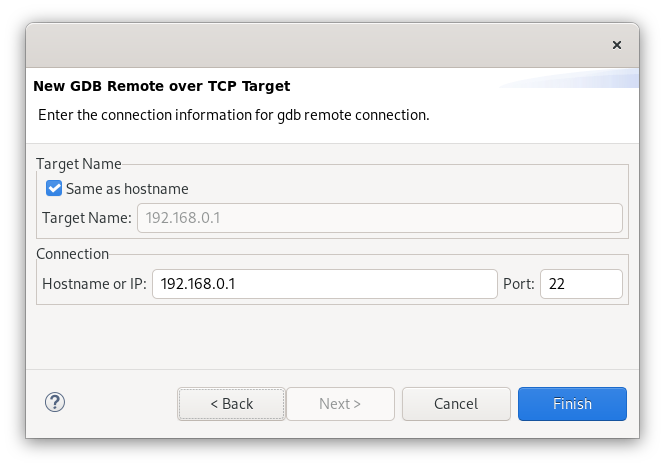
And the last thing - let’s add launch target - a machine that the launch will run on. On the toolbar select New Launch Target -> Select the type of target to create as GDB Remote TCP -> Next -> Enter the connection information for gdb remote connection: hostname and a port -> Finish
Now we are ready to run the app on a remote host in debug mode.
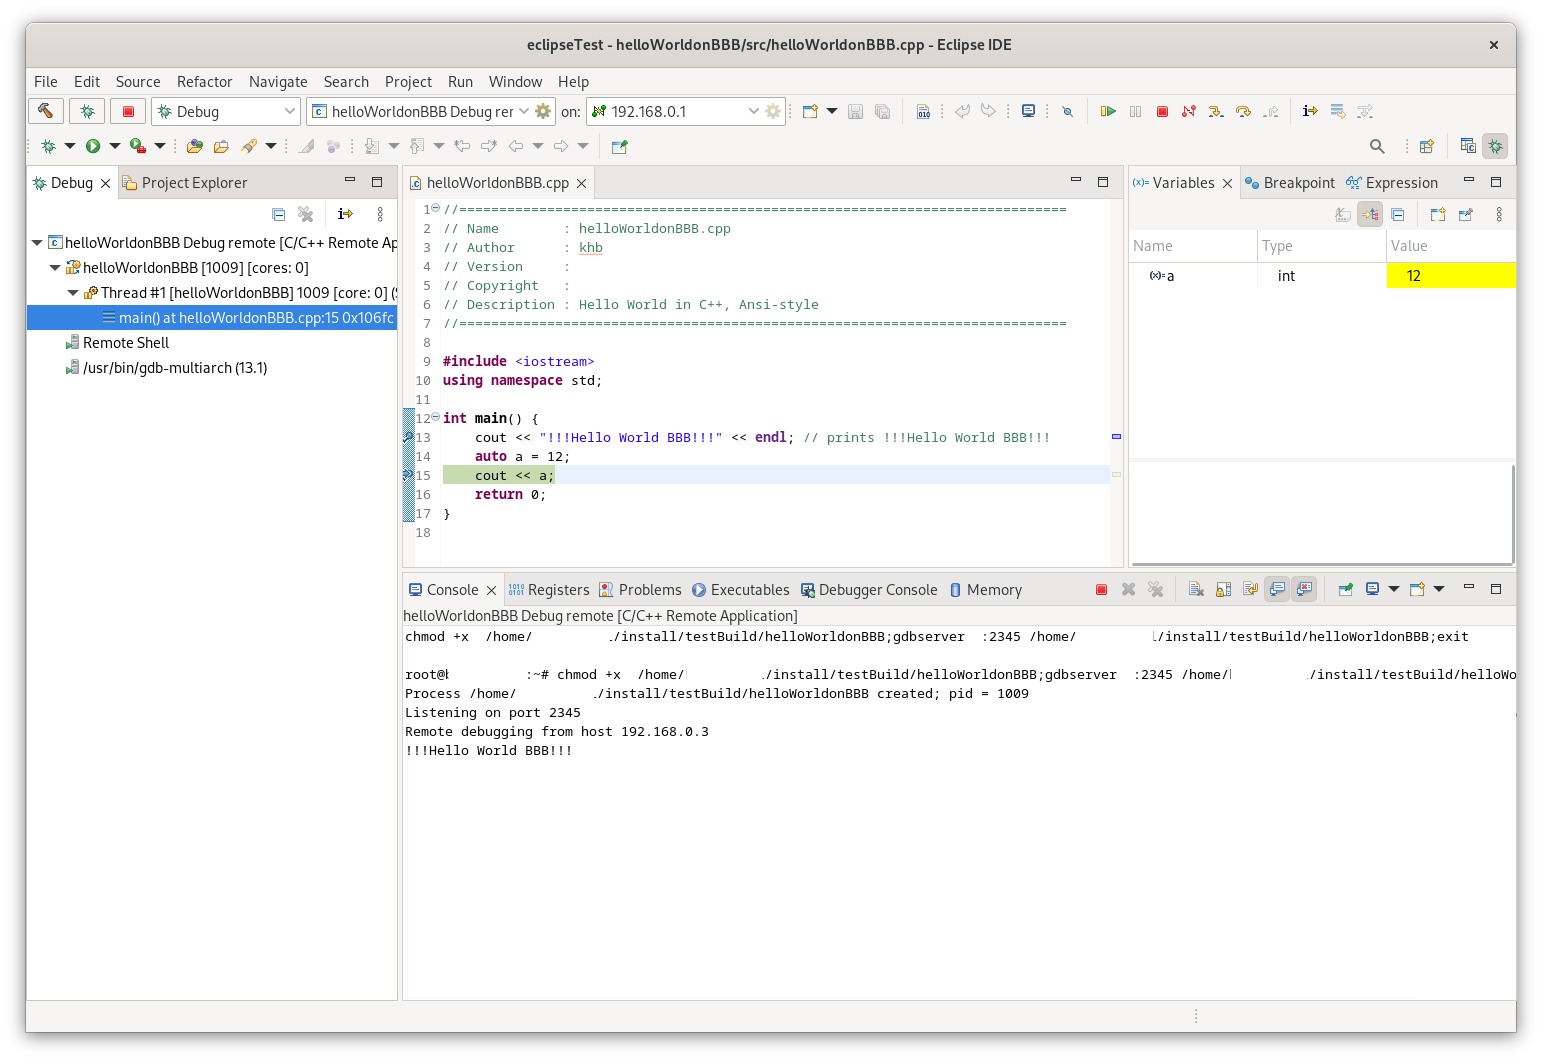
Now we can debug our remote app with Eclipse!
Alternative way
We can also skip this configuration and try to build the app on the board using for example cmake vs ninja or another approach. In this case, live debugging can be done via logger and console output.
Pitfalls
- If u use some libraries, Eclipse requires by default that the library name start from lib, and u specify a name without this prefix. In case the library has no prefix - u can use a colon in the name
:during linking - aka:some- this is the option for linking a non-standard library name. An alternative - is rebuild using soname, if u have such an option. - Eclipse does not accept the ed25519 SSH key type. Fix described here
- make sure u link libraries for the linking process compiled and linked for the target architecture, not for u’r system architecture
- some system libraries like
stdorfilesystem(addstdc++fsto linked libs) may not be visible until u select the proper Cross G++ compiler - version ISO C++17 (-std=c++17) can fix a lot of issues. How to fix GCC undefined reference to std::experimental::filesystem: may be also interesting - make sure that during specifying path for headers add common headers in the C/C++ Path and Headers section of project properties instead of C/C++ Build and only in selected compiler groups
- if u add flags - add them in proper places in project properties
- some flags to hide warnings are missed, u can add them manually in Miscellaneous sections for specific compilers. For example:
-pie -Wextra -Werror -Wconversion -pedantic -Wno-unknown-pragmas -Wno-psabi - make sure that
glicused for building libraries for linking is the same or lower than on installed on the target board - in another case, u will receive the errorunknown reference. - use
--verbosein debug to see detailed problem description - make sure that the prefix for the selected arch is correct
arm-linux-gnueabihf-- pay attention to the last symbol! - use
internal builderBuilder type in proj properties
Resources
- Beaglebone® Blue
- Eclipse
- gdbserver
- gdbserver pckg
- pkgdownload
.gdbinit- multiarch
- Configure remote debugging
- Develop and Debug C++ for ARM Linux Boards on Windows With Eclipse
- remote-debug-on-beaglebone
- gdb and gdb server with BeagleBone black
- How to fix GCC undefined reference to std::experimental::filesystem:
Share on: